Feeds:
Posts
Comments

A Non-knitting Project

I just had to share the project that I worked on today.  As a bit of background, my husband and I eat  basically low carb, and I am always trying to come up with new ways to” have our cake and eat it too.”  That said, my husband is a hamburger lover and he really feels deprived when he has to go without.  So….. to remedy the problem, I have come up with a hamburger bun recipe that has but 2 carbs.  Below is a peek at the result.

001

I have created a PDF recipe for you to upload if you desire.

J’s Low Carb Hamburger Buns

I have to tell you that he was really impressed.  They are light, tasty, and stay together well, even with a juicy piece of hamburger, onion, fresh home grown tomatoes, and the works resting between the layers.  They, of course, cut easily with a bread knife.  I have also used them to make open face grilled cheese, and tuna sandwiches.

I hope you enjoy them.

Now I can go back to knitting his socks. 🙂

KT

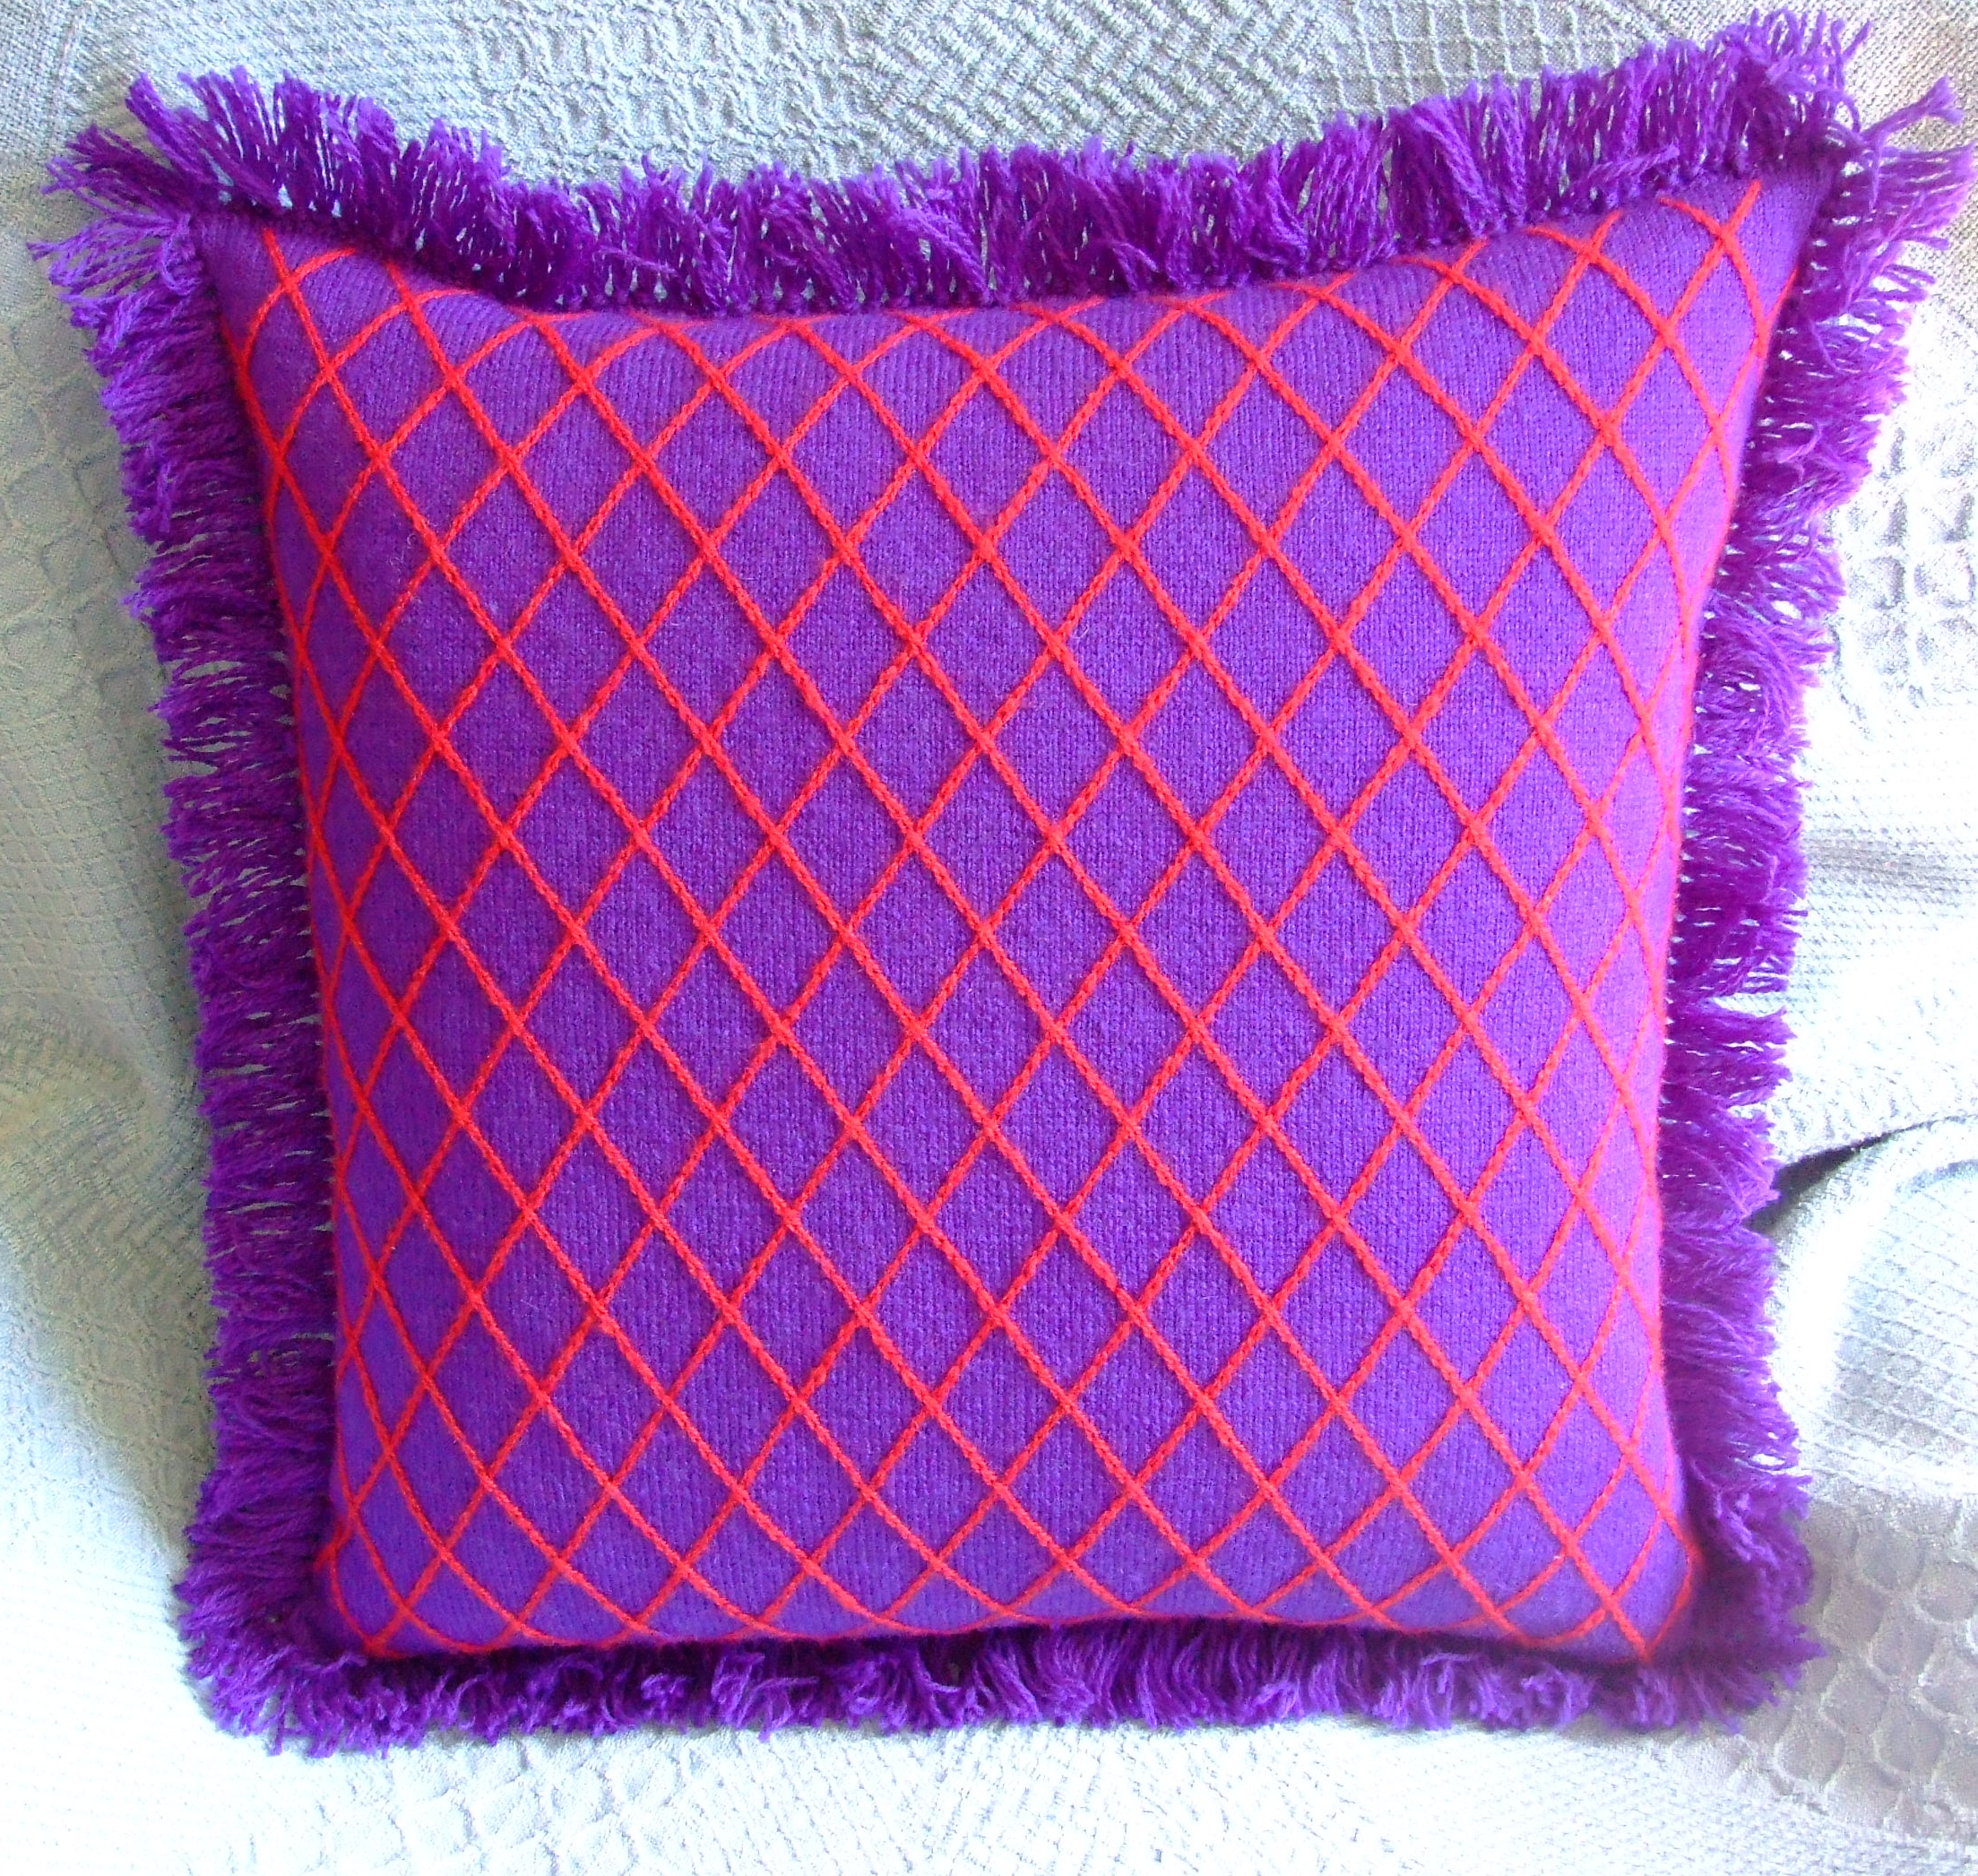
As I was contemplating the possibility of beginning on one of my latest pillow designs, I thought it might be fun for me to share my thought process with you.

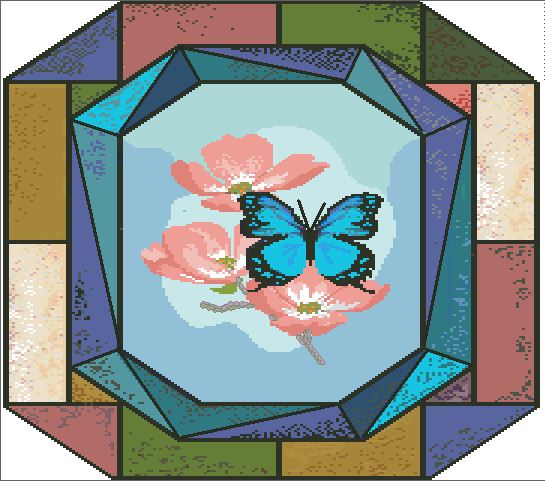
Below is a clip of the condensed chart, which gives me a view of “what you see is what you get,” with a 33 % view.

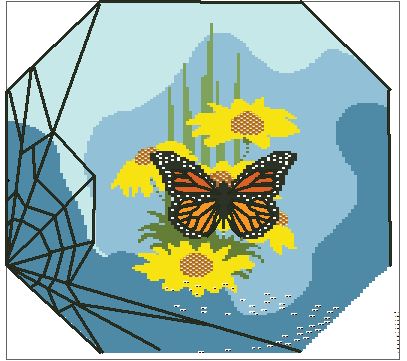
The design is from a simulated stain glass window that I created for my home in the mountains of Idaho.  I painted the original on plexiglass then mounted it on the window of my kitchen door.  The knitted design incorporates the frame, but I have added a South American butterfly to my Dogwood flowers, instead of the original Hummingbird.

stain glass window designYou will notice that there are 2 separate rings of colors surrounding the center motif.  The first, or outside ring, shapes the pillow.  The black edges will be knitted as part of the design.  The technique I use for this is called Armenian knitting.  I will be using 2 colors in each section and will be weaving the unused color in every other stitch.  This will give me a bit of a textured look, simulating old rough glass.  Any additional colors I might desire will be added using a single ply of the selected yarn, and applied as a duplicate stitch.

The second ring will also be knitted using the same technique, but this time the lines you see with be inserted after the work is finished.  This will give me the option of using an embroidery stitch or crocheted chain to add this detail.

The center motif will be created using the Intarsia knitting technique described in my e-book.

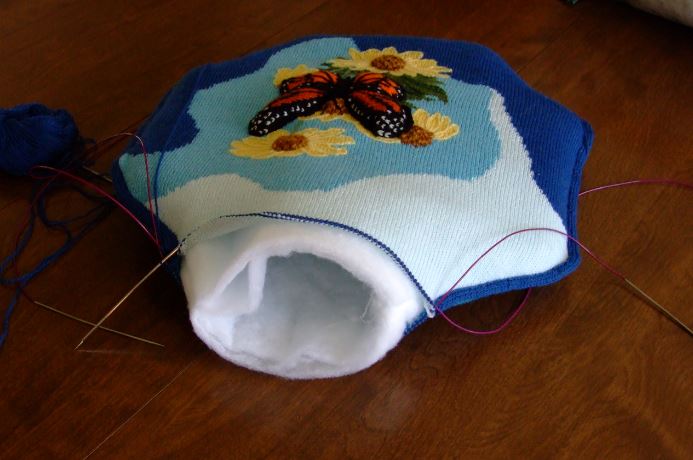
To begin, I roll all my colors into small balls.  Next,  crochet thread, and crochet hook, I make a chain long enough to support the number of stitches on the bottom edge of row#1 on the chart, plus 10.  Breaking the yarn, I leave a 6 inch tail, pull the yarn through and tied a loop in it.  This chain provides me a base for my provisional cast on.

Turning this chain over to the back side, I count in 5 loops from the end before I start picking up the stitches of the first row, inserting the tip of my knitting needle in to the single back loop of each chain stitch.  When all the necessary stitches have been placed on my knitting needle, row one of the chart has been completed.

The next row(purl) begins by adding a stitch.  You can do this anyway you like.  I will be using the following method: knit in front and back of same stitch at beginning and end of row for right side rows, then purl in back and front of stitches at beginning and end of purl rows.  This gives me a more compact addition.

I can’t wait to see the results of my labor.  Once I get started with one of these patterns, it is hard for me to put it down.  I love seeing the picture develop, one row at a time.

I am going to drop this pillow top chart into my Designer Pillow page.  You can also upload this 18 by 18 pillow top chart here.

stain glass pillow design chart

All the yarns are Palette by Knitpicks.  The gauge is 9/12  using a #1 needle

One skein of each color is sufficient.  You can also use fingering yarns from your stash. I have chosen to used  “heathers” for the darkened areas, in the outside ring.    I work with long strands of each color and spit splice yarn additions as needed.

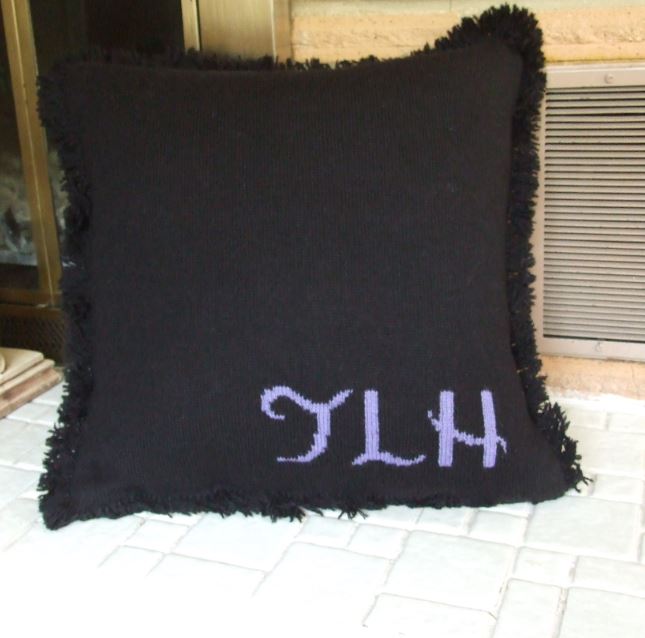
I have not decided what kind of back I will create for this design, but there is plenty of time for that later.  This is definitely not an overnight knitting project.

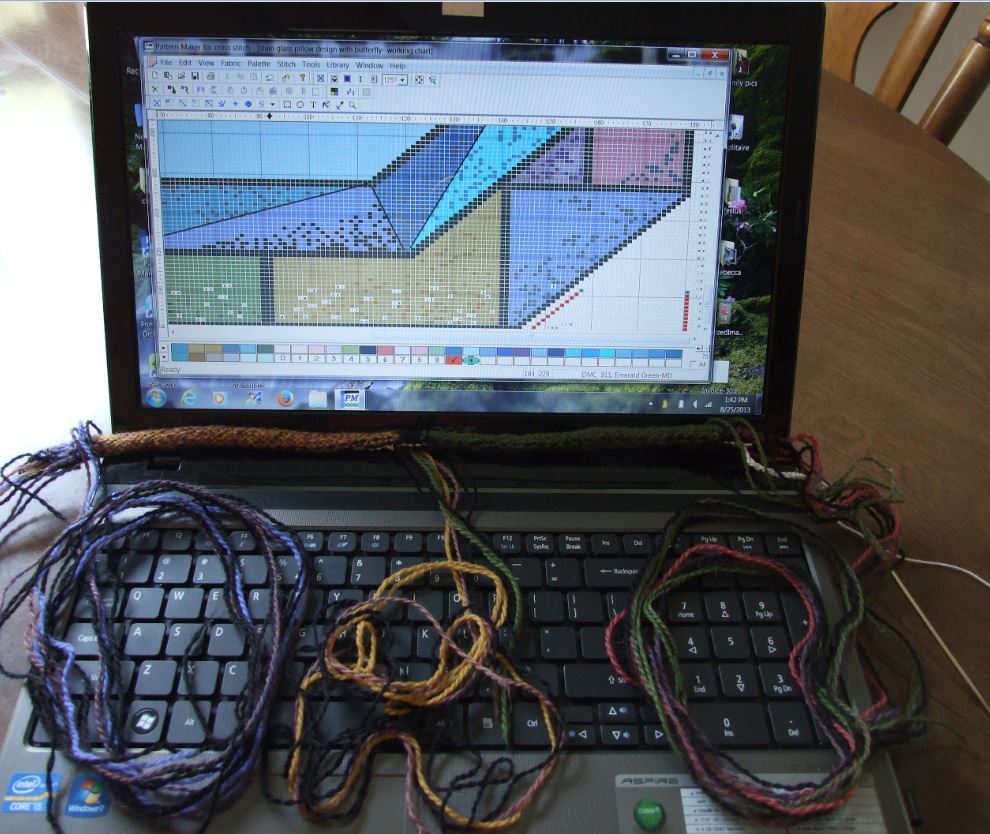
Below is a photo of what I see on my computer screen using my Pattern Maker Pro.

pm screen view 1If you have this program, then I can send you the actual file to work with.

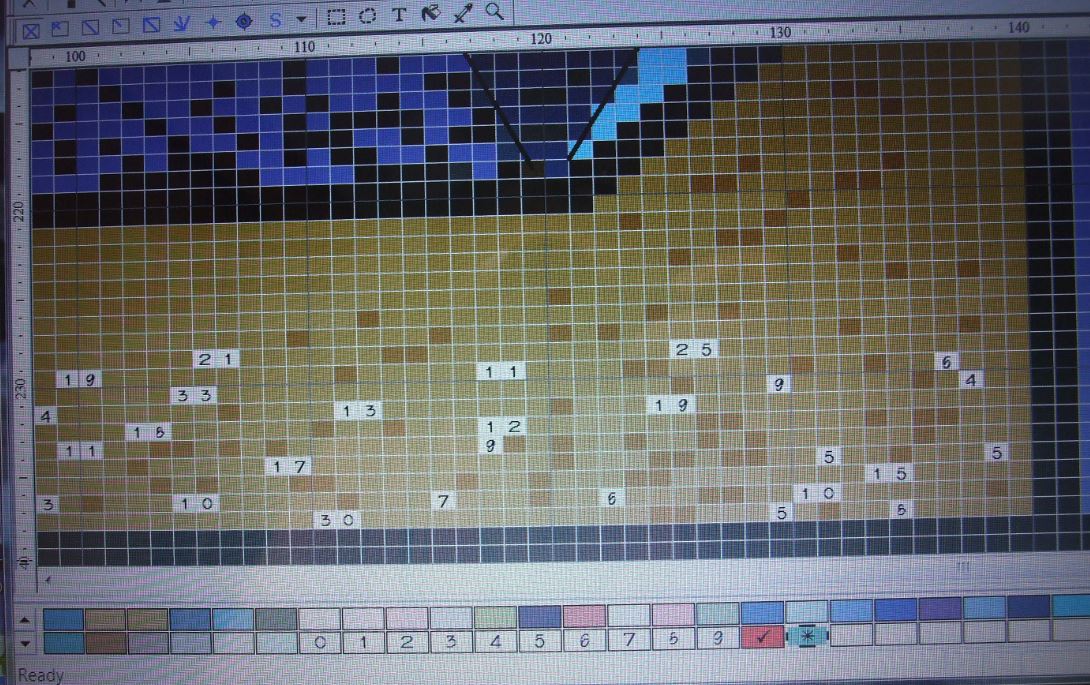
The second photo is a shot that shows how I number the larger areas of stitches, which helps me to read the chart.

pm screen view 2

It may be a bit hard to see, but I have inserted the stitch count of the main color.


Happy knitting – KT

I haven’t posted for a while as I have been in the process of moving to our new home, so as you can imagine, there has been very little time for knitting, but alas, my Equine Sunset designer pillow is finally finished.  As a final touch, I added a short fringe to complete the project.  Below are photos of the front and back.  You can see that I added my grand-daughters initials in the lower right corner to break up the solid black back (I get board easily when knitting solid colors).

taylors pillow - frontFront

taylors pillow - backBack

There are a couple of tips I want to share with you in regards to this design:

1)  When working on the back, check your gauge often.  Why?  Sometimes when you are switching back to a solid color after working with intense color changes there is a tendency to tighten up you gauge.

2)  When trimming your fringe, lay it over your fingers so that the trimmed yarns fall on the solid black back, and NOT on the light portions of the front design.  Why?  You will be picking off the black yarn tips for hours just to clean up your picture.  How do I know???? Guess!!!

Here is the pattern.  equine sunset pillow pattern and notes

In the past I have made and effort to include all the special instructions with every pattern design, however since I have written the e-books for you to download free, in the future I will be only uploading the charts of the designs, the yarns required, and the necessary knitting notes.  However, if I do anything different than what I have previously posted for you, I will include it in the pattern.

In the case of “Equine Sunset,”  the back chart will not be included.  You can work up your own chart, or knit it plain.

Happy knitting – KT

Equine Sunset

In the middle of trying to purchase and move into a new home, I have been working on a  pillow design for my “horse loving ” grand-daughter’s birthday.  I just finished the top last night, and finally have it blocked on my zero circle needles.  Here is a peek.

equine sunset - s

The back will be a solid black, with her initials in the Chickory blue of the sunset.  I will be finishing it off with 1 1/2 to  2 inch black fringe.

By the way, the designed sunset was taken from a photo.  The colors and contrasts were stunning.  Believe it or not, there are those who don’t believe that this is from a photo, but then maybe they haven’t observed the beautiful tapestry of colors that God created in our universe.

As always, I will add this to the charted designs on the “pillow” page as soon as I have time.  It may be a while, as I need to settle in my new home first.

Just sharing- KT

Today I finished my Red Hat Silkie pillow.  This has been a joy to work on, and soon I will be sharing the pattern on my Designer Pillows page, but for now here she is ready for her debut in Southern Idaho.

ms slikie - red hat pillow

Here is the back-

ms slikie - red hat pillow back

I love the floating red chains over the purple background.  I think this would make a lovely fabric for various projects.

I hope to make a video of the the process soon, as this color combo should make it very easy to see.  Will upload it ASAP.

KT

This project has been a delight to work on.  It not only is colorful but has given me the opportunity to use various yarns and weights in the same project.  My Red Hat Silkie pillow is also another of my knitted sculpture designs.  Below is a photo of the top blocked on the needles, awaiting the back portion to be finished.

ms red hat silkie pillow top

This project incorporates, lace weight floating chains over a fingering yarn base, lace weight mohair in different strand counts to create raised areas in the design for the sculptured relief, a lace weight crocheted ruffle on the parasol, and crocheted chain detail on feet, hat and swirls.

Below is a photo of the sculptured relief areas.

silkie relief portions

As you can see I concentrated mainly on the chest and tail area.  I was able to accomplish this by just adding an extra strand of the lace weight mohair when knitting in these spots.  I used 3 strands for the flat, and 4 strands for the raised.  It worked great!   As in all my sculpted designs, it is secured on the back with a 3 step process.

1)  encircling the area with a yarn strand, or strands, then pulling in the area to return to the original gauge

2) filling the area with yarn or fiber fill

3) over laying the area with netting or Tule, then stitching it down with a single ply of the appropriate yarn color. this insures that it will hold it’s shape, even when it is washed.

I can’t wait to get the back done.  The design for the back uses the same floating chain design as I used for the front.

I will update the photo of the finished produce soon, as Ms Silkie is scheduled to make her debut at a Red Hat gathering in southern Idaho in May.

Just thought I would share-

KT

As I put the finishing touches on my latest pillow design, and then took a good look at the finished product, I decided that only one word could be used to describe the design – Spring.  The blues are as clear as our Idaho skies, the yellow daisies adds the warmth of the sun, and the butterfly- a touch of real life

butterfly pillow - the finished product

I have already share the pattern and instructions for the butterfly, so I won’t repeat that here.  Instead I thought I would walk you through the finishing process as I learned a few things worth passing on.

First, I cut the shape of the pillow form using 4 layers of heavy lofted quilt batting, then sewed the 7 sides together, leaving the top open.

butterfly pillow  oct -form

Next, I  slipped it inside the pillow which has been knitted together on 7 sides, and has had the I-cord applied as well.

buttterfly pillow - ready to fill

 Now it is time to filled the center with fiber fill.

Having done that, I  folded the quilt batting into itself and hand stitched the edge together.  Next step- close the top.

butterfly pillow - closing the top

The first trick here is to make sure that you slip your stitches on to the smallest circle needles you have.  I used my 47 inch zero’s.  They are my “go to ” needles for this use and also for setting my pillow sections up to be blocked.

*Note -When I knitted the last of the 7 sections together, I had left a long strand of yarn just for the purpose of this closure, so it was waiting there for me to pick up and start the last leg of my journey across the top. 

And…just in case you are wondering, yes, I did add 1 stitch to each side of  corners so that the i -cord would flow nicely around the turns.  Once the top row was completed, I secured my yarn ,weaving in the end.

butterfly pillow- finishing the I-cord

The next step is completing the I-cord.  Here again, I first picked up the top row with my zero needle, so as to have more flexible  space to work with.   Using my working needle (#2), which has the 5 stitches of my cord already it, I proceeded across the top.  To make it easier,  instead of trying to knit through the back loops of the 5th stitch and the one to its right, I slipped the 5th stitch, knitted the next stitch through the back loop, then pass the 5th stitch over the new stitch.  Once across,  using the live stitches of my I-cord, I attached it to the beginning of the I-cord with a modified duplicate stitch.

For instructions on the I-cord, type in “I-cord” in the search box to find the post.  the only difference is that I cast on 4 stitches, instead of 2, knitting the base stitch( #5) and the one to its left together.

It has definitely been an interesting design.  Oh, about the spider web I originally thought I would put in the corner- I nixed it.  The butterfly just took on a life of it’s own, and I didn’t want anything to spoil it.  One can change one’s mind you know!  🙂

I have uploaded the charts and basic instructions on my “design pillow” page.

Happy Knitting – KT

Having just finished my Daisy and Butterfly pillow top, I thought it would be the proper time to upload the tutorial for the 3D butterfly.  I can just see it being used on a knitted purse or hat, maybe both, knitted as a set.  Humm….?  Anyway, here it is for you to upload and use for whatever your imagination can come up with.

butterfly 1

butterfly 2

Butterfly tutorial 2

The tutorial includes chart and instructions.   For any Intarsia questions feel free to upload my e-books on the subject.

Oop’s!  I almost forgot, this butterfly chart is gauged for 8 stitches and 11 rows per inch.  I used fingering yarn.  The approximate size is about 4 inches square.  Of course, you can use any yarn you have to try it, then resize it to fit your project.

Got to get back to knitting the back of the pillow, so for now-Happy knitting!

KT

Intarsiamania II

I just had to share my latest pillow top with you.  Although it is still a work in progress, I have taken my “Intarsiamania” to a new level and have used it to create a relief sculptured design.    The pattern below consists of 3 levels; the base knit of daisies and background; the butterfly, then finally the spiderweb.

hexagon pillow -butterfly and daisies

I chose to knit up the butterfly wings at mid point in the design, so that I would not have the bulk of the entire pillow top to deal with.   Below is a close up of the completed butterfly.  All I have to add is the antenae.

Completed Butterfly

I have also rounded the main body out and stuffed it with yarn strands before closing the back.

It has become a very enjoyable knitting project.  The daisies also have raised centers, which I accomplished with the two tone Pine Cone stitch I developed while designing my, “The Quail in the Snow” motif.

I have charted the butterfly and will upload as soon as possible so that you might be able to use it for a project of your own.

In the meantime, I have been able to finish the second book on Intarsia and invite you to peruse its pages at your leisure.   This second book is focused on planning the project, marking up the chart, and choosing the best method of color knitting for the design.  Check it out.  A peek is just a click away!  Who knows, it might spark your adventure into color knitting.

Intarsiamania Book II

That’s it for now!!

Happy Knitting -KT

Today I just finished the first of a series of e-books focused on my adventures in color knitting.  It has been a real challenge as well as a great joy to put together.  My hope is that someone will get something out of it.  If not, then perhaps some member of my family will be able to “pick” grandma’s brain when I’m gone.

The 26 page book I am uploading for you is mostly focused on Intarsia, although I do have a section on knitting and purling with both hands.  The information and illustrations in it are from my experience in developing my designer pillow patterns, which are intense color knitting; thus the title“Intarsiamania.”  The book has two sections.  The first deals with Intarsia basics; the second, focuses on yarn management.

Capture

Painting with Yarn – Intarsiamania

I hope you enjoy the book.   I hope that some of the techniques will be helpful on your next color knitting project.

Happy knitting-  KT