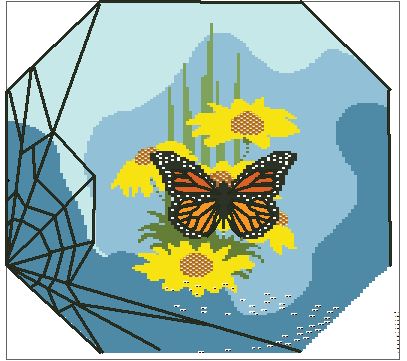
As I put the finishing touches on my latest pillow design, and then took a good look at the finished product, I decided that only one word could be used to describe the design – Spring. The blues are as clear as our Idaho skies, the yellow daisies adds the warmth of the sun, and the butterfly- a touch of real life

I have already share the pattern and instructions for the butterfly, so I won’t repeat that here. Instead I thought I would walk you through the finishing process as I learned a few things worth passing on.
First, I cut the shape of the pillow form using 4 layers of heavy lofted quilt batting, then sewed the 7 sides together, leaving the top open.

Next, I slipped it inside the pillow which has been knitted together on 7 sides, and has had the I-cord applied as well.
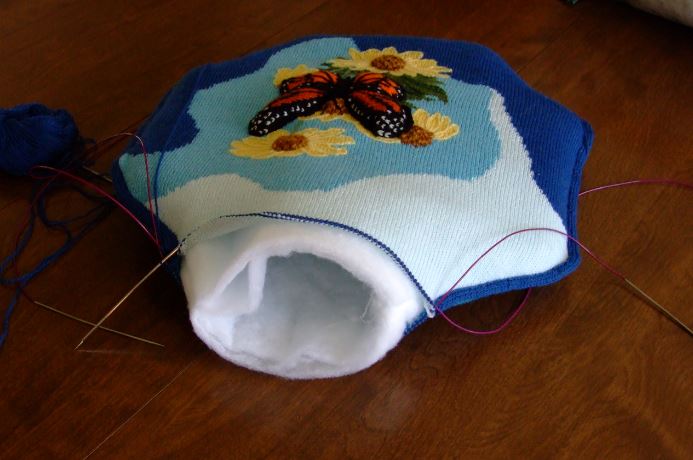
Now it is time to filled the center with fiber fill.
Having done that, I folded the quilt batting into itself and hand stitched the edge together. Next step- close the top.

The first trick here is to make sure that you slip your stitches on to the smallest circle needles you have. I used my 47 inch zero’s. They are my “go to ” needles for this use and also for setting my pillow sections up to be blocked.
*Note -When I knitted the last of the 7 sections together, I had left a long strand of yarn just for the purpose of this closure, so it was waiting there for me to pick up and start the last leg of my journey across the top.
And…just in case you are wondering, yes, I did add 1 stitch to each side of corners so that the i -cord would flow nicely around the turns. Once the top row was completed, I secured my yarn ,weaving in the end.

The next step is completing the I-cord. Here again, I first picked up the top row with my zero needle, so as to have more flexible space to work with. Using my working needle (#2), which has the 5 stitches of my cord already it, I proceeded across the top. To make it easier, instead of trying to knit through the back loops of the 5th stitch and the one to its right, I slipped the 5th stitch, knitted the next stitch through the back loop, then pass the 5th stitch over the new stitch. Once across, using the live stitches of my I-cord, I attached it to the beginning of the I-cord with a modified duplicate stitch.
For instructions on the I-cord, type in “I-cord” in the search box to find the post. the only difference is that I cast on 4 stitches, instead of 2, knitting the base stitch( #5) and the one to its left together.
It has definitely been an interesting design. Oh, about the spider web I originally thought I would put in the corner- I nixed it. The butterfly just took on a life of it’s own, and I didn’t want anything to spoil it. One can change one’s mind you know! 🙂
I have uploaded the charts and basic instructions on my “design pillow” page.
Happy Knitting – KT