Feeds:
Posts
Comments

Archive for April, 2019

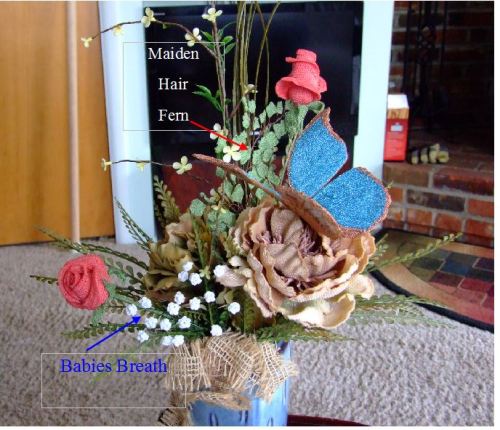
As I mulled over the elements I wanted for my Morpho Butterfly arrangement (butterfly, Baby’s Breath, Maiden Hair fern, stems and grasses), I found I was lacking 1 essential item- a flower that my butterfly could land on.  So, I did a little research and found out that since  this butterfly comes from Central America region, then one of the flowers from the same region is what I needed.  My choice- red Hibiscus.  Not only is it gorgeous, but red is one of the background colors of the room where it will be displayed.

hibiscus- illustrations 4

Here it is in all it’s glory!

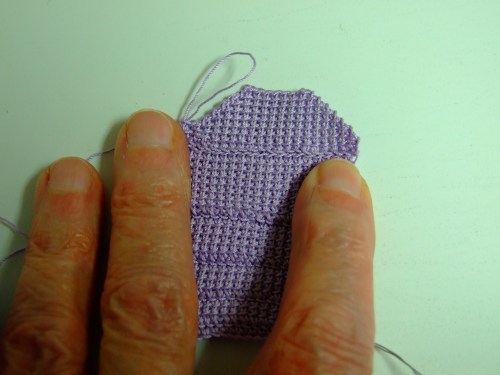
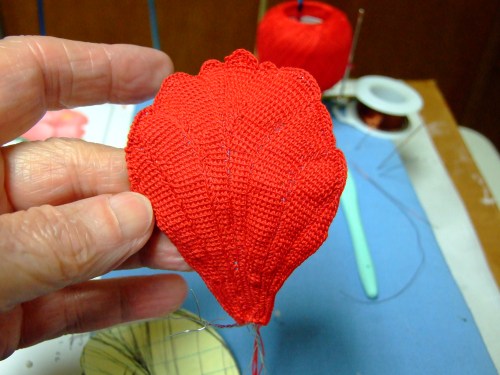
Now to examine my subject.  I noticed that the “vein’s” of the petals run vertically, just as they do in my butterfly veins.  So with that in mind, and using size 40 thread and a .09 hook, I made a sample.

001

006002

Once I had played around with this, I decided to write up the process, hoping to encourage some of you to do the same.

To start with, the paper template you see in the last photo was my guide.

hibiscus petal template with instr

Hibiscus Petal Illustration

The green lines and directional arrows, are the wires (size 32g, red).  Those wires are divided as shown in the illustration.  A and B will be used to secure the petal to the main stem.  The center 6 wires will establish the center pistols and stamen, which are at least the length of one petal plus some.  One wire from each petal with be the top of the 5 pistols and have a red bead to finish them off.  The other wires will be pealed off one at a time, trimmed to length and finish with a #11 yellow seed bead.  You can see those wires in the last photo.

By using the wires in the manner I did, I am able to flute the edge.  I add even more detail in the solid red areas, as I enclose the wire turn.  Here I can sc, hdc, etc, defining the edge as I like.  I can do the same with the 2 veins that do NOT have the wire turn.  *On the sample I did not add all the scallops.

The solid blue section of this illustration will be worked as one vein.

This may seem complicated to some, but for me it is fun.  Keep in mind that this is a guide, and I am always open to changing things as needed.  Another thing is that nature is not perfect, so any slight variation in the petals is more perfect than you think.

I can not wait for my red wire to arrive so I can get started on the Hibiscus.

I will keep you updated on the progress.


Read Full Post »

basket weave sample029

One of the most important aspects of free form crochet is knowing how to make the shapes you see on the picture or template you are working with.  To explain this concept I have uploaded the next part of the Basket Weave stitch tutorial.

You will note that the  completion of each section results in a post- ie.,  Basket Weave Post, or BWP.  You will also note that you will be working across the row in a vertical position, as the weft loops (Wflp) lead the way.

I hope that I have made this tutorial understandable, but if you have any questions, you can contact me.

Basket Weave Stitch – Ups and Downs

Happy crocheting!

Update on Morpho Butterfly arrangement elements

1 – frawn of Maiden Hair fern done!

2- 2 clusters of Babies Breath

Morpho arrg

This vase is one that is handy to put the elements in as I go.  It is not the vase that the final arrangement will be made in, that one is a 16 inch crystal fan design.


KT


Read Full Post »

20190406_113004

My Morpho Butterfly is done.  I even have 6 legs under him.

20190406_113349

In the photo above you can see both sides, and his legs.  By the way, this photo is the favorite pose of my butterfly professor.

The brown circles are tatted(Josephine knot).  The out side circles are embroidered with chain stitch, and the white wash is white enamel.


20190406_114043

Now he has a home!

I will leave him here until I have the rest of the elements of the arrangement done.

The next segment of this project involves Maiden Hair fern, and Baby’s Breath flowers.  Below is a photo of the Maiden Hair fern in progress- one branch at a time.

011

For this element, I also used the Basket Weave Stitch.  I am still working on the tutorial and will upload it as soon as it is finished.

These leaflets are about 1/2 to 5/8 inches in size.  I am using #80 thread, .06 hook, and size 32 gauge jewelry wire.   Each 12 inch section will be made separately then connected.    The brown thread you see lying on the table surface is #80, and used to tat “double stitch,” anchoring each stem to the main wire.  It is overlaid with Hard as Nails clear polish as I go.  When finished, the entire stem sections will be coated with a coffee brown polish.  Not only with this make is all match, but it helps to secure the stems in place.

As in nature, the leaflets are similar but not exactly the same.  This of course means that I am free to shape them a bit different, and just keep them in the ball park of the size I need.

And yes……………., it takes patience, but I am very happy with the results.

Below is part I of the basic Basket Weave Stitch

Basic Basket Weave Stitch


KT


Read Full Post »