Feeds:
Posts
Comments

Archive for January, 2013

I just finished knitting a pair of infant socks for our expected arrival in about 2 weeks.  Since my daughter’s theme is “Jungle Pets,”  I decided to do an elephant head on the leg portion of the sock.  Below is the right foot.  I flipped the head chart for the left foot, so that they face each other.  If you noticed the color variation in the photo, it  is due to the fact that the sock is not quite dry yet. 🙂

elephant sock

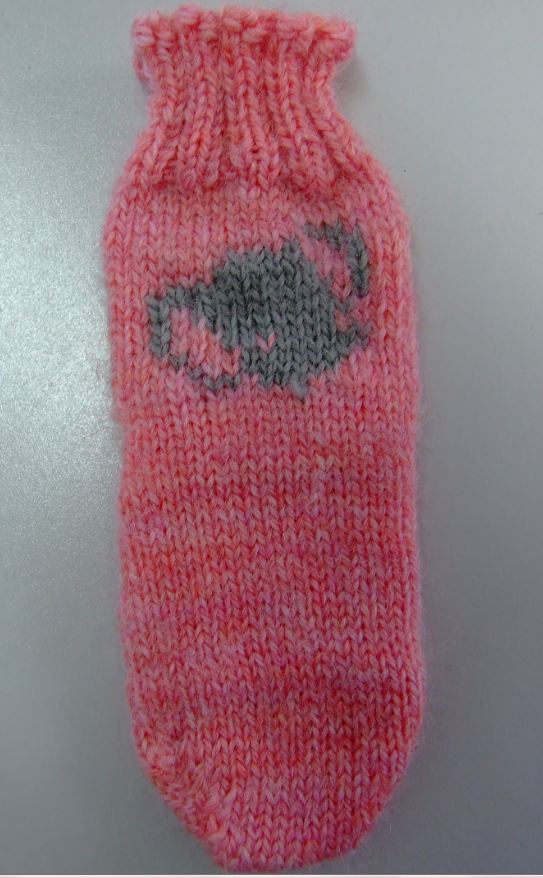
I used the same method as I described in the “Seamless Cables Tutorial”   to join the outside edge of the design, so as to not have a seam in my sock.  The inner ears of pink are one area that I chose to use the Fair Isle approach, as it eliminated the need to add additional yarn strands to the design, thus cutting down the number of yarn ends having to be woven in at the completion of the project.   On this particular sock, I chose to interlock the rows at the color change on the right edge of the design.

cropped elephant sock

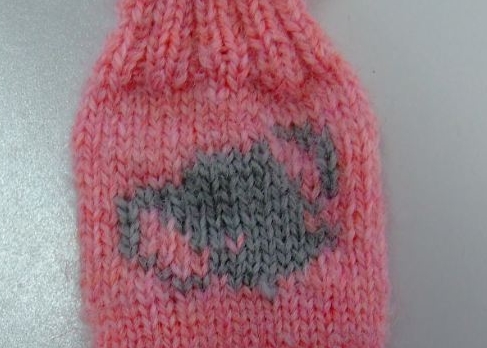
I have also discovered that it is advantageous to leave a longer tail when adding an additional yarn, as these shorter strands(double or single ply) can be used to add duplicate stitches for detail(such as the eye or added grey stitch at the bottom that opens his mouth a bit).

POINT!!  I don’t like to have any more yarn strands to weave in than is absolutely necessary.

When I find the time, I will try to write up a row by row tutorial for the charted design so you can become better acquainted with the technique, but for now, I just wanted to give you a sneak peek at what I did with it.

Happy knitting – KT

Read Full Post »

I just finished knitting a sweater and hat for my new granddaughter who is scheduled to arrive in February.  In the process of working on this design, I was determined NOT to have seams, as it just adds bulk.  That said, I started with a simple raglan sleeve pattern and had fun from there on.  I wanted a contrasting cable design down the center of the sleeve, which was simple until I was ready to pick up the sleeve stitches to be knitted in the round.  Now, I had that old  “Intarsia” problem, the yarn was on the other side.

OK!  I have tried most the methods thus far out there- Ann Berk’s loops(which works great,but I don’t like fighting with the loops), and other various methods connected with YO’s (loops again), then those knitting or purling “loops” together with the stitch at the end of the round, but I didn’t want a seam.

Then it hit me, I was not looking for a seam at all, I was looking for a “stitch” connection that would mimic the interlocking of any typical color change- and….I found it.

001

The result is that my Valentine Babe will be ready for the Ski slopes in this seamless cable designed hat and sweater.

I have just completed a tutorial that shares my discovery and I hope you try it.  You can also use this method to knit an Intarsia pattern in anything that is seamless.

*The tutorial includes a cable panel, but just for practice you could replace it with a plain panel of any contrasting color.  The technique will be the same.

I will be writing up this pattern soon, and will share it when it comes up the presses, but for now, here is the Seamless Cables Tutorial to learn the technique.

Here is Rebecca’s Seamless Cable Sweater and Hat

Happy Knitting

KT

Read Full Post »

In my internet surfing the other night, I watched some videos on how to make an separate I-cord,  and also one on how to apply it to a cast off edge.  Using the method suggested for making the cord by itself seemed rather tedious. So…. I asked myself, why can’t  you “apply” an I-cord to a cast on row only?  Answer, you can.  It makes a rather nice roped cord and you can cast on the number of stitches you need for the length, then simply work across.  Here is a photo of the one I made to replace the drawstring in my Twine Knitted Slippers.

I-cord example

In my case I used a #3 needle, as I did for my slipper.  Cast on the amount of stitches I needed for 24 inches.  I then proceeded as follows:

Cast on 2 sts, [:Knit  2, knit  2 together  through back loop:].  Slip three stitches back onto left needle, and repeat the process in the brackets [   ].  I DID NOT pull the yarn hard across the back as some instructions suggest, I simply  used the same tension as in my normal knitting.  It worked just fine and ended up very close to the exact measurement I wanted.  The example in the photo was done with Sports weight yarn.

As you can see in the photo below, the slipper on the right has the new cord.  It does not curl up like the crocheted chain, making a much neater looking finish.

I-cord example 2

Give it a try!

Happy Knitting!

KT

Read Full Post »

The other day, as I was working on some baby socks for our new grand daughter due on Valentine’s Day, I caught myself pulling the cord of my circle needle around the corner as I started the transition to the back needle tip, of my Magic loop.  I do this to prevent ladders, where the cords of my 47 inch circle needle form loops on each side.  The trick is to pull your cord through long enough so that you can bring it to the left under the left needle tip, then swing it down and around and up over the top to start the first purl stitch of the last section of the round.  That is why I always opt for the 47 inch cord.

cricle needle tip 1-preventing ladders

Here you see cord being pulled to the left and under the needle.  This move takes the stress off the gap between the left needle tip and the cord.

circle needle tip 2 -preventing ladders

The right tip of the needle is then brought around and over the top, then inserted under the yarn in preparation to be purled.

circle needle tip 3  -preventing ladders

Once the stitch is purled, I make sure to release it, allowing the right hand needle to lie parallel to the stitches riding on the cord to the right.  If need be, I take up any slack.

magic loop tip 1

In the above photo, you can observe how I accomplish this on the knit side.  Here again, I swing my cord around to the left and secure it with my thumb before knitting the next stitch.

magic loop tip  2

Once the new stitch is complete I allow the right needle to lie parallel to the cord, then take up any slack that remains before proceeding to the next stitch.

In both cases I  continue holding the cord around the corner for a few more stitches before releasing it to finish my round.

Just passing it on!!

KT

Read Full Post »