Feeds:
Posts
Comments

Posts Tagged ‘knitting in the round’

Having completed the body of my grandson’s Ski sweater, I decided to knit both sleeves at the same time. One of the issues that comes up when doing this is that the underarm increases need to be handy, but also needed to be where I wouldn’t be dealing with “ladders, ” a frequent an issue when knitting in the round.

I solved this problem by moving the stitches so that the seam area was in the middle of the needle,with a marker at the seam. I executed the increase with a YO, knit 1, move marker, then knit 1 YO. Attaching a stitch/row counter to the cuff starting tail, I began increasing as my pattern established.

This particular sweater is knitted with fingering yarn on size #3, 40 in circle needles.

By using this method to insert the increases, I have had no problems with “holes” or loose stitches.

Just thought I’s share.

I apologize for my tardiness in posting, but at age 80 I have taken up studying the violin. I am having so much fun, and Mutes are a God send. 🙂

Happy knitting- KT

Read Full Post »

I idea of having to taking out stitches because of a mistake you can’t live with, or maybe just changing you mind, can be a daunting task.  However, it can also be an instructive one.

I have been sharing the process of knitting my English Rose tablecloth with you in the previous posts, so I thought I would share the “tinking ” lessons I learned when  I decided to extend the double rose leaf portion of the pattern.  I had to take out my extended rose leaves, and then about 12 rounds of the previous pattern to restart an additional set of the double leaves pattern.  I also knew that I would have to adjust the pattern as there were only five sets of the double leaves in the original version.

Tinking Lessons– Lay your work on a table where it will have no stress on the stitches, especially if you have not done this before.  As for me, I pulled my coffee table up to my favorite chair to share the weight of the work.

Take it out from the wrong side, working right to left, holding the thread/yarn in your right hand as you would for knitting English style(throwing the yarn).

  1.  Use your left index finger and thumb to pinch just below the stitches or stitch groups to prevent them flying off the needle.
  2. Use the index finger of the right hand to gently lift the thread/yarn up to release the knitted stitches.
  3.  Use a clockwise rotation of the right needle tip to pick off the stitches.
  4.  Use smaller size circle needles.   I knitted with a 2.75, so I used 2.0 or below to tink with because it allowed me to see the stitches and the path of the thread/yarn more easily.
  5.  Remove the 2 legs of a “knit 2 together” by inserting the needle from back to front, lifting the index finger of the right hand slowly, as you pinch the base of the group of stitches with the left hand thumb and index finger. (See photo below)
  6.  Stitch groups such as YO, Sl 1, K 2 tog, psso, are processed the same as a K 2 tog, except that when you release the stitch group you need to rotate you left have forward to pick up the third stitch of the group.
  7.  Stitch groups as SSK, Sl, 1 K 1, psso;  Sl 2, K 1, psso, (left leaning) just require you to insert the right needle from back to front before you lift the yarn with the right hand to release the group.
  8. Relax, don’t look at the clock.  When you finish your project you will be proud of it.

In this photo I am getting ready to pick up a K 2 tog.

Above, I have identified a sl 1, K 1, psso.

In this photo, you can see that I inserted my needle from back to front.  I will proceed by placing my thumb and index finger below the stitch group and then gently raise the yarn up with my right hand index finger.

  •  If for any reason the stitches come off out of order, you can simple keep the pressure on the “pinch” you have in your left hand, then fix the position of the stitches.  As long as you have secured the base, the stitches are not going anywhere.
  • If you are in double about the needles position, tip the area of concern toward you with the left hand.  At a look at the right side.

Happy “Tinking”  – KT

One more thing-  I found that dividing my tablecloth into smaller segments and knitting my circles in rounds( knitting off one end to the other), allowed me to deal with less bulk at a time.  Also, the stitches were not crammed together on one 60 inch needle.  I now have the tablecloth on three 60 inch needles.  It also gives me the opportunity to lay it out on the table to see the results of my additions to the pattern.

And, yes…… I am writing it down.


Read Full Post »

Since I didn’t want this tablecloth 72 ins, I decided to work it until I thought I had about 60 inches.  However, the only true way to know when I reached that point, or near it, was to block it.

I learned how to do this when working on the Princess Shawl designed for the Queen of England.  The lady who published the pattern advised checking out what the final blocked edging looked like.   Her advice was, “When in doubt, block it out.”  The only stipulation is to have all your stitches on needle cords, and secured with stoppers.

*Even, if your project is rectangular, the circle needle cords work great.

For this project, that meant using my other 47 inch circles needles, from 2 on down.  Since I have an abundance of them, this wasn’t an issue.   I just dunked, squeezed, toweled and dropped it on my bedroom floor, which I had covered with a heavy cotton quilt, and used the burgundy sheet to create contrast.

**I did put my attached working thread in a Ziplock bag to keep it dry.

The carpet, and pad underneath gave me a perfect base for pinning.  I also used different colored tips for the original 60 inch needle, so when it is dry, I can just pick it up and start knitting the stitches off the other needles.

Since I now have the right measurements, I know exactly how much further I want to knit.  I also like the scalloped edge, so I will add the stitches necessary to maintain the stitch count to make that possible.

Don’t be afraid to try it.  You can do this with any size project.

When I do my final wash and block, I will use the tape measure to ensure that each point is exactly the same distance from center to outside edge.


Happy knitting- KT

Read Full Post »

At this point of my knitted English Rose tablecloth, the stitch count seems daunting.  So I opt for thinking of it in units, or pattern repeats, which in this case equals 40 per round.

With this in mind, I decided to share some of my tracking tips, especially for those who are intimidated by this kind of project.

First, I think about only one repeat at a time.  I always have a colored piece of thread of yarn placed at the beginning of each round.  I also place a piece of contrasting yarn in the location of each addition of thread, just in case I need to do some work on them later.  Doing this also lets me know how far a ball of thread/yarn will go–  I am using Knitpicks Curio on this project.

Secondly, in this pattern, I am creating rose leaves.  Each leaf unit has a prescribed number of stitches.  In the photo above, I have illustrated this leaf top.  Each end of the leaf has 2 stitches knitted together, one leans left(slip one, knit one, lift slipped stitch over knitted stitch);  the other leans right(knit 2 together).  In between these two stitch combinations, 7 stitches are knitted, altogether making a count of 9 stitches in the leaf unit.

Why is this important?  When I finish a leaf, I always count the unit to make sure I have the appropriate stitch count.  If I don’t, then something is wrong and now is the time to check it out, not after I have knit 2000 stitches.  

Another check point, is paying attention to the divisions in the repeat.  In the photo above you see the division between the two leaves leaning in opposite directions.  That division always has a center stitch.  

I pause here again to make sure the appropriate stitch lands in the center of this unit, if not, I count back to see what is wrong.  Most of the time it is that I have forgotten a yarn over.  If this happens in an even round, I simply pick up the bar between the adjacent stitches and knit one to erase the error.  If it is in the present round, I tink back and put it in.


This photo shows the unit that divides the set of rose leaves.  Here again there is a line of center stitches that you can use for a guide to make sure your stitch count is right.

I often take just a few seconds each repeat to check all my stitches before I advance to the next repeat.  Trust me, it saves you lots of stress and headaches.

My next test will be placing the entire tablecloth on many circle needle cords.  Why?  I am not sure I want the cloth to hang down more than 6 inches from the top of the table, so I will stretch it out, with it still on the needles, then I will get a better idea how I want to finish it.  I am not enamored with the finishing rows of this pattern, so I am toying with the some alternative ideas of my own.


Happy knitting- KT

Read Full Post »

I am sorry to say that I do not like working with double pointed needles.  That is not to say that I haven’t been successful knitting with them, but I did not enjoy it.

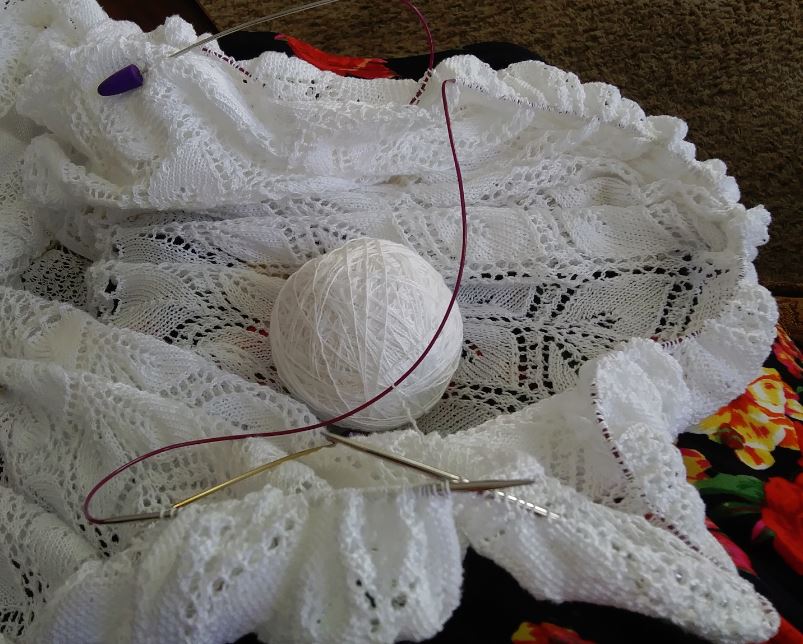
I recently remodeled my home and put new windows in the music room, so with all that new woodwork framing those beautiful windows, I just had to have a new white round tablecloth for the  table that sits in front of the window.

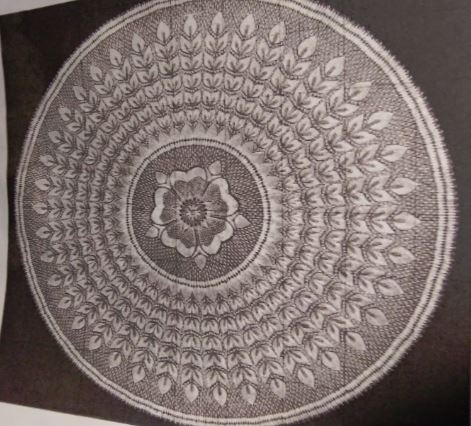
I found just the pattern in “Modern Lace Knitting” by Marianne Kinzel.  The pattern I chose was called “English Rose.”

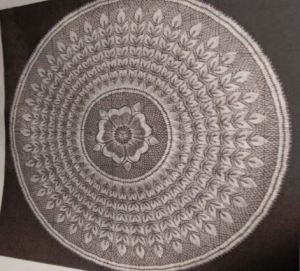
Of course, the first instructions were to pickup the double pointed needles to start the center.  However, my inclination was to make a crocheted Magic Loop-which I did, replacing the DP needles with a 47 inch circular needle.

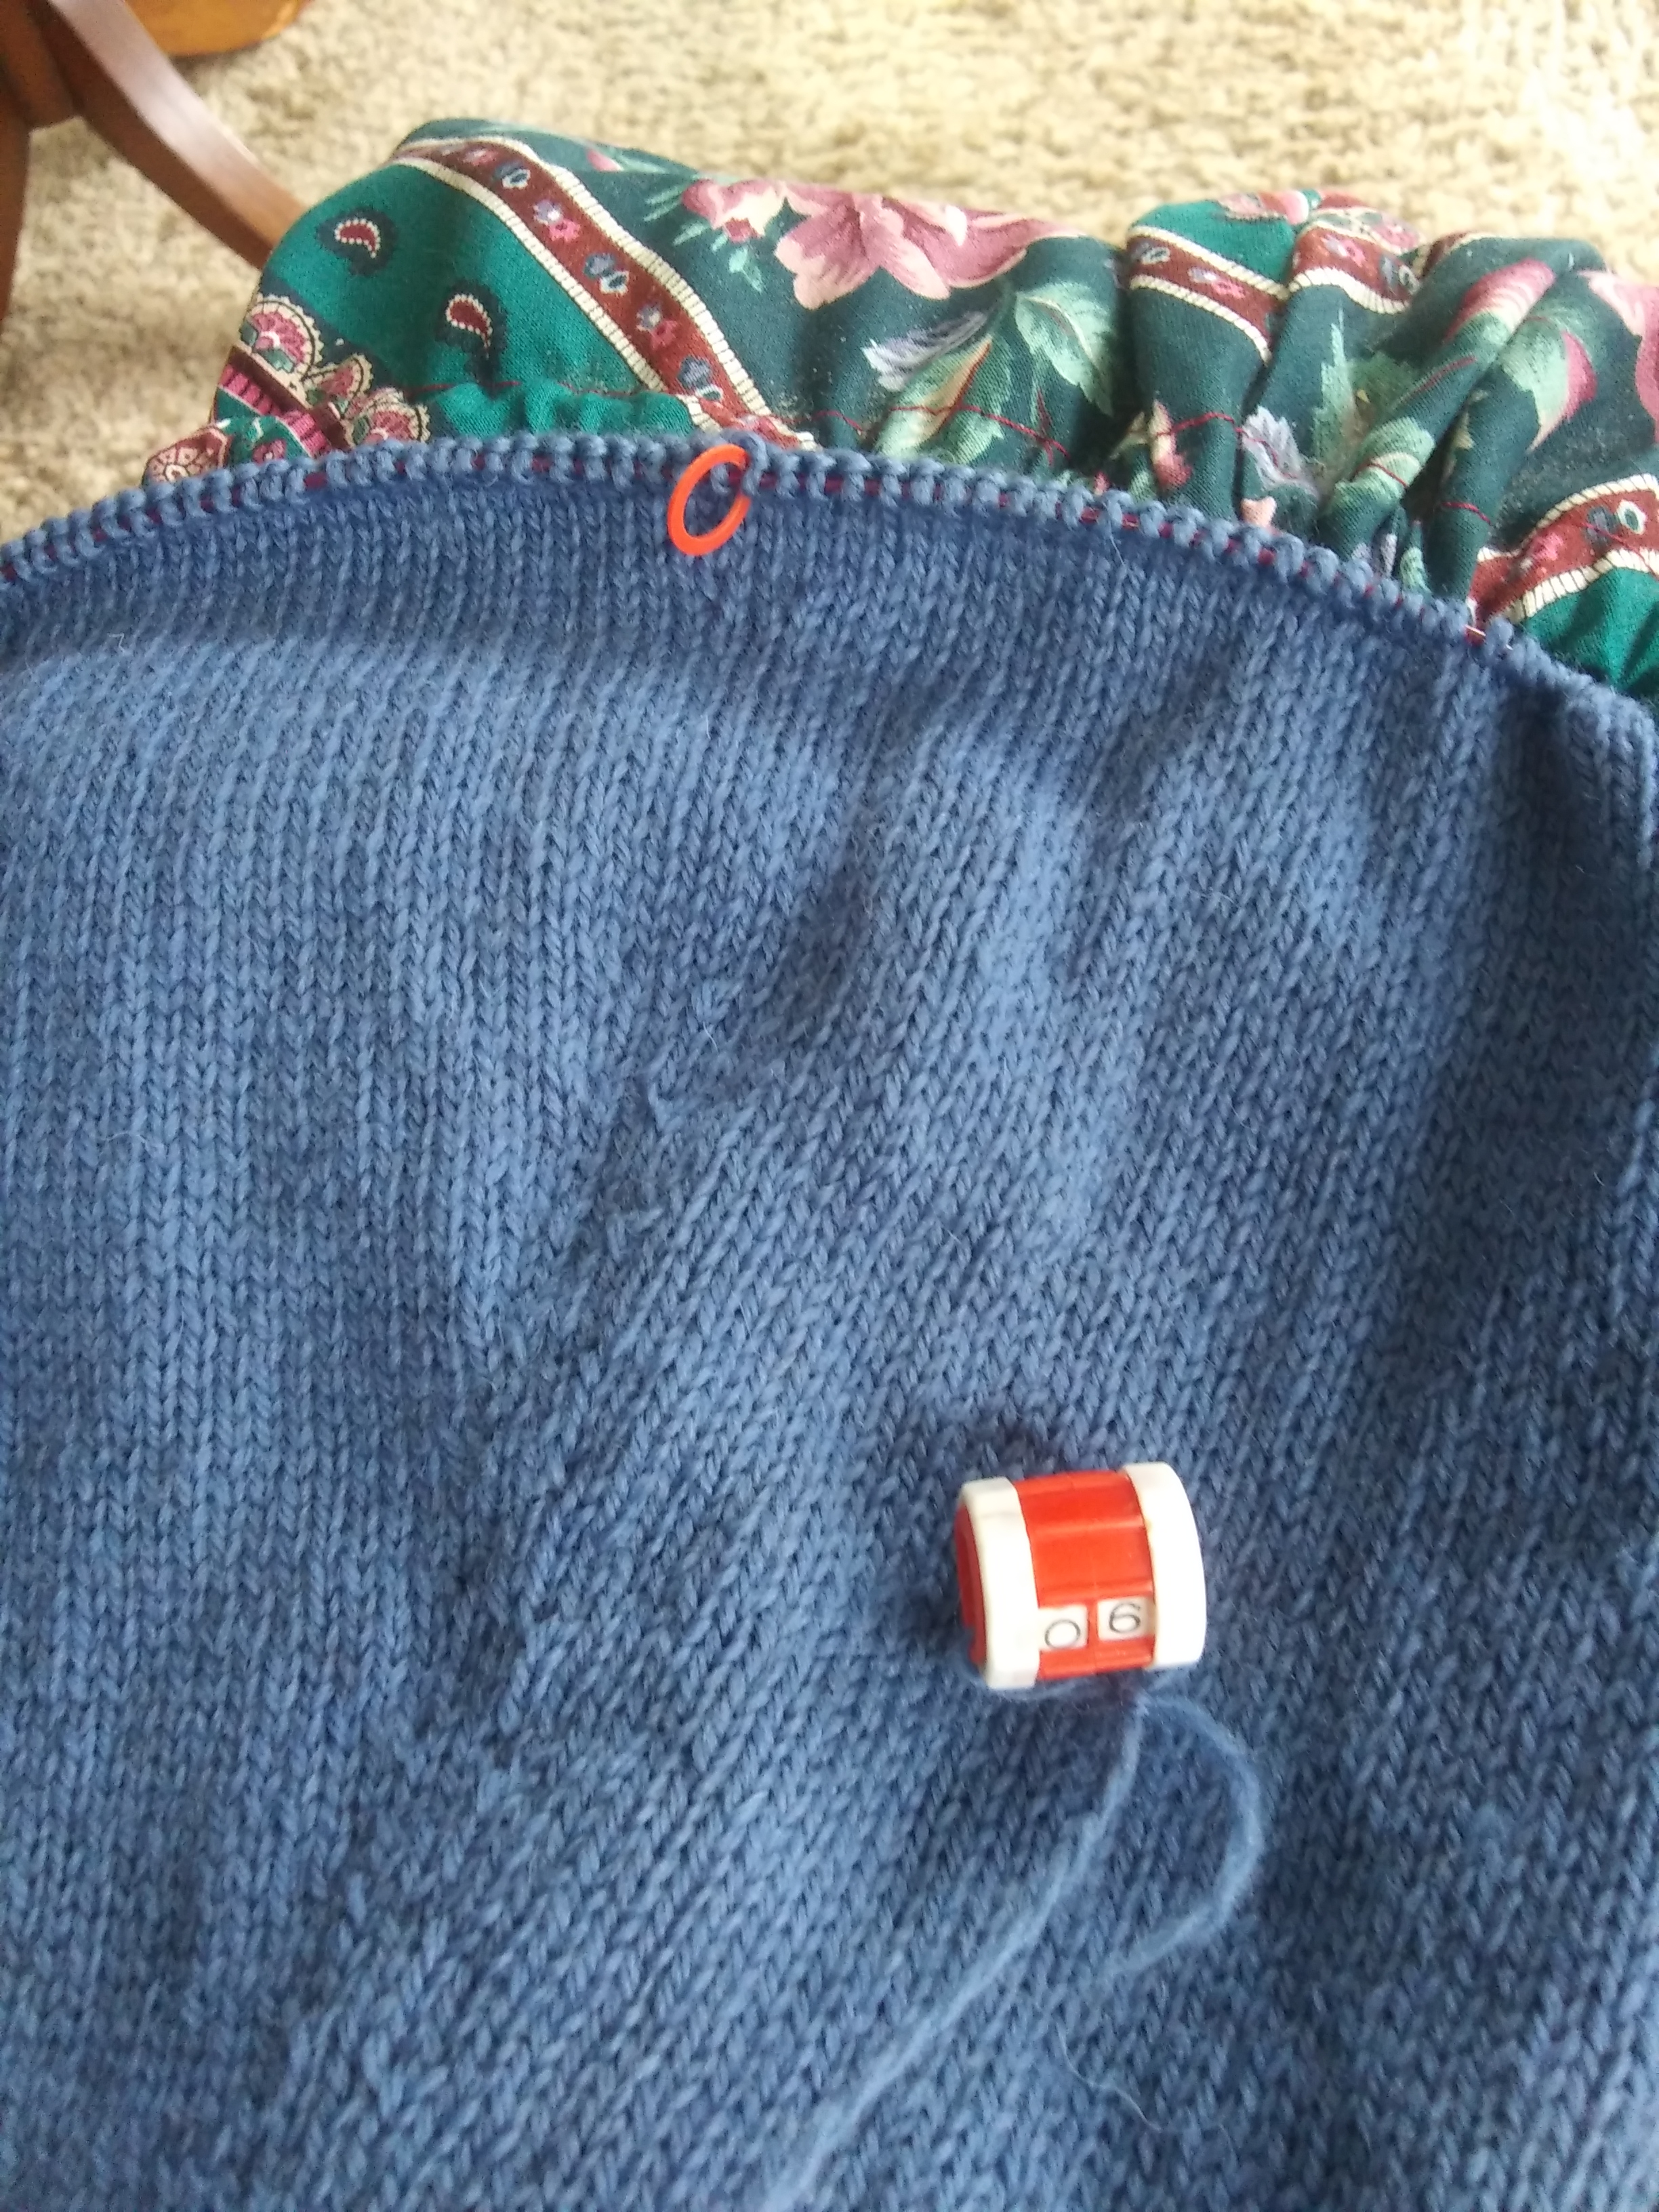
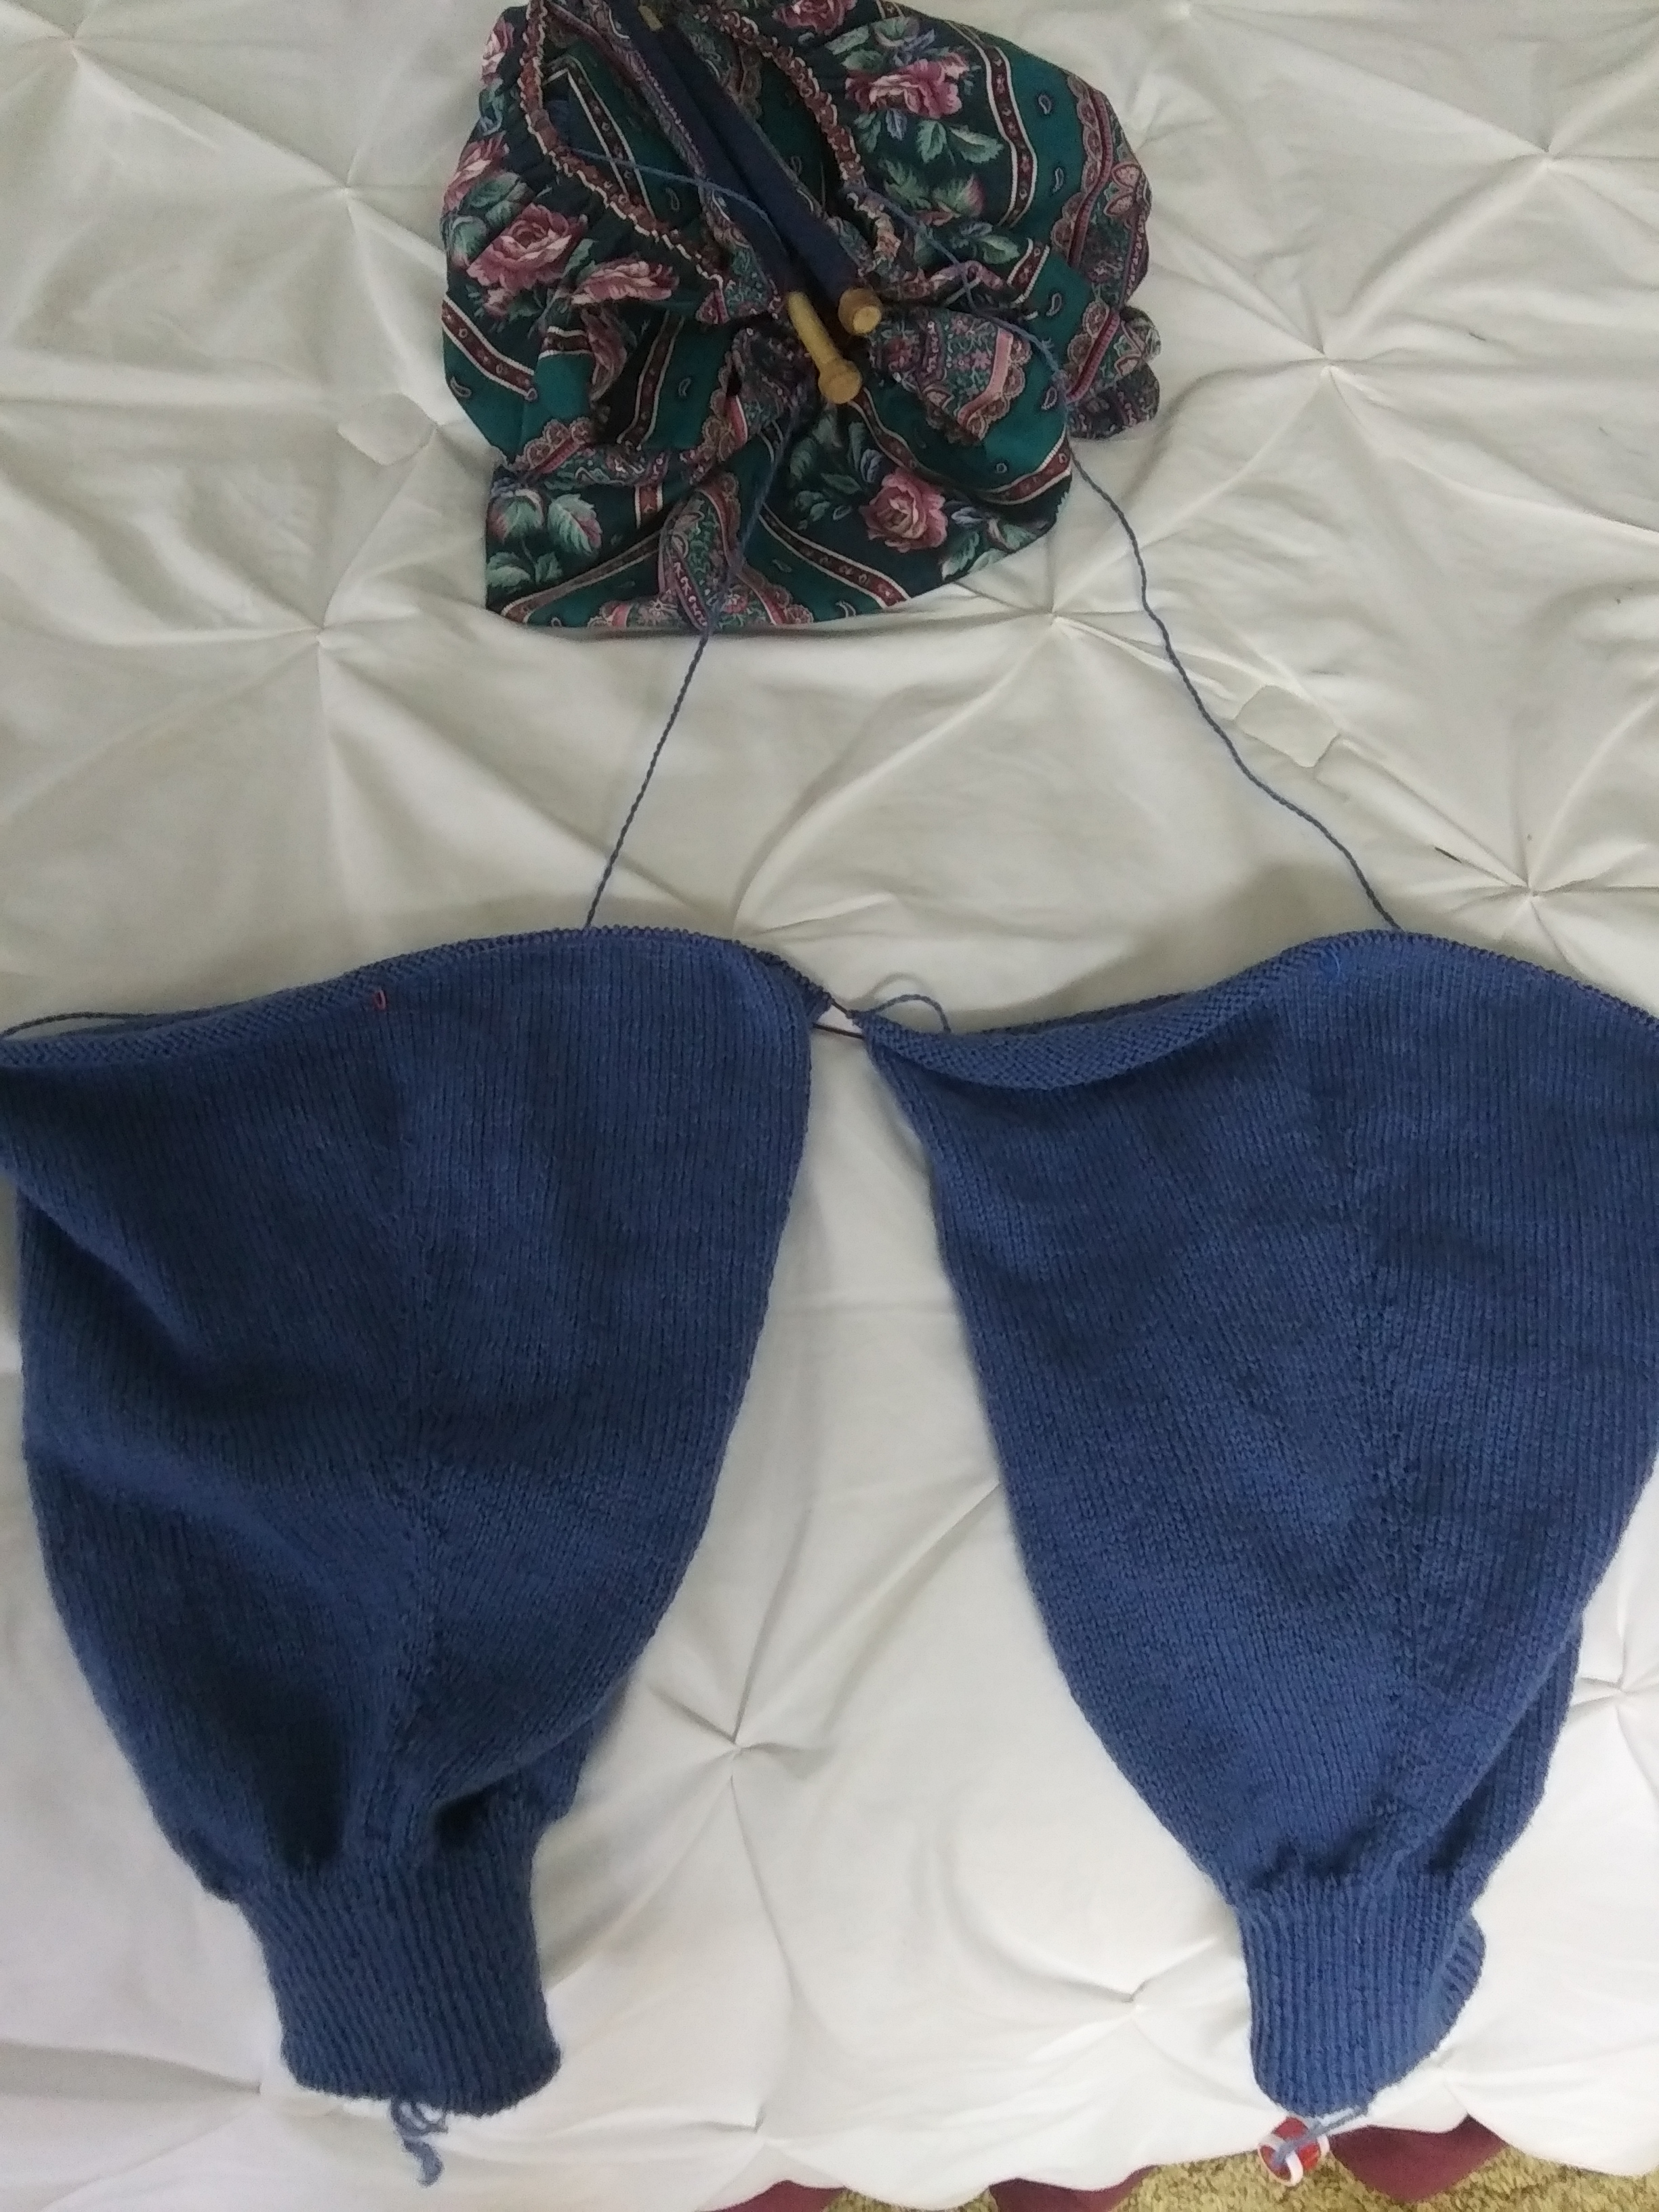
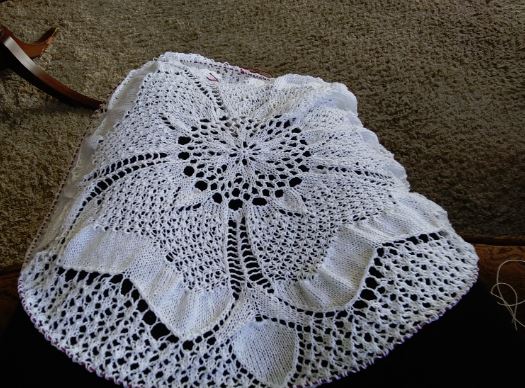
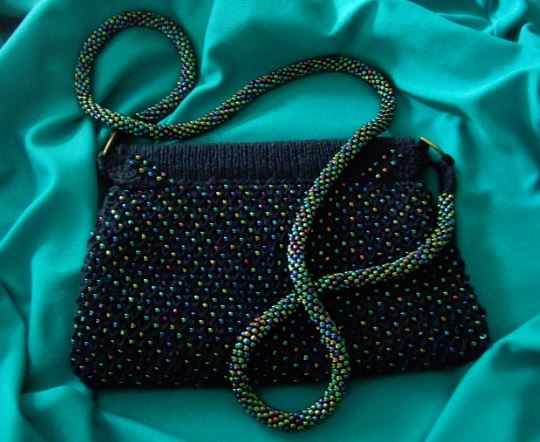
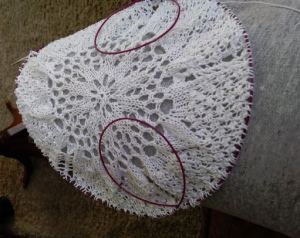
Here is a photo of my work in progress.  In the photos below I hope I can explain the process I used simply enough that you will be encouraged to try it, if you haven’t already done so.

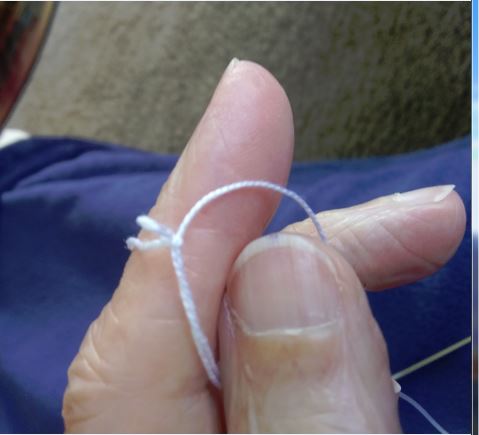
Create your Magic Loop.

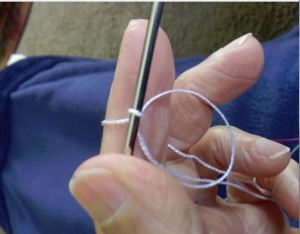
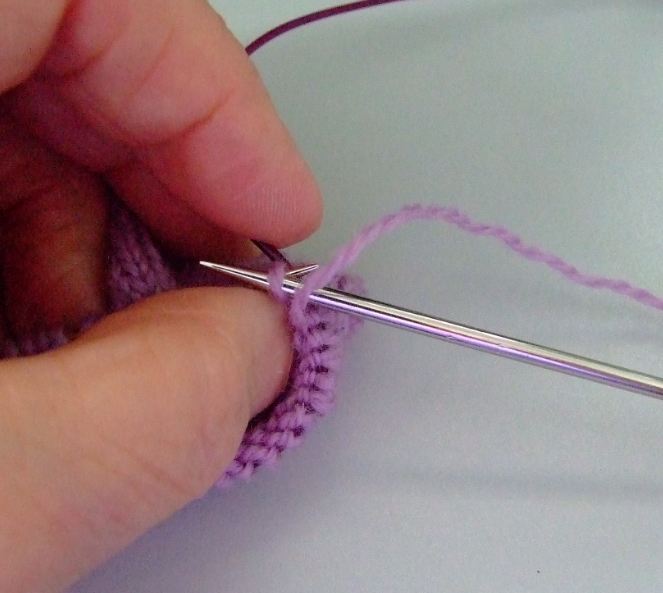
Insert tip of circle needle into crocheted loop.

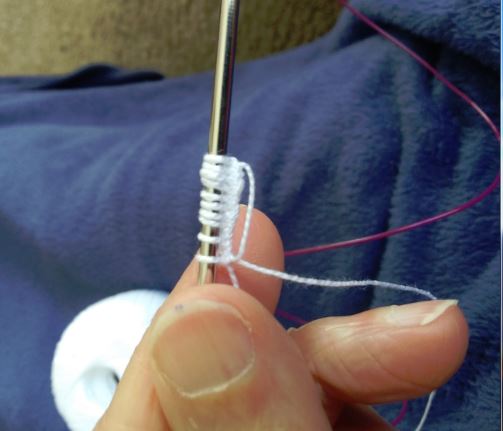
Using the crochet hook, insert hook through Magic loop, yarn around hook and draw through to front, yarn around hook again and draw through loop on hook.  Place this loop on the knitting needle.  I repeated this process 10 times, as this pattern calls for 10 stitches to be cast on.

Take up slack in the Magic loop.

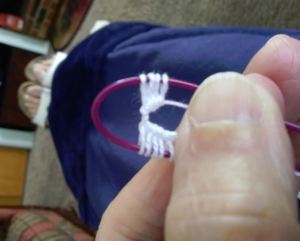
Once all the stitches are on the knitting needle, I pull the needle all the way to the left, leaving only a small amount of cord to my right.  Next, I divide the stitches up as instructed in the pattern.  In this case there were 3 sections, 4, 4, and 2.  I simply bent the cord and pulled it through, allowing a loop to form.  I did the same for the next 4 stitches, then the two that remained were my last unit.

Once this was completed, I closed the Magic loop to form the center ring.

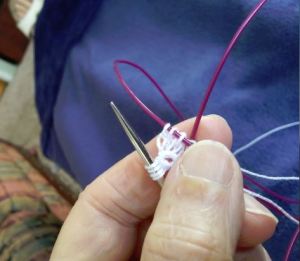
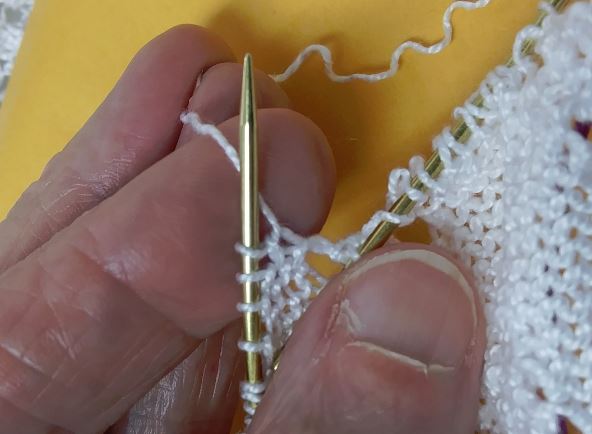
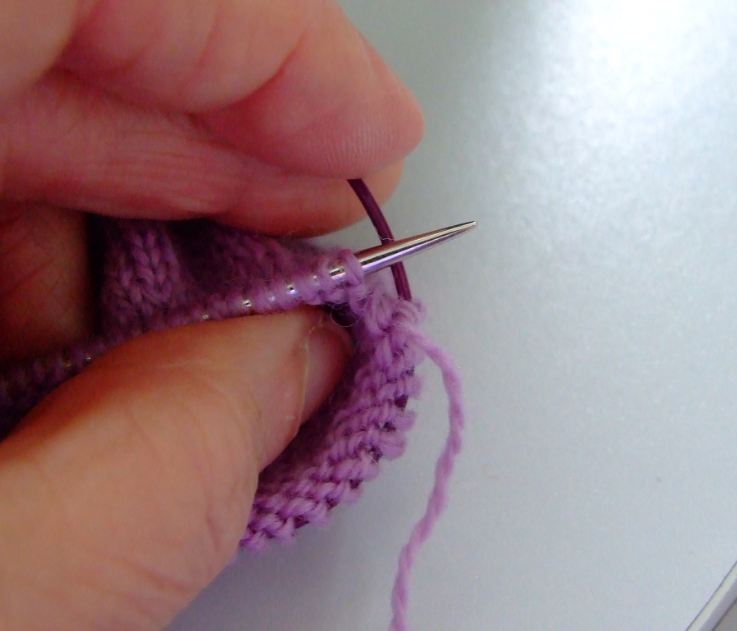
To begin the first round, pull the left needle into the “start position.”

Pull the right needle though and make a clockwise circle, positioning the needle in the start position to begin knitting off the needle in your left hand.  Be sure to make the first stitch snug to the cord of the right needle..

Personally, once I have knitted all the stitches off the left needle, I pull my right needle through so that the stitches rest on the cord.  Next, I pull the left needle back so that it is in position to knit the next group of stitches.  I adjust my loops for comfort, before I begin the next section.  I have never lost a stitch doing it this way.

When you first try this it is best to work on a table top.  It helps you to keep the work from twisting.  I admit it takes a bit of practice, but I think it is worth it.  I also don’t have to go back and fix the center.

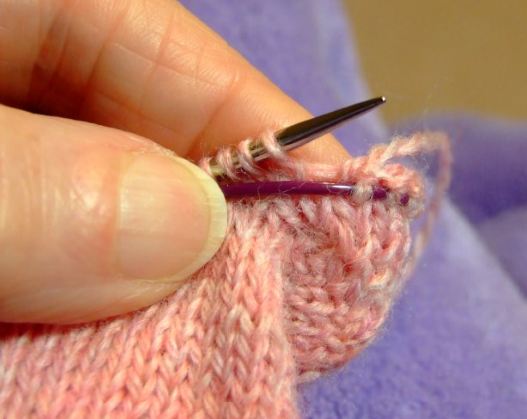
Here you can see the loops as they have diminished in seize.  Once the needle is full, I changed to a 60 inch circle to finish the project.


Happy knitting-  KT

Read Full Post »

This project has been developing as a possibility for some time, but I finally got my act in gear and just went for it.  This evening bag is knitted with “Navy Lindy Chain” yarn (Knitpicks) and combines both a Honeycomb stitch, with a bead inserted in the middle of each diamond formation. The casing for the facile hex purse frame is knitted in Stockinette.  The dazzling strap is beaded spiral rope construction of  .06 multi iris transparent beads and Curio crochet thread, both from Knitpicks.

beaded purse- night shot

The evening bag is 9 by 5, with a 42 inch spiral beaded strap.

beaded purse finished


Each of these photos were taken with different setting of the camera, because shiny beads are hard to capture.  The “night” and sunset” modes seem to do the best.


037

In the above photo, you can see the inside of the bag.  You will notice that I put a zipper pocket in the inside purse.   I made a complete purse with lining in a nice cotton fabric, then hand stitched the knitted purse over the top.  This gave me great stability, and as you can see, it even stands by itself.

There are “D” rings on each end, which hold the strap in place, yet don’t interfere with the hinge.

Beaded Honeycomb Purse

I have created a pdf instructional guide/pattern for you to use if you like.  Caution! This is not a quick knit, and it takes patience, but I think it was well worth it.

I will be working on various alternative straps and will upload the instructions as each one is completed.

This has been great fun, and definitely has gotten all kinds of “oo’s and ah’s” from everyone who has seen it.

I have never worked with beads before I designed the bathroom curtain that I shared in my recent post, but now that I have-look out!

Happy Knitting- KT

Read Full Post »

Well- I promised I would work on this, so here it is.

cake pan jacket

I used cotton yarn(Peaches and Cream), and 1 inch elastic (non-roll).  I also opted for a variegated MC (main color) and used a solid black for my CC(contrast color).

In the process of working on this I also discover how to make a alternating color cable cast on, which is match on on the top with and alternating color cast off, both edges mirroring each other.  I think it is pretty cool.

The main body of the knit is done in double knitting, which forms the casing for the elastic.  The elastic band is knitted right in, so when you are done-your done!

Below I have uploaded instructions for this project, in which I have included instructions for the “alternate color cable cast on, and off.  There is a swatch practice for you to use for establishing your gauge and practicing both the cast on, and cast off.

If you are not sure why you should make one or two of these “pan jackets”  then check out this post


Cake Pan Jacket

Happy knitting- KT

PS-Because of my discovery, I also can use this method to make straps for my purses.  Having the casing open on both ends will allow me to insert a piece of ribbon into the strap, stabilizing the stretching, and…..I will have two pretty edges to boot.  Yeah!!!!

Oh,just an observation-

I washed my jacket, squeezed it out, put it on my pan, blocked it out and let it dry.   Then  I  observed that the cotton yarn holds the moisture quite a bit longer than wool, so  I finally, tossed it in a low dryer.  It didn’t hurt it a bit.  I can’t wait to bake with it.  I will let you know the results.

Read Full Post »

nordic rose knee high finish 1

When I finished these “Nordic Rose” knee highs, I found that they were a bit loose for me.  At first, I just washed them in the washer and put them into the dryer to shrink them a mite.  That helped a little but they were still a tad to big around the ankle.
To compensate, I pulled them up higher, which left me with a ribbed band that was a bit long.   The fix-fold it over, encasing  1/8 th inch elastic bands to secure them around the top of the calf.

nordic rose knee high finish 2

Because I had striped the ribbing, I was able to use a crochet hook to slip stitch the opposing purl bumps  that formed the black strips together (top of photo) to form a casing for the joined  elastic band.  The next step was to slip another elastic ring over the sock in into the area just under the first casing.  Using the crochet hook again, I slip stitched the top edge of the stocking to the base of the ribbing.

The real lesson here is that because the stockings are a bit looser, and they have the elastic rings in the top to pull them in, they stay up all day.

The next time I make this design, I will plan my casings in the ribbed( using #2″s)  area, use the #3 needle for the calf area before the decreases, then return to the #2 to finish the stocking.  That extra stitch per inch in the calf area, allows the knitting to move with you, without seeking a path of least resistance to the ankle- just like water flowing down hill.  The secret is to make them long enough to have the elastic ride above the largest calf portion, so that it pulls in just below the knee.

Below are the charts for this stocking.

Nordic Rose Knee High Pattern

Nordic Rose Knee High Chart

Nordic Rose Heel, Toe, and Border Charts

Happy Knitting-

KT

Read Full Post »

honeycomb handbagThe photo above is in the development stage.  I have combined the Honeycomb stitch, I-cord, and stockinet to come up with this design.  The purpose is to create a small bag for just my wallet and lipstick, etc, to take with me when going out for an evening.

honeycomb handbag- inside

As you can see, I knitted the inside in white.  Why?  I want to find what I am looking for without having to turn on the lights.:)

This bag has no seams, except the inside join in the bottom, and that was accomplished by flipping the edges to the backside (purl), joining them with a three needle bind off.

The rolled edge on the flap and the strap are created with an I-cord.

The flap has the honeycomb stitch on the right side and with stockinet stitch as the liner-constructed in the round.

The basic bag construction incorporates provisional chains of waste yarn,  short row shaping for the corners at the bottom of the bag, and knitting the Honeycomb stitch in the round, as well as back and forth.

At present, I am trying out a double knit version, so as to eliminate the need for knitting the lining separate.  By separate, I don’t mean detached.  Why?  Because all additions in this pattern come off those “great” provisional chains, so I have live stitches to begin the next section.

If you have been following this website for a while, you know that I always use this method when possible, as I base my pattern engineering on the short row heel and toe idea, and working in the round when ever possible, as to avoid seams.  I used the I-cord method described on this website for the strap.  If you want to see that, just type in “I-cord” in the search box.

I will be making a final copy of this model in black Galileo sports yarn from Knitpicks.  I will be using a silver for the lining.  The model above was made from leftover sports yarn, (from different dye lots) using a #5 circle needle.   I used about 1 1/2 skeins of the main color for this mock up, but I will probably use the full 2 skeins of the black, as I will be making the strap longer( about 30 inches).

I will post the complete pattern for you to upload as soon as I finish the final copy.

I am sending this one to my grand-daughter to play with.  I think I might even add on of my Pansies…….?  Hummmm??????  or a Butterfly………..? I think she will love it- that is if mom doesn’t snatch it first.

It has been a fun project.  I can just imagine making one of these for each one of my “evening out” outfits.

KT

Read Full Post »

The other day, as I was working on some baby socks for our new grand daughter due on Valentine’s Day, I caught myself pulling the cord of my circle needle around the corner as I started the transition to the back needle tip, of my Magic loop.  I do this to prevent ladders, where the cords of my 47 inch circle needle form loops on each side.  The trick is to pull your cord through long enough so that you can bring it to the left under the left needle tip, then swing it down and around and up over the top to start the first purl stitch of the last section of the round.  That is why I always opt for the 47 inch cord.

cricle needle tip 1-preventing ladders

Here you see cord being pulled to the left and under the needle.  This move takes the stress off the gap between the left needle tip and the cord.

circle needle tip 2 -preventing ladders

The right tip of the needle is then brought around and over the top, then inserted under the yarn in preparation to be purled.

circle needle tip 3  -preventing ladders

Once the stitch is purled, I make sure to release it, allowing the right hand needle to lie parallel to the stitches riding on the cord to the right.  If need be, I take up any slack.

magic loop tip 1

In the above photo, you can observe how I accomplish this on the knit side.  Here again, I swing my cord around to the left and secure it with my thumb before knitting the next stitch.

magic loop tip  2

Once the new stitch is complete I allow the right needle to lie parallel to the cord, then take up any slack that remains before proceeding to the next stitch.

In both cases I  continue holding the cord around the corner for a few more stitches before releasing it to finish my round.

Just passing it on!!

KT

Read Full Post »