I see a year investment in this project, but I want it to be as real as possible. Hopefully , I will be able to make one for each of my kids, if God sees fit to keep around long enough.
Figuring out how to make these feathers was a bit of a challenge but determination paid off.
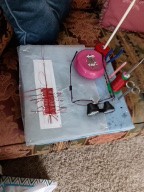
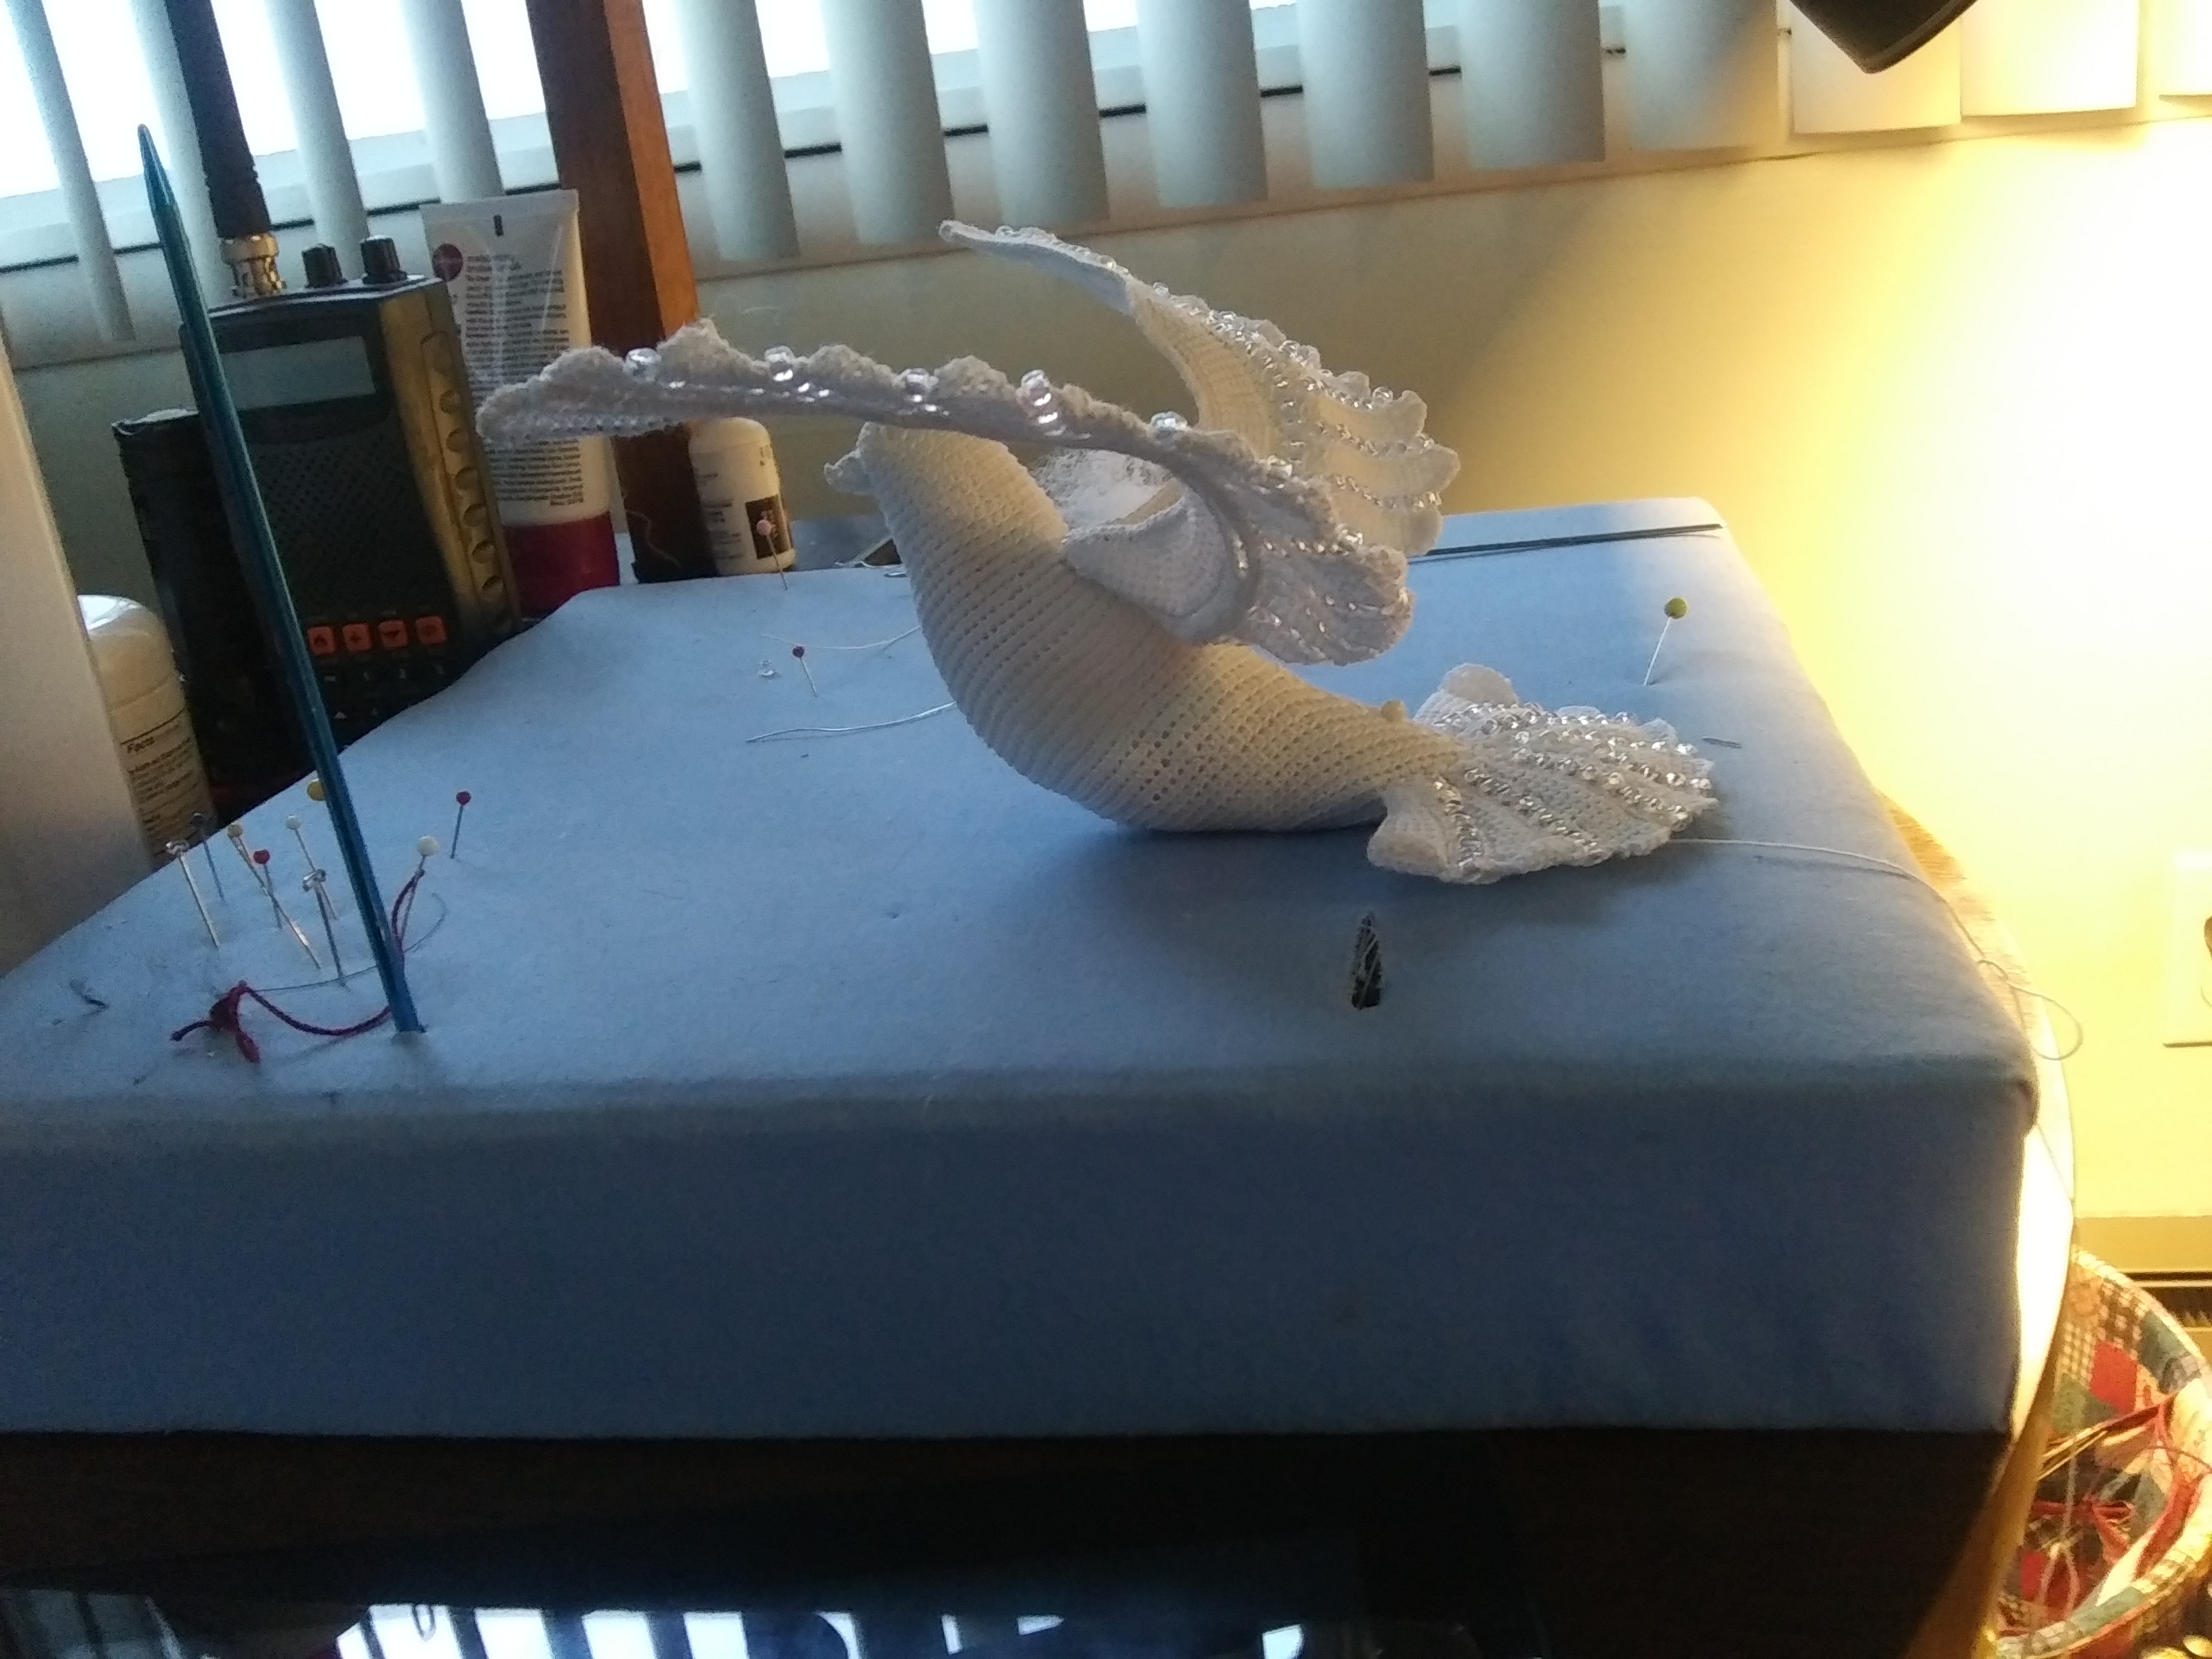
The set up is simple. I made a template (in white) with a center line and two outside lines that give me a guide for my pins. Over that is placed a large sheet of waxed paper, this keeps my form base clean and collects the fine thread that will be trimmed at the end of the process, so I can just gather it up and depose of it.
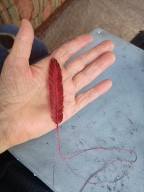
Using a .6 crochet hook, with size 80 thread in red I measure out a 24 inch strand of 32 gauge red wire, and bend it in half (12 inch). Beginning at the bend, I work a sc down the wire for the desirede length of the feather (at 24 st to the inch) This foundation chain of sc will be the anchor for all the threads inserted to make the feather. Next, I measure out 3 strands of Isachord thread from Germany, arms length, fold it in half and thread my sewing needle.
After tying the ends, the thread is brought through the “v” formed by the sc over the wire, pulling the thread through smoothly ( I make sure the knot of the thread is about 1/2 in past the outside “Pin” line). Working back and forth, I pull the threads through each “v'” working down the foundation chain, placing a pin at each turn, using the “pin ” line as a guide. It is a slow process but worth it.
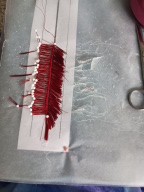
As the foundation chain determines the length of the feather, and you start at the bent end, extra stitches can be added as needed. When I run out of thread, I just pull is smooth and take my clear fingernail polish and glue it to the wax paper at a point 1/2 in beyond the pin line.
Once done, the process just involves, carefully removing the pins on one side, clipping the loops, and stroking them with the fingernail polish, while shaping them upward with a pin, and my finger. Once one side it ready and dried I move to the other side and repeat the process.
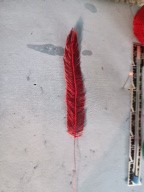
When everything is dry, I remove the feather and turn it over to the right side, give it a quick coat of polish, and lastly, trim it to size or the shape I want.
I know, this looks crazy, but I am having fun, and at 84, what the heck!
Happy crafting- KT
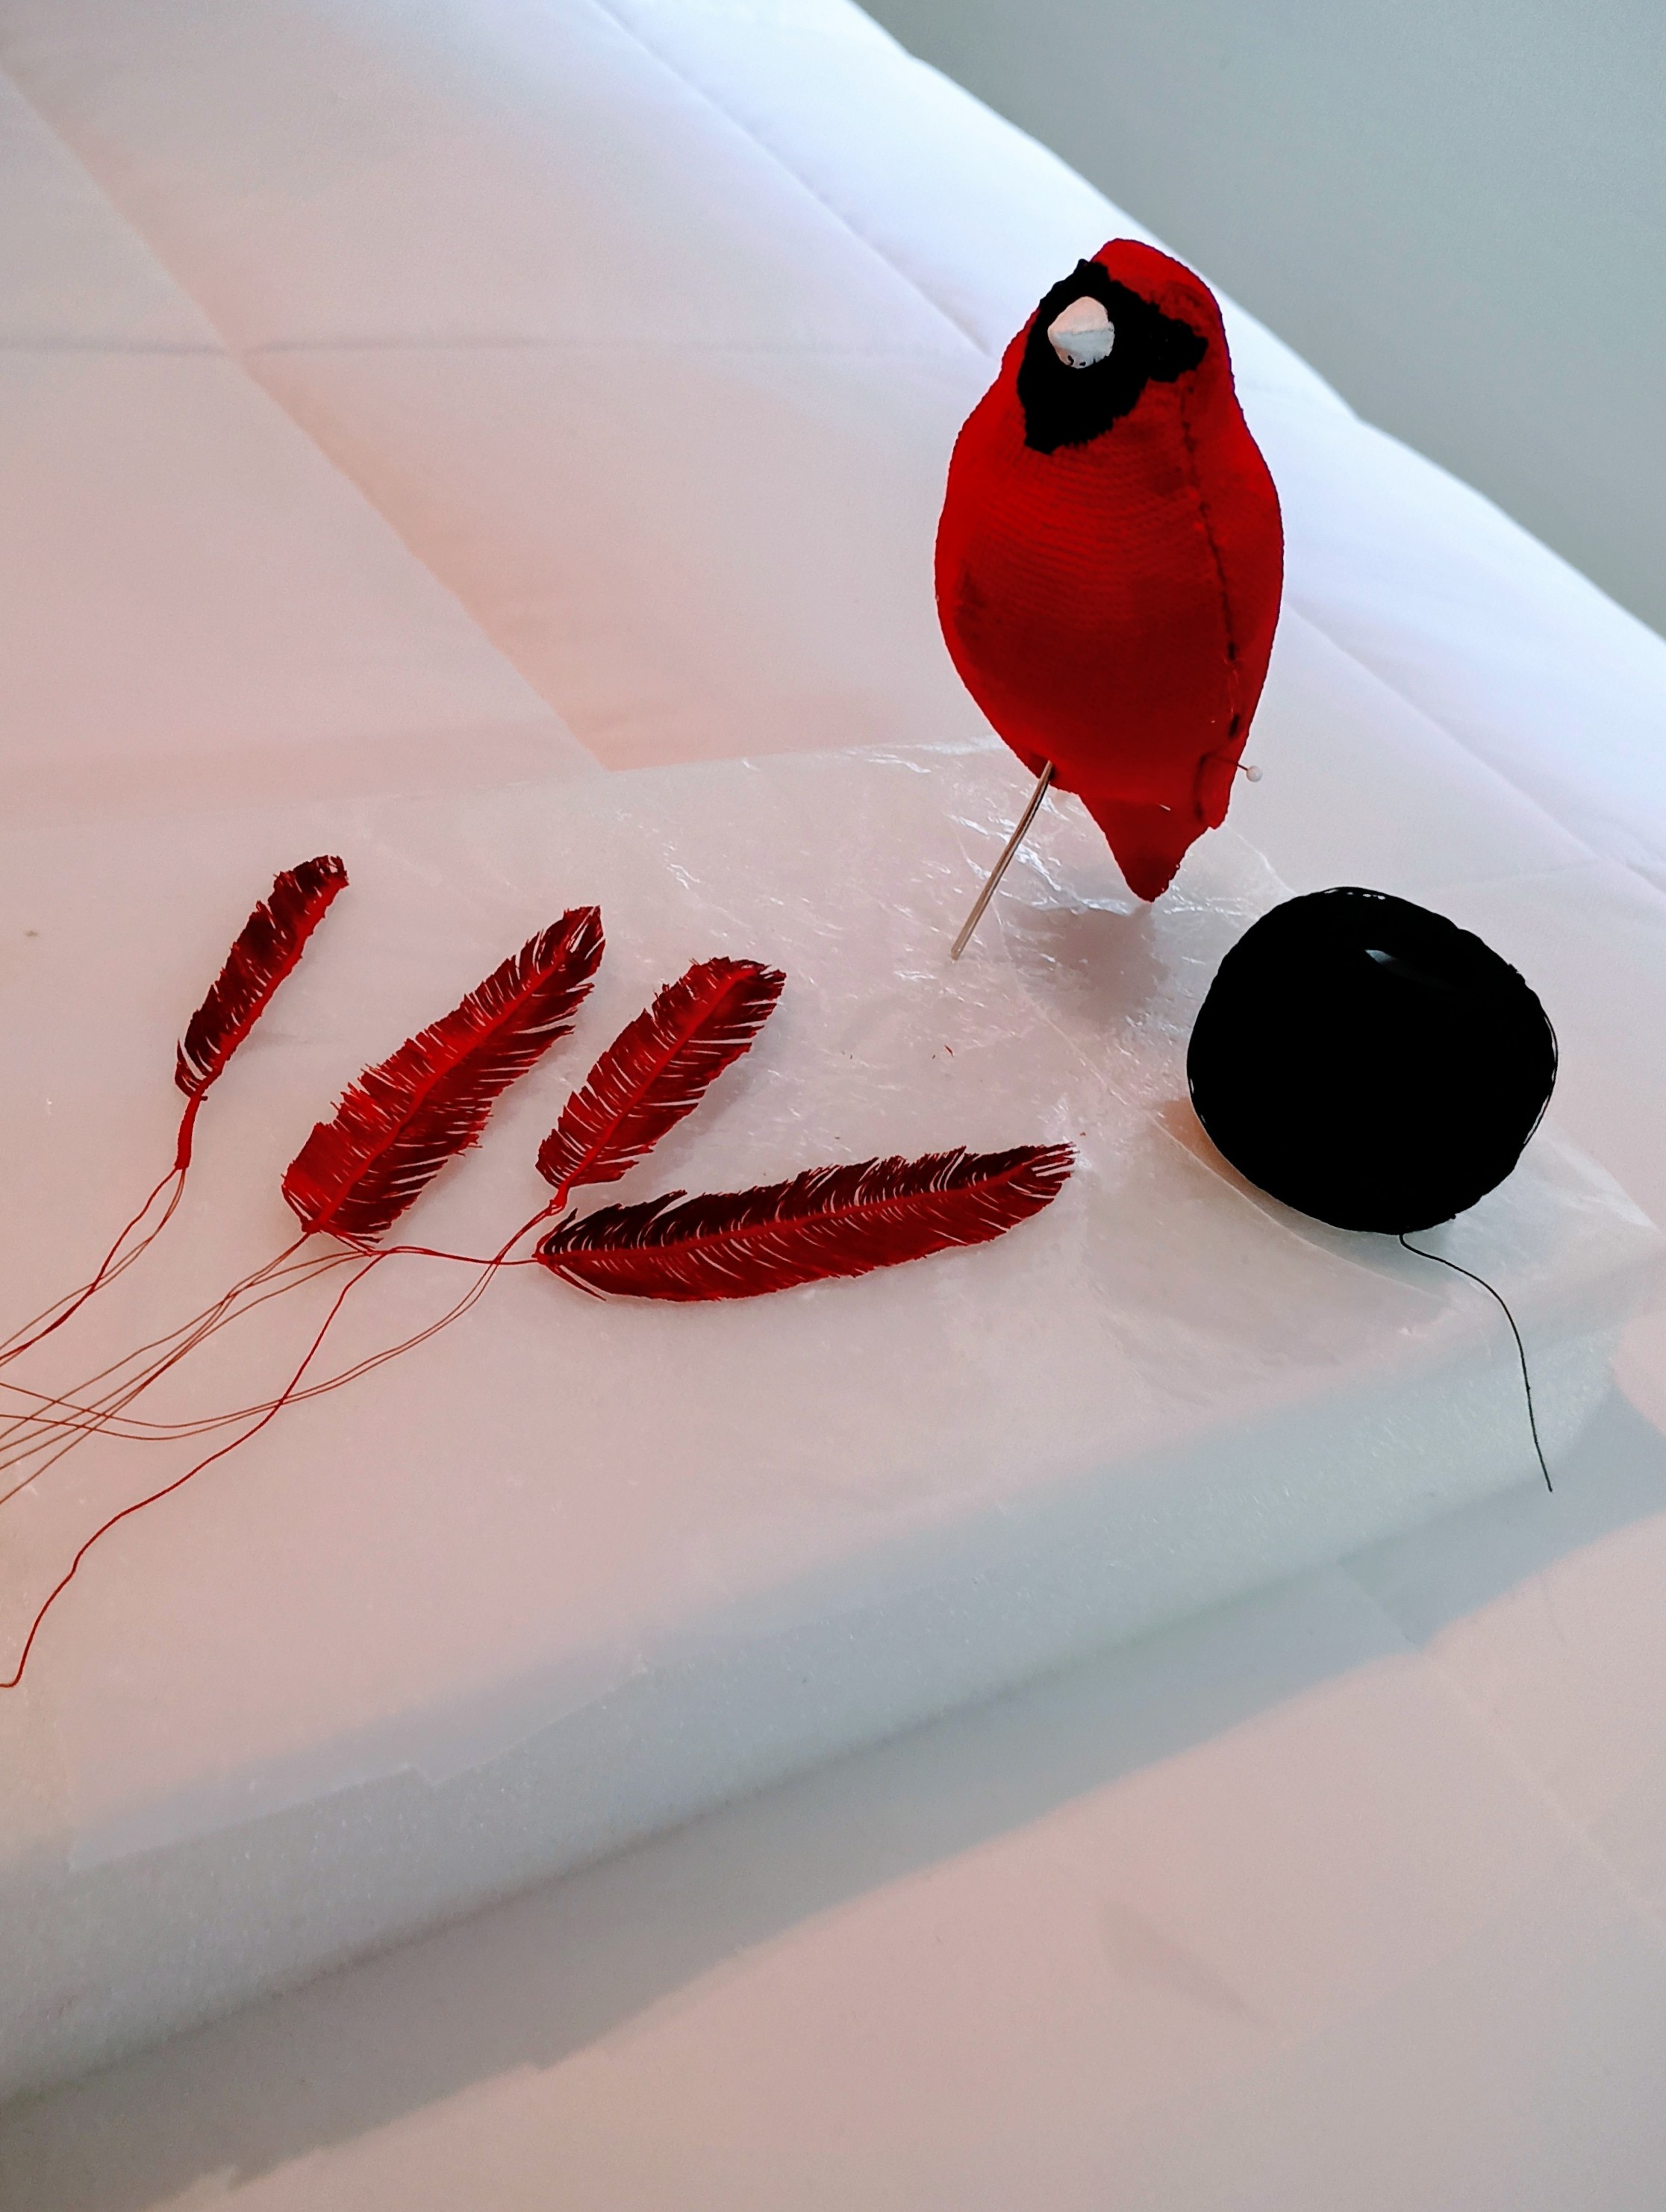
By the way, my Cardinal was created using my Basketweave st. The contour feathers, (on the body) will be made using 6 strands, via a hooked rug st. This background is flat and provides all the squares I need, just like a hooked rug foundation.