Feeds:
Posts
Comments

Archive for April, 2018

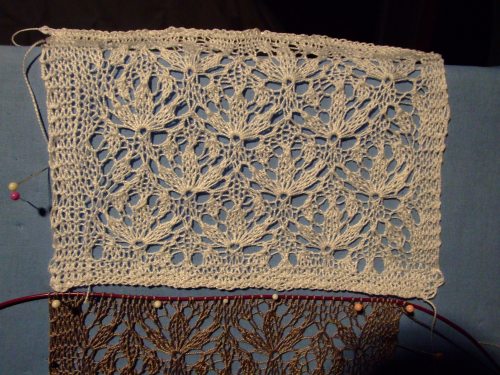
I just finished crocheting a white Magnolia.  While working on the leaves I realized I hadn’t shared my latest discovery.

It has ever been my desire to create a realistic leaf, one that could be altered to fit the flower I was working on.  I have tried many versions from Irish crochet patterns to Russian patterns.  Many were good, but never came up to what I wanted.

To that end I began playing around with some ideas of my own.  I am not saying that this has not been done before, just that I hadn’t discovered the concept.

004

I was close in the post I made in July of last year, but after reviewing it I think I have finally put together the best option, at least for me.

003

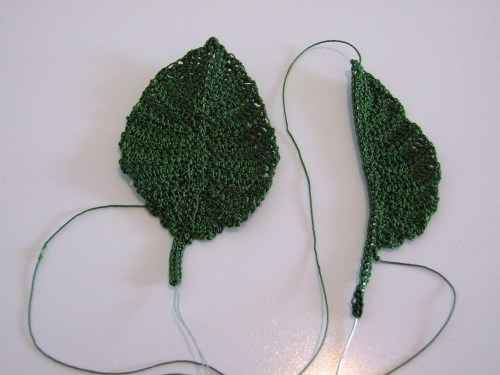
With this method you begin each section of the leaf at the top.  There is no having to slip st to the top to begin the second side.  The trick is to peal off about 5 yards of thread before you begin.  This thread will be used to finish the second side, allowing both sides to be finished at the bottom.

By manipulating the stitches, sc, hdc, and dc, you can shape each wedge of the leaf and make the veins stand out.  This also give you the freedom to shape the leaf for any specific flower.   The key here is to draw a picture on paper first, then measure the center from top to bottom.  This figure with determine the chain length needed to begin.

I have uploaded a tutorial here.  It is not an exact pattern.  It is the concept, and methods used to create the leaf, or leaves of your choice.

Magnolia leaves tutorial

I have not included the instructions for the Magnolia, as I have not written them up yet.

This Magnolia will be going on a hat for a friend dealing with cancer.  I will share the finished product when it is done.


Happy Crocheting

KT


Read Full Post »

Since I have been into lace knitting lately, I have been perusing the net for all the lovely patterns available.  One of my favorites is the Estonian Star Flower.

I worked up a swatch from one of the available charts; however after blocking it I had the desire to open it up a bit.  To that end I  added yarn overs to the section between the flowers.  The result was a more smooth knit, that didn’t have to be blocked out as much to really see the design.

As I have in mind a project that needs to be washed more often than a curtain, or table cloth, or simply needs to be more user friendly for the person I am making it for, I came up with the version below.


001

The one on the bottom in gray, is my own swatch, which I have written instructions for and will share with anyone who wants to try it.  My swatch includes a half of flower at the sides- I like things even.

Click here if you would like to have the instructions.

Expanded Estonian Star Flower Pattern

Happy knitting- KT


Read Full Post »

It has been a while since I knitted lace, but I got inspired this week.  My daughter needed something to throw on quick for a instant “dress -up” affair.  The first think I thought of was a lace tunic to throw over a tank top.  It’s light, but elegant.

As I searched the net for ideas I ran across a beautiful diagonal lace tunic from Europe.diamond lace tunic

Perfect!  It even had a chart for the lace pattern below the picture.  The only problem was the symbols.  They were not at all familiar, so I went on the web and search for all the international knitting symbols.  I found them on “Knitting Fool.” However, when I match them to the pattern I knew something was wrong. How?

As any seasoned knitter will tell you, if you add and extra stitch or yarn over and you want to keep the stitch count even, you have to balance the count by knitting together two stitches somewhere in the course of the row, or the stitches won’t add up right.  When I looked at the chart carefully there was no doubt that the stitch count had to be maintained.

Now what?

The yarn overs were represent be a large “U”, but the K 2 tog, looked like a symbol that indicates to make 2 stitches in one stitch, thus adding an additional stitch besides the yarn over- that wasn’t going to work.  Then I notice in a close up that the ridges between the yarn over holes were more raised and defined than usual, so I sat down to work it out myself.  I love this pattern.

008

Here is what I came up with.  It involves a new stitch (for me, at least).  I created the raised ridge by knitting deep and slipping the next stitch(right or left) over the top to achieve a SSK, and a K 2 tog.

The knit 2 tog (deep) is created by knitting in the stitch below, then placing that new stitch back on the left needle. Next, slip the stitch to the “left” of the new stitch over the new stitch and to the right, releasing it to lay at the base of the new stitch.  Return the new stitch to the right needle and proceed with the chart.

When an SSK is required, the first stitch is slipped( knitwise) on to the right needle, next; knit deep(into the stitch below)into the next stitch to the left.  Pass the slipped st on the right needle over the newly made stitch.  It is not hard, just take s a bit of getting use to.  I really like the affect.

knit deep

Knitting “deep.”  I learn this term from a German pattern that I had a while back.  It simply means to knit into the stitch below the one you usually knit in.  When you do this you can see that it makes a more defined hole in the lace, as it releases the stitch made in the previous row.

I have cleaned up the chart and have uploaded here. This swatch has 3 added edge stitches on each side.

Russian Lace tunic Design

Feel free to contact me if you have any questions.


Happy knitting- KT

Read Full Post »