Feeds:
Posts
Comments

Archive for August, 2011

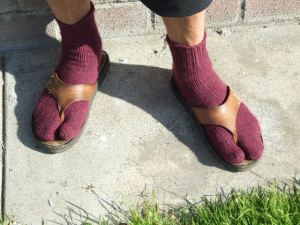
I just finished the Tabi Sock pattern (unisex) and have it available on my Free Pattern Catalog page.   This Tabi sock pattern knitted from the toe-up is constructed using Magic Loop method.  The pattern has detailed instructions, and illustrations, and will be accompanied by the necessary tutorials for your convenience.  Once you have the concept, you can design your own Tabi’s, as plain or fancy as you like.  With the necessary proper measurements done, all you have to do is apply your gauge and away you go.

One exclusive feature of my sock patterns is the toe shape.  I like my socks to “fit.”  For this specific sock, that means that I want the four toe section to fit perfectly, no wrinkles, no gaps.  In this pattern I will illustrate how I make the adjustments needed to help you fit your toe shape.  One of the concepts I introduce in this pattern and in the Foot Glove pattern, is called a CTF (connecting toe fan).   This little addition provides added comfort between the toes and conforms more closely to the actual foot shape where the toes are attached.

The picture below, is of my brothers Tabi socks.  These are done with Sports weight yarn.  With this pattern you can do either fingering yarn (my favorite) or Sports weight.

You can see in the picture above that my toe shape is intirely different than his.

Some might think my patterns are a bit lengthy, but, I like to draw, and love working with my camera.   It is very important to me that you understand the reasoning behind the instructions.  Why?  Because I am one that learns better by doing than by reading.  I need pictures.  I need to know the concept.  Once I do, then, look out!  Get out of my way!  I’m coming through!!!

The creating process is fun for me- it’s not work.  So bear with me, you’ll have to get use to the 15-20 pages of detail. 🙂

Knit-tweaker
Read Full Post »

Most of the time, when one thinks of short row closures,  it means making the turn to complete the diagonal seam in a sock heel, or toe.  However, there are times when short rows are used to add shape or a rounded extension to a garment, or hat, like in the pattern for the Mock Tyrolean offered  on my “Pattern Catalogue” page.   The instructions for these types of short rows often involves a wrap, made around the adjacent stitch during the turn.  I have tried this method, but was never pleased with the result, so I thought I might share the process that I use to accomplish the task.

To do this we will start with a swatch-my favorite practice tool.  Use whatever needle and waste yarn you have available.

First, cast on 30 sts ( I used the purlwise longtail cast on).

Row 1.  Knit across.

Row 2.  Purl across.

Row 3.  Knit across.

Row 4. Purl across until there are 3 sts left on LN.  Turn.

Row 5.  YO, knit across until there are 3 sts left on LN.  Turn.

Row 6.  With yarn in back,  purl.

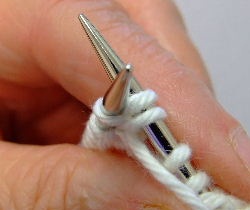
Keep the single YO, and first purl snug.

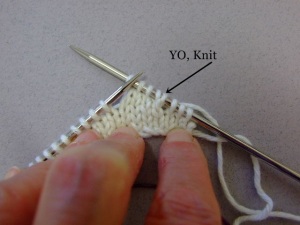
 Now, continue to purl across until you 3 sts before the first YO on the LN ( 7 loops).  (See picture below).  Turn.

Row 7.   YO, Knit across, until there are 7 loops on LN, including the YO.  Turn.

Work back and forth in this manner as many times as you like, ending on the purl side.  Turn.

I worked until there were 9 sts left in the middle.

Now I am going to show you how I close those gaps.

Knit across to the first YO.  Slip the YO knitwise, place it back on the LN (left needle) and knit it together with the knit stitch on the left side of the gap.  Continue across knitting the next 2 stitches.  As before, slip the YO knitwise, return it to the LN, and knit it together with the stitch on the left side of the gap.  Work to the end of the row closing all the knitside gaps.  Turn.

Purl side row.  Purl across to first YO.  Slip the YO onto the RN through the back loop (twist it), purl the YO.  Slip the purl to the left, knitwise, place it back on the LN.  Now slip the new purl stitch made in the YO back to the LN.  Pass the stitch to the left over the stitch on the right.  Return the new stitch to the RN.

*This move sets the knit stitch on the right side over the YO.

Work purl side, closing the gaps as instructed above.  Turn.  Now knit across.  Place your stitches onto a piece of waste yarn and view your results.  I think you will like it.  One of the key things to remember is to keep the YO and first stitch very snug.

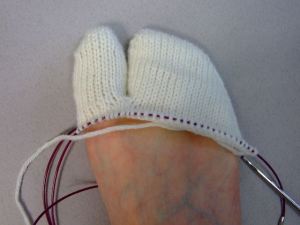
Here is the result-

Last row completed.

Try it!

Knit-tweaker

By the way,  my “Foot Glove Pattern is now available at my Etsy Store.  Just click on the “Pattern Catalogue” page for the details.

Read Full Post »

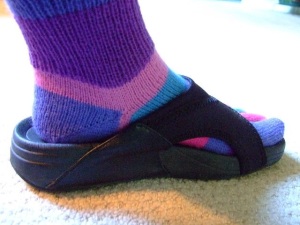
Today I’d like to share with you a sneek peek at my latest fun project.  I call it the “Foot Glove.”

I started out with the intention of using one color for every toe to illustrate the contruction, but afterwards liked the results so much I decided to continue the stripes throughout the entire sock.   This is definitely a great project for using up the sock yarn stash.  All you have to remember is to divide each color in half (two balls, one for each sock) then knit away.

Presently, I am working on writing up the pattern and will have it in my ETSY store soon.  This was a bit of an engineering challenge, as the toes are not simply attach in a straight line, but need to be comformed to the shape of the foot, but I soon figured it out and will be giving you step by step instructions in the pattern.

Of course, once you get past the toe section, you can let your imagination run wild with all your pretty colored yarns.  The techniques I used in this Toe-Up pattern included jogless stripes,  my no-wrap short row heel, “no-dots” rib color change, and an invisible bind off.  All these techniques will be included in the pattern.

It has been great fun knitting this up.  I hope you have fun knitting up your version, too.

Knit-tweaker

Read Full Post »