Feeds:
Posts
Comments

Posts Tagged ‘knitting’

While working on my Nordic Rose stocking I did a little experimenting.  Why?  The pattern for this stocking has large areas of one color, and kind of stretches the Fair Isle method to its limits.  How to handle this problem became my challenge.

The first chart section I constructed using the Fair Isle method with short floats, say at least every 3/4 inch, and established breaks on my one circle needle for NA(needle A-front) and NB(back).

The second portion of the chart I changed my needle positions to suit the pattern, allowing me to work across the design portion without any ladders to worry about.  I also did not weave in my alternate yarn color as before.   The results were stunning.

fair isle comparison

The upper section of the above photo was done in the second method, repositioning the needles as I worked around the chart.  Of course, another benefit of this method is that you yarns don’t get tangled as they remained in the same place all the time(black on the right, red on the left).

The lower section of the example where the floats were kept shorter, shows slight dimples( see photo below)in the surface. This happens no matter how loose you leave the float.

fair isle with short floats

If you use the second method and leave your float too loose, the stitches at the opposite ends of any section of the color can loosen and affect your gauge.

fair isle with long floats

The remedy-

By securing or capturing the alternate yarn at the change of the new color, and then again one stitch before the change at the other end, the float will stay in its proper place.  To make the capture of the alternate yarn on the far end of the float smooth, first stretch out the stitches to the right, then bring your yarn(black) firmly across the expanse-

1) wrap as to knit,

2)wrap main color(red) as to knit

3)unwrap alternate color(black)

4)complete stitch with main color (red).

The next stitch will be the new color (black).  Now the float will stay in place and lay horizontally(with no discernible dip) across the back of the red stitches.  I always tip the work forward to check the tension of the float before proceeding to the next section.  I make sure that everything stretches out equally.  Taking the time to do this will save you lots of headaches later.

You will notice that the diamond above is very smooth.  The long floats on the inside that I deem might pose a problem when sliding on the stocking will be tacked down with a needle and one ply of the background yarn ( in this case, red).

The process of moving the needles as I go has  eliminated the need to deal with the “ladders” of  circle needle knitting.  One thing that makes this easy is that this pattern always has a center back pattern, and the last stitch of the round completes the right side border of this section.  This lets me know where the round starts without using a marker.

Below is a photo of a new needle position, as I retain about 10-12 stitches on my right needle, and prepare the left one to knit across the rose diamond section.

nordic rose-repositioned needles

It works for me!  Give it a try. Below is a practice chart for you to try.

Nordic Rose float Practice Chart

Of course, I could do this pattern in Intarsia, as the center back stitches make an excellent point for a turn around.  Hummmmm????

Happy knitting!

KT

Read Full Post »

While I was working on my latest sock design, I began to pay particular attention to my color change where NA(needle A) and NB (needle B) meet as I start a new round.  Normally, I make this back seam design lie in the center of NA, but this time I decided to put it at the beginning of the round.  Why?   Since these few stitches involve changing colors more often, it forms a firmer, less stretchy surface; therefore it is a great place to hide and secure any loose floats that happen to be hanging around.  By working your extra yarn across to this area, from either side, you can tuck them under and stitch them down, with no one the wiser.

Below is a photo of the area in question.

nordic rose back seam transition

You will notice that there are 5 red stitches between 2 black ones, this is the center back pattern of my Nordic Rose knee high.  These stitches are riding on NA.  NB is laying on the counter to the right, with its cord pulled across the surface of the knitting to the left.  You can see how this move frees up the stitches to lie closely together, just as if you would be working on a straight needle.   However, there is another move that is just as important, freeing the stitches at the other end of needle A to ride on the needle tip.  See photo below.

nordic rose back seam transition 2

You can see that I have pushed the stitches onto the needle tip so that they might ride smoothly on the needle itself and NOT on the cord.  With these two moves completed, I can make a smooth transition when starting my next round, eliminating any loose stitch at the beginning.

I use the same procedure when I make the transition from NA to NB in the middle of the chart.

Give it a try!

Happy knitting!

KT


Read Full Post »

One of my discoveries in dealing with the “yarn over” issue is the uneven holes that are created by the traditional method.  If you are working in a lace pattern, it is not hard to see that the YO purls are a bit larger.  Why, because they are really “not” a yarn over,  they are in fact a “yarn around needle,” creating a full loop.

Since I am a bit picky about my knitting, I tried some experiments.  The easiest answer, was to mirror the traditional yarn over.  Yep, that fixed the problem.   From that point on, when instructed to make a YO purl, I bought my yarn to the back, and purled the next stitch.  Now, my holes in the lace pattern were the same.

Next, I experimented with the “yarn around ” needle.  It works just as well.  The key is to have the lengths of yarns creating the yarn overs, or around needle, the same.

I use the “yarn around needle” to increase stitches.  It makes a very nice transition.

Below are some demos illustrating both methods on the knit side.  For the purl side you would just reverse the process.

yarn over demo


This first demo shows the yarn being brought forward in preparation to accomplish the , YO(yarn over) knit.   This is the traditional method, but actually creates a half loop between the two stitches.

yarn around needle demoThe second demo illustrates creating a yarn around needle by bringing the yarn over the top of the needle and then again to the back in preparation to knit the next stitch.  This method make a complete circle around the needle, creating a full stitch, or loop.

Either way, I get the best results by doing a swatch of each type of yarn over before getting into a complicate piece of work.  The goal is always to make you stitches look even.

Hope this helps.

KT


Read Full Post »

cozy toes nordic sock

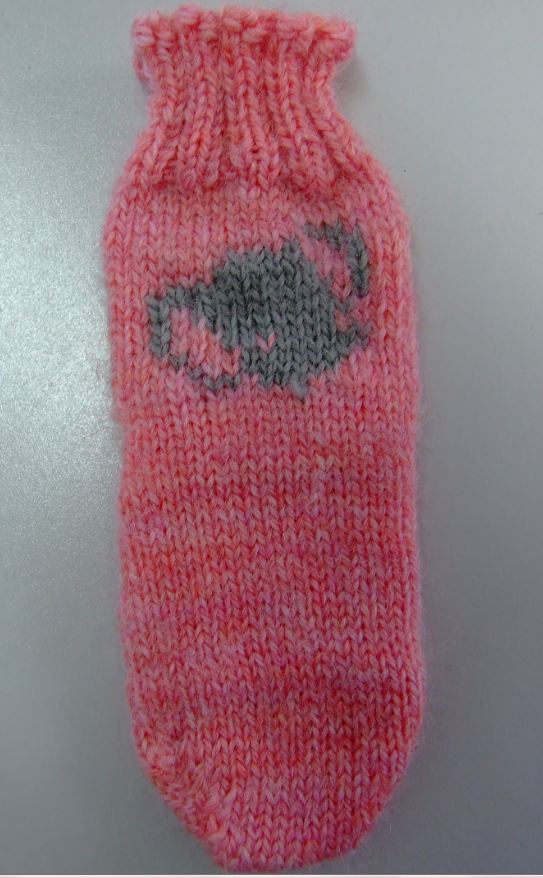
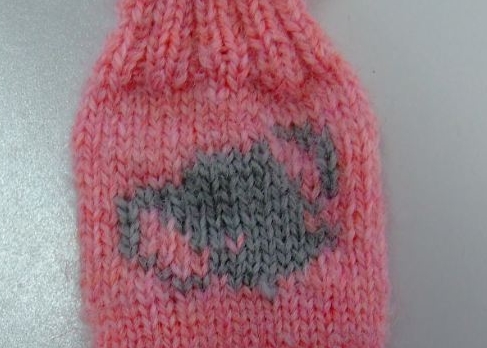
As I was working on the second sock  I decided to take some photos of the double heel set-up.

First, let me say that I have discovered that using a needle  at least two sizes smaller for setting up double knitting, gives a much smooth transition than doing it with the needles designated for the field. So…, since I am using a #3 for the main knit, I will be using a #1 when setting up the double knit for the heel.

cosy toes-heel set upDouble Knit Set-up

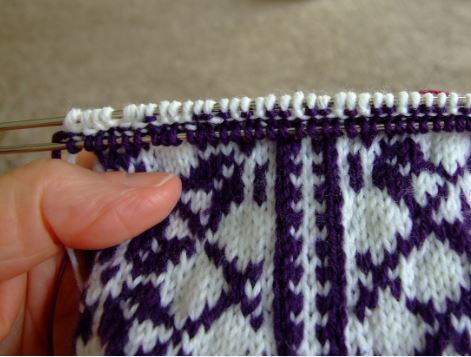
Using my #1, I knitted the first stitch with the MC, leaving it on the needle, I brought both the yarns(MC and CC) through to the front; with the CC  I purled into the same stitch.  To repeat, bring both yarns to the back, then knit the next stitch with the MC. Bring both yarns front, and purl in the same stitch.  Work all the heel stitches this way.  You should have twice the amount of heel stitches on your needle. The next step is to pull the #1 through all the way so that the stitches are now on the right end tip of the circle needle.  This puts them in position to be slipped off onto the two tips of the #0 needle.

Pick up a #0 circle needle.  Fold your #0  in half so that both ends face the same direction.

cosy toes-dividing sts

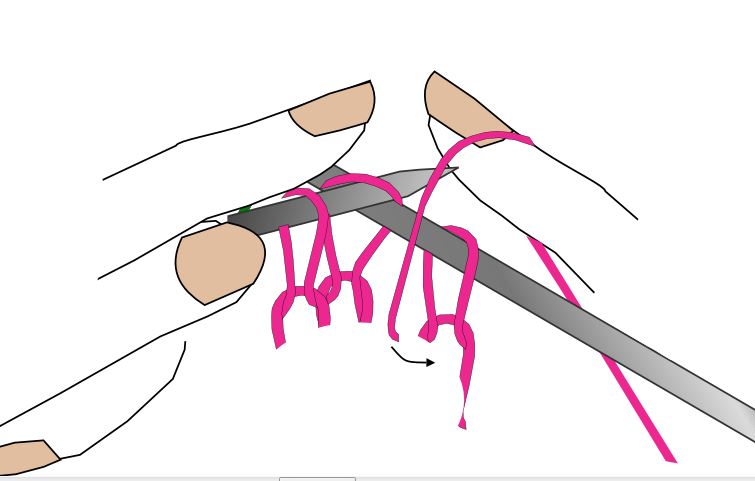
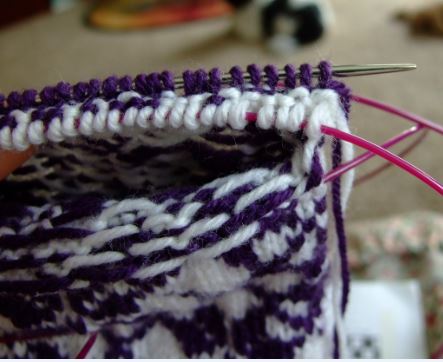
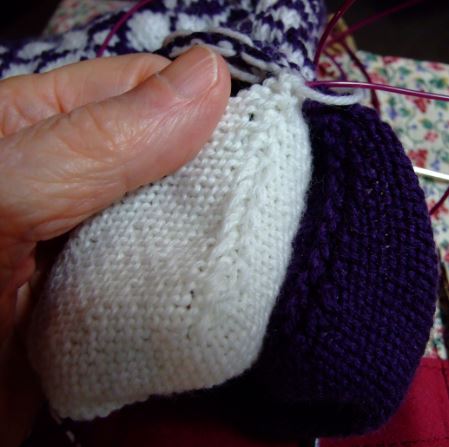
You can see that I have positioned the tips between the thumb and index finger of my right hand.

cosy toes-dividing sts-2By rocking my wrist forward and backward, I pick up the MC from back to front, with the nearest needle, the CC stitch is picked up in the same manner, with the farthest needle.  The trick is to keep your right hand thumb on the stitches just picked off.

cosy toes-dividing sts-3

You can see in the photo above how it looks as you progress across the row.

cosy toes-dividing sts-4Once you have them divided onto the two points of the needle, it is time to set up for knitting the MC heel on my #3’s.  To do this just turn the needles around so that the working yarn is on you right.  Now pull the #0 needle holding your CC through, so that the stitches ride on the cord.

cosy toes-dividing sts-5

*Note- you will find that knitting off the #o holder, leaves you ample room for the larger needle and makes a smooth transition.

cosy toes-ready to knit heel

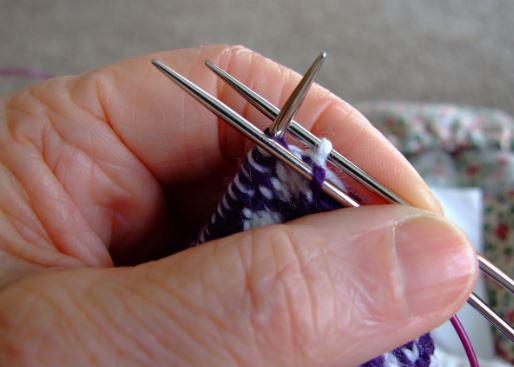
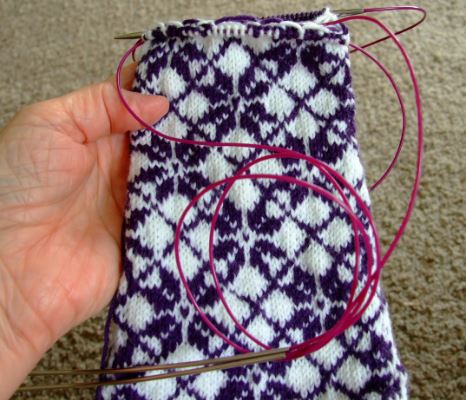
Next, pick up the #3, slip the first stitch, and purl across, beginning your short row heel.  Once the #0 is released from this row, pull it through so both side hang out evenly.  I actually tie a loose knot in the coil and let it hang.  This needle serves as  a stitch holder for the CC stitches of the inside heel.

cosy toes-ready to knit heel- keep cc sts out of the way

Complete the MC short row heel, ending on a knit row.  Why?  This will set up our working yarn in the proper order to complete the round that was interrupted when the heel was begun.

cosy toes- picking up cc sts for second heel

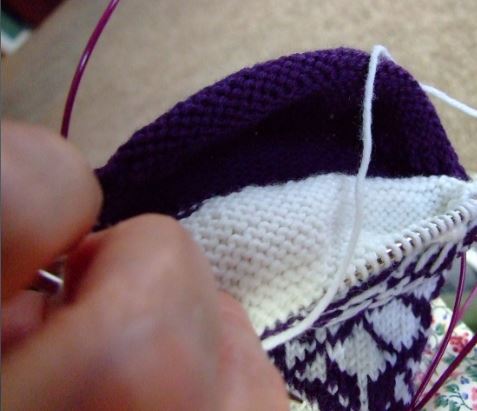
After transferring the finished MC heel stitches onto a spare #1 or #0, beginning at the right edge, with the purl side of the MC heel facing you; with #0 needle, pick up the stitches for the inside CC heel.

cosy toes- photo of inside heel

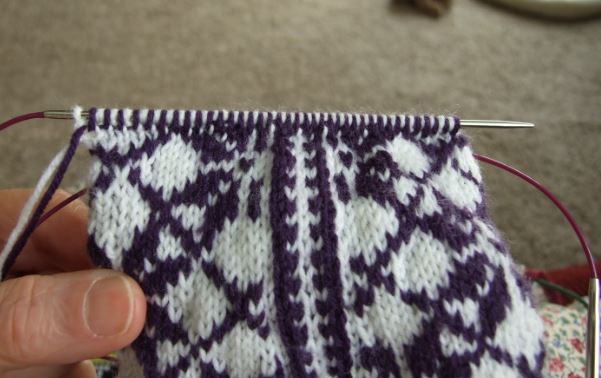
Here you can see the stockinette stitches of the inside CC heel.  Beginning in the knit side, complete the short row heel, ending with a purl row.  Now both working yarns are in position to complete the original round.

Below are some photos of the completed heels.

cosy toes- photo of opposing heelsYou will notice that the purl sides oppose each other.

cosy toes- lining up short row turn ridges of inside heelsOnce the two heals are completed, line up the short row turns as shown in the photo, and loosely stitch them together, weaving in the ends of your yarn.  I have found that using a piece of the MC works best.  Now turn the heels inside each other, both sides should be in stockinette.  Slip the stitches alternately back onto your the right tip of your #3 needle. Pull the cord through, in preparation to complete the original round.  The heel stitches riding on the cord should  in the same order as in the first photo in this post.  Now complete you chosen chart for the instep section.

When you come to the heel portion with the two colors, knit the MC and CC together with the MC.  At the same time you will be weaving in the CC behind every other stitch.

From this point on you just complete the charts you have chosen for the instep and sole section until you get to the toe.  Repeat the process as for the heel on the amount of chosen stitches.  Join the two together, and Kitchener stitch the remaining stitches to the matching sole stitches.

* I interlock the first  and last two stitches, before I start my Kitchener in order to eliminate the bulk at the beginning and end. Using 2 #0 DP needles makes this process much easier.  Click on the link to “Techknitter” for instructions.

Here are some additional ideas and instructions.  Nordic Boot Sock Ideas

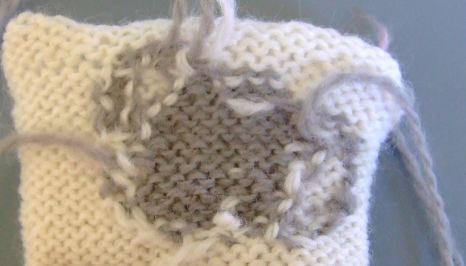
Chart tips-For this and any other project requiring a chart I have found that “whiteout tape” you can get at Staple or stationary supply, works great for keeping track of where you are.

cozy toes chart tipIt peels off easily and can be moved up the chart as required.  You will notice in this photo that I also have used it to mark the out the section for the heel.  As you can see it great for any application where you need to mark your progress.

Happy knitting!

KT

PS- You can find the original version of these stockings at Knitting Daily.

*The original stocking, uses a Shepherds heel.  It works well, but I prefer the short row version.

Read Full Post »

Today I finished my Red Hat Silkie pillow.  This has been a joy to work on, and soon I will be sharing the pattern on my Designer Pillows page, but for now here she is ready for her debut in Southern Idaho.

ms slikie - red hat pillow

Here is the back-

ms slikie - red hat pillow back

I love the floating red chains over the purple background.  I think this would make a lovely fabric for various projects.

I hope to make a video of the the process soon, as this color combo should make it very easy to see.  Will upload it ASAP.

KT

Read Full Post »

Having just finished my Daisy and Butterfly pillow top, I thought it would be the proper time to upload the tutorial for the 3D butterfly.  I can just see it being used on a knitted purse or hat, maybe both, knitted as a set.  Humm….?  Anyway, here it is for you to upload and use for whatever your imagination can come up with.

butterfly 1

butterfly 2

Butterfly tutorial 2

The tutorial includes chart and instructions.   For any Intarsia questions feel free to upload my e-books on the subject.

Oop’s!  I almost forgot, this butterfly chart is gauged for 8 stitches and 11 rows per inch.  I used fingering yarn.  The approximate size is about 4 inches square.  Of course, you can use any yarn you have to try it, then resize it to fit your project.

Got to get back to knitting the back of the pillow, so for now-Happy knitting!

KT

Read Full Post »

Today I just finished the first of a series of e-books focused on my adventures in color knitting.  It has been a real challenge as well as a great joy to put together.  My hope is that someone will get something out of it.  If not, then perhaps some member of my family will be able to “pick” grandma’s brain when I’m gone.

The 26 page book I am uploading for you is mostly focused on Intarsia, although I do have a section on knitting and purling with both hands.  The information and illustrations in it are from my experience in developing my designer pillow patterns, which are intense color knitting; thus the title“Intarsiamania.”  The book has two sections.  The first deals with Intarsia basics; the second, focuses on yarn management.

Capture

Painting with Yarn – Intarsiamania

I hope you enjoy the book.   I hope that some of the techniques will be helpful on your next color knitting project.

Happy knitting-  KT

Read Full Post »

I have been working on a tutorial that shares the method I used to knit this Intarsia design in the infants socks I recently completed for my new grand-daughter. One of the most important concepts I tried to illustrate in this method is learning to read the chart properly.   I hope that I succeeded in explaining it clearly.  If not, please feel free to contact me if you are interested.  Below is a photo of the completed sample.

elephant head sample

The second photo is of the back of the design before I wove in the ends.

elephant head design back

You can use this method to insert an Intarsia design in any project knitted in the round.  There are no seams, with only a few exceptions all yarn connections are made at the color exchanges.

Give it a try.

Elephant Head Swatch Tutorial

Happy Knitting – KT

Read Full Post »

I just finished knitting a pair of infant socks for our expected arrival in about 2 weeks.  Since my daughter’s theme is “Jungle Pets,”  I decided to do an elephant head on the leg portion of the sock.  Below is the right foot.  I flipped the head chart for the left foot, so that they face each other.  If you noticed the color variation in the photo, it  is due to the fact that the sock is not quite dry yet. 🙂

elephant sock

I used the same method as I described in the “Seamless Cables Tutorial”   to join the outside edge of the design, so as to not have a seam in my sock.  The inner ears of pink are one area that I chose to use the Fair Isle approach, as it eliminated the need to add additional yarn strands to the design, thus cutting down the number of yarn ends having to be woven in at the completion of the project.   On this particular sock, I chose to interlock the rows at the color change on the right edge of the design.

cropped elephant sock

I have also discovered that it is advantageous to leave a longer tail when adding an additional yarn, as these shorter strands(double or single ply) can be used to add duplicate stitches for detail(such as the eye or added grey stitch at the bottom that opens his mouth a bit).

POINT!!  I don’t like to have any more yarn strands to weave in than is absolutely necessary.

When I find the time, I will try to write up a row by row tutorial for the charted design so you can become better acquainted with the technique, but for now, I just wanted to give you a sneak peek at what I did with it.

Happy knitting – KT

Read Full Post »

I just finished knitting a sweater and hat for my new granddaughter who is scheduled to arrive in February.  In the process of working on this design, I was determined NOT to have seams, as it just adds bulk.  That said, I started with a simple raglan sleeve pattern and had fun from there on.  I wanted a contrasting cable design down the center of the sleeve, which was simple until I was ready to pick up the sleeve stitches to be knitted in the round.  Now, I had that old  “Intarsia” problem, the yarn was on the other side.

OK!  I have tried most the methods thus far out there- Ann Berk’s loops(which works great,but I don’t like fighting with the loops), and other various methods connected with YO’s (loops again), then those knitting or purling “loops” together with the stitch at the end of the round, but I didn’t want a seam.

Then it hit me, I was not looking for a seam at all, I was looking for a “stitch” connection that would mimic the interlocking of any typical color change- and….I found it.

001

The result is that my Valentine Babe will be ready for the Ski slopes in this seamless cable designed hat and sweater.

I have just completed a tutorial that shares my discovery and I hope you try it.  You can also use this method to knit an Intarsia pattern in anything that is seamless.

*The tutorial includes a cable panel, but just for practice you could replace it with a plain panel of any contrasting color.  The technique will be the same.

I will be writing up this pattern soon, and will share it when it comes up the presses, but for now, here is the Seamless Cables Tutorial to learn the technique.

Here is Rebecca’s Seamless Cable Sweater and Hat

Happy Knitting

KT

Read Full Post »

« Newer Posts - Older Posts »