Feeds:
Posts
Comments

Archive for the ‘Uncategorized’ Category

2012 in review

The WordPress.com stats helper monkeys prepared a 2012 annual report for this blog.

Here’s an excerpt:

4,329 films were submitted to the 2012 Cannes Film Festival. This blog had 15,000 views in 2012. If each view were a film, this blog would power 3 Film Festivals

Click here to see the complete report.

Read Full Post »

Since I got into the “slipper mode” a few weeks ago, I have been playing around with ideas to warm my cold feet.  The howling winds outside and the snow covering the ground, are constant reminded to get busy, so I forged ahead.

Tonight I finally finished my new design, for a partially felted slipper.  Why, partially?  Its sole and sides are felted, while the upper toe and instep area is twined knitted in wool.  The ankle and upper leg are ribbed, then the leg warmer cuff is knitted with a fun fur and 4 ply wool knitted together.  It will be after the holidays before I get the pattern written up, but thought you might like to see it anyway.

felted slipper with leg warmer cuff

The leg warmer section can be as long as you like.  I’ve already decided I will make this section about 12 inches, so I can pull it up when things get really cold; otherwise it just stacks neatly on the top of the foot.

felted slipper with leg warmer cuf 2 f

As you can see in the photo, I used two colors in the felted area, while using two strands of black in the sole.

Below is a peek at the felted section before the knitted upper toe and instep area was attached.

felted slipper before upper toe attached

I felted this by hand, leaving the circle needle cords in the finishing stitches.

It was a fun project.

KT

Read Full Post »

Last night I finished another slipper.  This time I tried using the loop stitch on the upper toe section.

moccasiin with loop stitch at toe

I think I like it.

I am thinking about designing one for my husband as well.  Will upload the pattern as soon as I get it done.

Just sharing!

KT

Read Full Post »

Last night I finished my newly designed Moccasin slipper, and I was anxious to share it with you, so I have uploaded the pictures below.  I hope you like the design.

As I mentioned in the last couple of posts, this project was constructed using the Twine knitting technique  and shaped with short rows.

Here is a closer look at the upper toe section of the pattern.  I have  knitted a casing around the back and sides, which aligns with the casing I designed in the instep flap.   A 24 inch crocheted chain of both colors cinches the Moccasin in for a perfect fit.

The slipper on the right was my original pattern.  It is enough to say that I am pleased with the results of my labors.  I will be ordering the yarn for the second one, as this creation was done out of  my stash (my play around yarn).  I am planning on knitting snowflake knee socks to match.  I might even put them together.  Where I live it gets cold in the winter, and a extra Thermo layer would be nice.

As you can see the side chain, which can be done with a crochet hook or can be stitch as a embroidery chain stitch, pulls it all together.

This has been a fun project.

Happy knitting,

KT

Read Full Post »

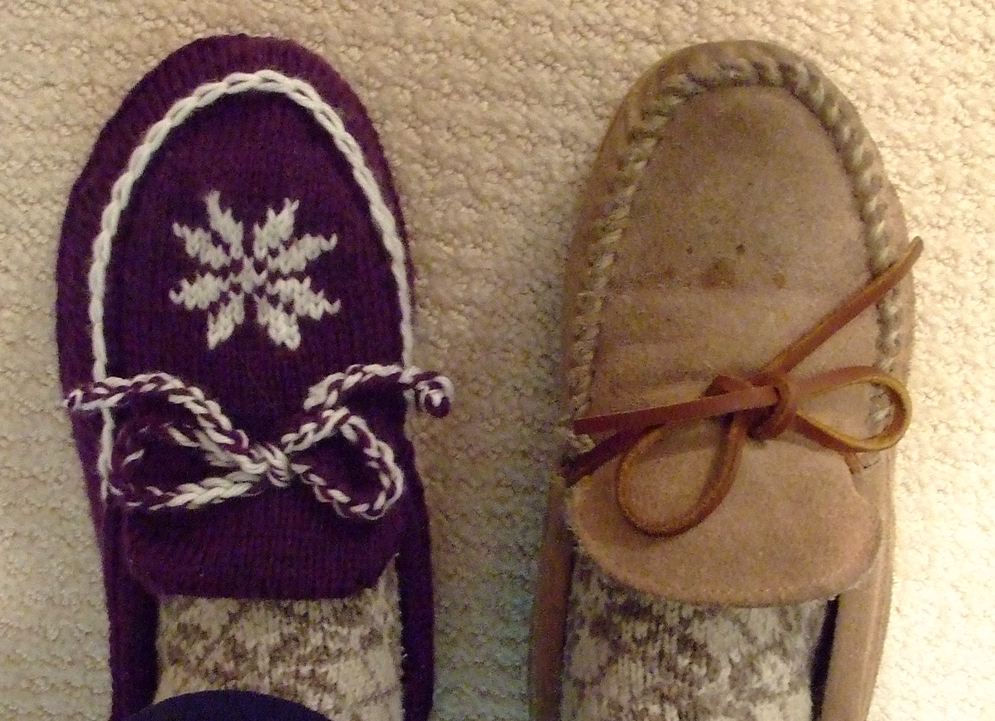
The other day I was working on an idea for a new Mocassin slipper.  After turning over the one I was wearing, I decided to try and duplicate the shape of the sole.  How?  With short rows.

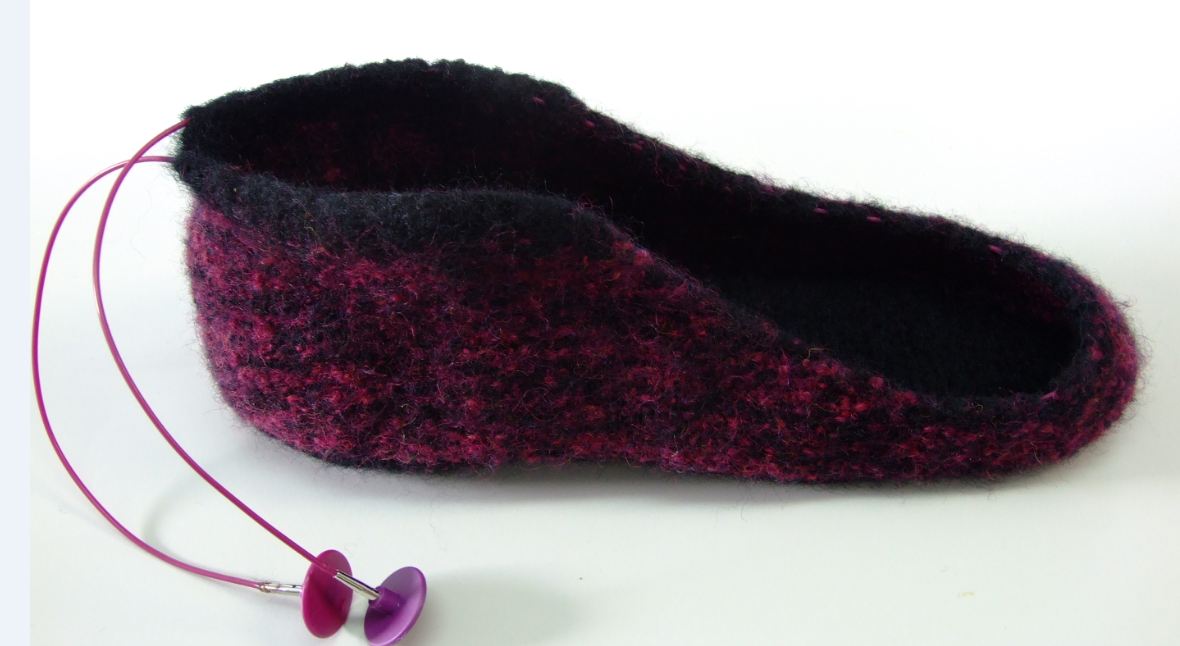
Dividing the sole shape lengthwise, I charted the short rows to achieve the upper half which ends at the toe edge.  Next, I flipped my chart and designed the other half, ending the final row at the back of the heel.  If you will notice there is a blue line of loops down the center;  that is the provisional cast on row.  Once the first half is finished, the provisional chain is released and the stitches are picked up to complete the second half.  Below is the result of my playing around.

If it looks a bit textured, it is.  The entire project is Twine Knitted.   The wonderful double layer will keep my feet warm and toasty.  🙂

The finishing round of this part of the slipper was a purl row, as it made a clean transition before starting the short row shaping for the sides.

After working about 5 even rounds, I marked off the front tow section and began to shape the back part of the slipper sides with short rows.  Once the short rows were complete, I closed the gaps, continued around to the toe section and ,decreased stitches at the front to create a much nicer fit.  The next section will be the top of the toe and a flap that lays up on to the instep.  I am thinking about doing a Fair Isle design for that.      Humm????????

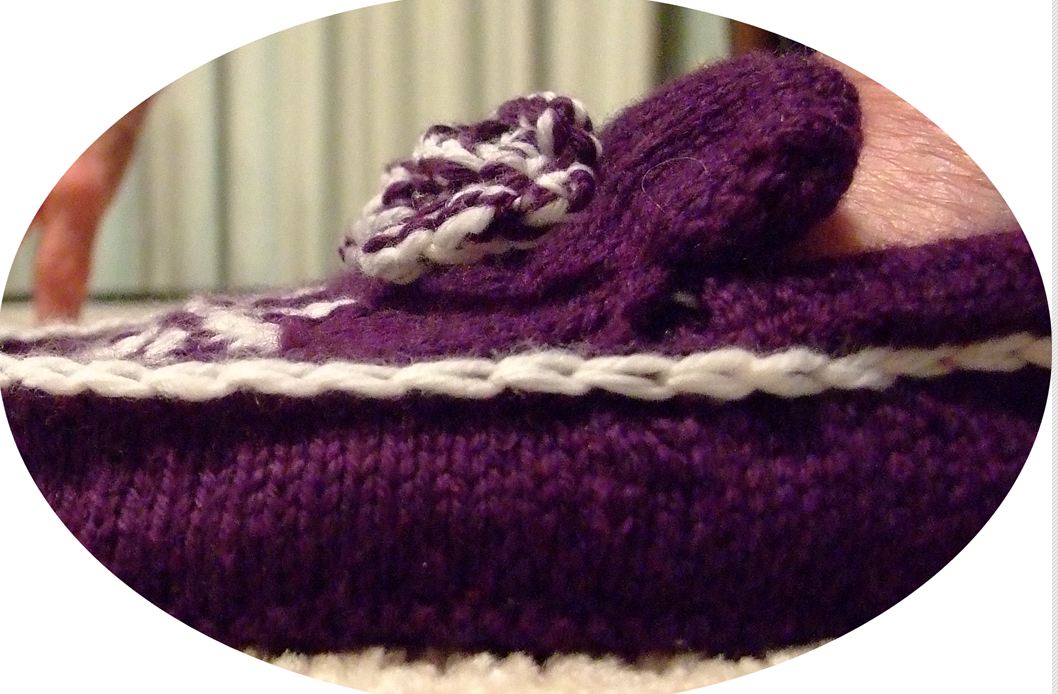
It was during the process of creating the flap for my toe section that I decided to share the process I used .

This double layered(or lined) flap is knitted with straight sides, and single and double stitch portions to form the shape.

I have completed a tutorial with written instructions as well as a chart.  The idea is to get you imaginations going.  Short rows are not limited to sock heels, shoulder seams, and sleeve cap shaping.  This tutorial is a swatch practice that I hope will help you feel more comfortable with closing all sorts of short row gaps.

Below is a result of repeating the chart three times on the same original cast on.

I feel a hand puppet coming on!!!!!!

Short Row Closure Practice Tutorial

PS:  I will be uploading the slipper pattern when its finished.

This morning I added a PDF that might help you understand the way I design these short rows-at least I hope it does.

Short Row Designing

Happy Knitting

KT

Read Full Post »

This project has been particularly interesting, as I not only had fun knitting Intarsia , Armenian knitting and Fair Isle, but I also was able to combine three different types of yarns in this design.  The border was done in fingering yarn with lace weight wool and silk strands of  free floating chains riding over the top.

The chicks were especially fun to do with a combination of Aloft mohair, added to a ply of fingering yarn.  Their  3D look was accomplished by adding an additional  two strands of the black mohair to the belly and wing area.  Adding these extra strands automatically increased the gauge without changing the stitch count.  I was able to restore the  gauge around the area by filling the void with poly fill stuffing, then running a few strands of lace weight across the back, side to side, and top to bottom.   Taking up the slack with these strands, allowed me to contract the surrounding stitches back to their proper gauge.  The next move after blocking the top was covering the back with nylon net, (great stuff, by the way) and stitching around the expanded portion of the chicks,so that it would remain securely in place.

The  combination of the Mohair and the 3 D affect  made my chicks look like the little “fuzz balls” they really are.     They are the first thing people touch when they pick up the pillow and comment, ” Oh my gosh!  They look so real!”  And so they do.

The details on the legs, feet, and beak were done with duplicate stitches and crocheted chains of one and two plies of the various yarns.   The various shades on the hen are yarns that have been blended, using  of one ply of each color that have been hand spun back together.   Check out my post on blending yarns if you are interested .

So….the most clarifying  statement I can make about this pillow is that I was never bored knitting it.  It definitely was a challenge to my adventurous knitting spirit.

I also loved working with the free floating chains on the frame of the picture.  Of course as I looked at it more closely I realized this free floating chain pattern would look great on the bottom of a tunic, or the cuff area of a sleeve, or……..  Hummm????  Maybe?   …….

I have included a  tutorial describing the entire process with this  pattern.  I even included charts for practicing the process.  This tutorial is also on my “Fun Stuff”page.  It includes a sample swatch chart of the border for you to practice with.  Enjoy!

At present the pattern is available  in my Ravelry  and Etsy stores.

Again, it was an extremely fun knit.

Happy Knitting

KT

Read Full Post »

I was  having lunch with a friend who is a Red Hat lady the other day, when I mentioned to her that I had designed a pillow top with a Silkie chicken as my subject.  Well, that led to an imaginary trip of what if’s-  she had a red hat on; she carried a parasol; she was energetic; she was HOT- and on and on.  We were laughing at the possibilities the rest of the day.  My mind was reeling with ideas, so….home I went just itching to get my hands on my mouse (computer mouse, that is).  The picture below is the results.  I have both a knitted version and a cross stitch version.

The cross stitch version is a very straight forward design, that is stitched on 32 count sky blue linen.  And… because it only uses 9 colors of DMC, the project is quite affordable.  The design dimensions are 14 by 14.  It can be made into a picture to be framed as in the photo above, or it can be made into a 14 by 14 inch pillow.   The pattern is available in my Etsy store.

The knitted version is a 16 by 16 inch pillow top, Intarsia design, with border of red  floating chains of lace weight yarn riding over the top of  purple fingering yarn.  I will have this pattern available soon.

This has been a really fun project.

Happy knitting – KT

Read Full Post »

This morning I finally took the plunge and uploaded my first video on YouTube.  What did I upload, “Knitting backwards/ or Reverse continental.   In reading  my stats daily, I have noticed that this seems to be one of my most popular pages, so there was no better place to start.

Here is the link- “Knitting Backwards/ or Reverse Continental”

Enjoy – KT

Read Full Post »

I have a friend who is wild, and I mean “wild” about her chickens.  Having decided some time ago to design her a special pillow, I finally came to the conclusion that only a “chicken” would do.  Now, she isn’t into the average chickens, she prefers the exotic, and unusual, so enter the Golden Sebright Hen and Chicks.

This new design not only gives me a chance to do the many techniques of color knitting, but also gives me an opportunity to use various kinds of yarns for special affects.  The chicks are really little fuzz balls, so Mohair will give them a more realistic look.  The spotted area you see in the design is actually going to be a blend of black Mohair and one ply of beige grey fingering yarn.  I will also be using White Mohair on the chests.

The border was another matter altogether.  I wanted a lacy grid in the design you see, but cabling the black fingering yarn over the bronze, was much to bulky looking.  What to do?  I began to think “lace.”    I pulled out my lace silk and wool cone, and went to work, using white in the background, I worked “floating” chain loops between the stitches to form the design I drew on the pattern.  Here is the result.

This gave me the affect I wanted.  So I am now waiting for the Black lace yarn to be delivered, so I can get started.  Meanwhile, I will be knitting up swatches of the various shades and combination shades that I will be using in the main design, and recording them in my color chart for later use.

If you might be interested in learning how to knit these free floating chains, take a look at the “Wandering Chains” tutorial on my “Fun Stuff” page, or you can use this Floating chains tutorial.  I will be add to the info as I work on this project and develop the pattern for sale.

Just thought I would share –

Knit-tweaker

Read Full Post »

I was so glad to get this one done so I could send it to my grandson.  He has been checking on it’s progress the last few months, so now he won’t have to wait anymore.

I had great fun knitting this one.  I even knitted some extra leaves, which I placed in the front of the duck, stuffing them a bit to give it a 3 dimensional look.

One other thing I did differently from the last pillow was to make my own pillow form.  I discovered that most of the forms  (no matter what you pay for them) are made with clumps of fiber fill, often leaving a lumpy surface.  Of course, that is unacceptable when you have spent many hours working on one of these pillow tops.  The only solution-make it yourself.

I began the process with a sheet of Poly-fill quilt batting.   I cut two 17 inch squares, then machine sewed them together on three sides, using a long stitch.   I stuffed the middle with tiny pieces of fill, poked them in place with a #1 DPN, then whipped the open edge shut.  You could even use two thickness (sheets) for each side to unsure an even smoother surface.   Anyway, it  worked great.  It will also dry much faster as there is no cloth on the inside.

I will be making all my pillow forms from now on.

Now it’s time to box it up and head to the UPS store.  My grandson will be a happy camper!

I hope to have this pillow pattern available soon.  I will be starting my J’s Designer Pillow page soon.

KT

Read Full Post »

« Newer Posts - Older Posts »