Well, the socks for Rebecca actually fit-not for long though. This tiny little 6+pound, 4 day old munchkin modeled grandma’s socks for the first time today.
Good thing I didn’t make them any smaller.
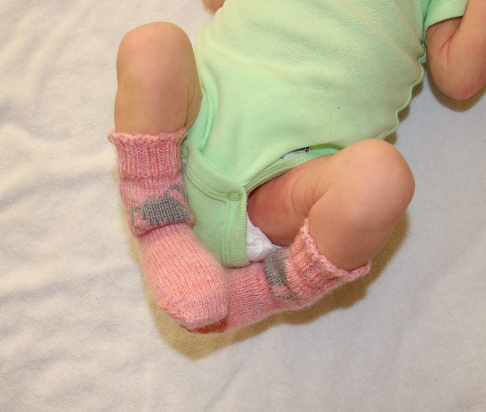
Just had to share!
Happy Knitting!
KT
Posted in Knitting Projects, Uncategorized, tagged intarsia, socks, toe-up sock on February 12, 2013| 1 Comment »
Well, the socks for Rebecca actually fit-not for long though. This tiny little 6+pound, 4 day old munchkin modeled grandma’s socks for the first time today.
Good thing I didn’t make them any smaller.
Just had to share!
Happy Knitting!
KT
Posted in Knitting Projects, Uncategorized, tagged Armenian Knitting, crocheted chains, double-knit design, nordic knitting, pattern, short rows, slipper, socks, Twine knitting on November 29, 2012| 2 Comments »
Last night I finished my newly designed Moccasin slipper, and I was anxious to share it with you, so I have uploaded the pictures below. I hope you like the design.

As I mentioned in the last couple of posts, this project was constructed using the Twine knitting technique and shaped with short rows.

Here is a closer look at the upper toe section of the pattern. I have knitted a casing around the back and sides, which aligns with the casing I designed in the instep flap. A 24 inch crocheted chain of both colors cinches the Moccasin in for a perfect fit.
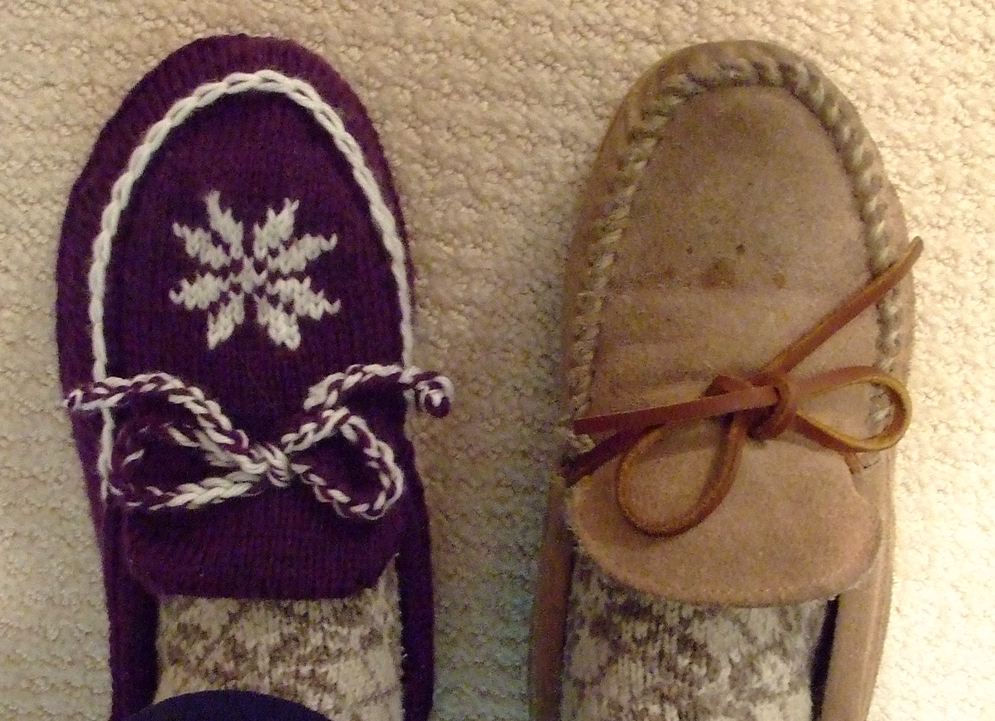
The slipper on the right was my original pattern. It is enough to say that I am pleased with the results of my labors. I will be ordering the yarn for the second one, as this creation was done out of my stash (my play around yarn). I am planning on knitting snowflake knee socks to match. I might even put them together. Where I live it gets cold in the winter, and a extra Thermo layer would be nice.
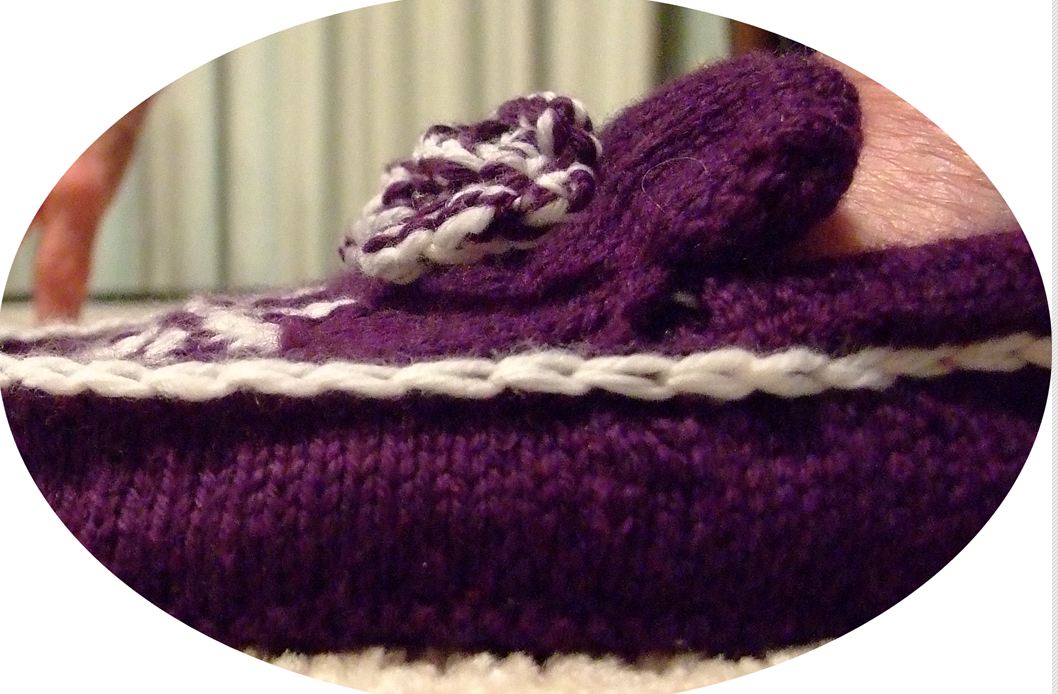
As you can see the side chain, which can be done with a crochet hook or can be stitch as a embroidery chain stitch, pulls it all together.
This has been a fun project.
Happy knitting,
KT
Posted in Knitting Projects, Knitting Tutorials, Uncategorized, tagged designing short rows, knitting charts, pattern, short row closures, short row gaps, short rows, socks, stitches on November 24, 2012| 1 Comment »
The other day I was working on an idea for a new Mocassin slipper. After turning over the one I was wearing, I decided to try and duplicate the shape of the sole. How? With short rows.

Dividing the sole shape lengthwise, I charted the short rows to achieve the upper half which ends at the toe edge. Next, I flipped my chart and designed the other half, ending the final row at the back of the heel. If you will notice there is a blue line of loops down the center; that is the provisional cast on row. Once the first half is finished, the provisional chain is released and the stitches are picked up to complete the second half. Below is the result of my playing around.
If it looks a bit textured, it is. The entire project is Twine Knitted. The wonderful double layer will keep my feet warm and toasty. 🙂

The finishing round of this part of the slipper was a purl row, as it made a clean transition before starting the short row shaping for the sides.

After working about 5 even rounds, I marked off the front tow section and began to shape the back part of the slipper sides with short rows. Once the short rows were complete, I closed the gaps, continued around to the toe section and ,decreased stitches at the front to create a much nicer fit. The next section will be the top of the toe and a flap that lays up on to the instep. I am thinking about doing a Fair Isle design for that. Humm????????
It was during the process of creating the flap for my toe section that I decided to share the process I used .

This double layered(or lined) flap is knitted with straight sides, and single and double stitch portions to form the shape.
I have completed a tutorial with written instructions as well as a chart. The idea is to get you imaginations going. Short rows are not limited to sock heels, shoulder seams, and sleeve cap shaping. This tutorial is a swatch practice that I hope will help you feel more comfortable with closing all sorts of short row gaps.
Below is a result of repeating the chart three times on the same original cast on.

I feel a hand puppet coming on!!!!!!
Short Row Closure Practice Tutorial
PS: I will be uploading the slipper pattern when its finished.
This morning I added a PDF that might help you understand the way I design these short rows-at least I hope it does.
Happy Knitting
KT
Posted in Knitting Projects, Knitting Tutorials, tagged clothing, pair of socks, pattern, short rows, socks, stitches, sweet tomato, toe-up sock on October 23, 2012| Leave a Comment »
I just finished a pair of socks for my husband. He claims they are the best he ever had, and the first ones that he didn’t have to pull up after he wore them a while. Wow, that is an accomplishment! With that endorsement, I thought I would share my design with you.
First off, credit where credit is due. I recently visited Cat Boudhi’s Sweet Tomato heel demo, and… as always I can’t leave anything alone but had to see what variations I could do with the presentation. As result of my dink’n around, I came up with this variation on her heel design.

In her video, she works all her short rows in pairs of stitches, and in the first two wedges I did as well. However, I began the second wedge several stitches to the left of the first, to spread out the stress. The third wedge began to the left of the 2nd as well, but this time I use intervals of 3 stitch groups for half the wedge and finished up with 4 stitch groups (this flattens out the curve). Varying stitch groups allowed me to shape the wedge to fit my husbands foot better. Play around with this and you will see what I mean. I also shaped my Twine Knitted toe cap with the same process.

As you can see I opted for a 2 by 2 rib to finish it off. It worked very nicely.
Below is a PDF of the entire process. If you have any questions, you know how to reach me.
Happy Knitting
KT
Posted in Knitting Tutorials, tagged socks, toe-up, toe-up sock on July 1, 2011| Leave a Comment »
While working on a pattern for a Tabi Sock Pattern, I began to think about all the different foot shapes, heel shapes and variables there are in making a custom fitted sock. I was especially thinking of those I know that have difficulty in finding socks that fit them. Some just have unusual foot shapes, while others have had to deal with medical issues. The bottom line is that they should have socks that fit them, too. So where do they go – hummmmmm?????? Who can make socks to fit them?????
Well, to me it is a challenge, one that is definitely worthy of my time and effort. So to that end I have put together a short illustrated tutorial to give you some ideas you might consider in designing your own custom socks, or perhaps designing some for that friend who can’t seem to find the “right” fit. This offering is one that will be updated as I deal with different issues, but for now it covers the basics.
Below is a picture of the Toe-Up Tabi Socks my brother and I designed when I was in California. His foot is a bit unusual as he has a second toe that extends way beyond the big toe. He also has a very narrow heel and ankle.
 You will also notice that his toes set at an extreme angle, and the base of the little toe is well below the base of the big toe.
All these challenges were resolved by starting each section with the proper measurements, knitting a Toe-Cap, and finally, shaping each section to fit his foot. This process is described in Customizing Your Toe-up Socks
Have fun- Knit-tweaker
| knit-tweaker on Merry Christmas to All!! | |
| Joyce on Merry Christmas to All!! | |
| runtabirun on Toe-up Tabi’s for Men an… | |
| lifelixiii on Double Knitting- Even Tension… | |
| knit-tweaker on Toe-up Tabi’s for Men an… |
