Feeds:
Posts
Comments

Archive for the ‘Uncategorized’ Category

I idea of having to taking out stitches because of a mistake you can’t live with, or maybe just changing you mind, can be a daunting task.  However, it can also be an instructive one.

I have been sharing the process of knitting my English Rose tablecloth with you in the previous posts, so I thought I would share the “tinking ” lessons I learned when  I decided to extend the double rose leaf portion of the pattern.  I had to take out my extended rose leaves, and then about 12 rounds of the previous pattern to restart an additional set of the double leaves pattern.  I also knew that I would have to adjust the pattern as there were only five sets of the double leaves in the original version.

Tinking Lessons– Lay your work on a table where it will have no stress on the stitches, especially if you have not done this before.  As for me, I pulled my coffee table up to my favorite chair to share the weight of the work.

Take it out from the wrong side, working right to left, holding the thread/yarn in your right hand as you would for knitting English style(throwing the yarn).

  1.  Use your left index finger and thumb to pinch just below the stitches or stitch groups to prevent them flying off the needle.
  2. Use the index finger of the right hand to gently lift the thread/yarn up to release the knitted stitches.
  3.  Use a clockwise rotation of the right needle tip to pick off the stitches.
  4.  Use smaller size circle needles.   I knitted with a 2.75, so I used 2.0 or below to tink with because it allowed me to see the stitches and the path of the thread/yarn more easily.
  5.  Remove the 2 legs of a “knit 2 together” by inserting the needle from back to front, lifting the index finger of the right hand slowly, as you pinch the base of the group of stitches with the left hand thumb and index finger. (See photo below)
  6.  Stitch groups such as YO, Sl 1, K 2 tog, psso, are processed the same as a K 2 tog, except that when you release the stitch group you need to rotate you left have forward to pick up the third stitch of the group.
  7.  Stitch groups as SSK, Sl, 1 K 1, psso;  Sl 2, K 1, psso, (left leaning) just require you to insert the right needle from back to front before you lift the yarn with the right hand to release the group.
  8. Relax, don’t look at the clock.  When you finish your project you will be proud of it.

In this photo I am getting ready to pick up a K 2 tog.

Above, I have identified a sl 1, K 1, psso.

In this photo, you can see that I inserted my needle from back to front.  I will proceed by placing my thumb and index finger below the stitch group and then gently raise the yarn up with my right hand index finger.

  •  If for any reason the stitches come off out of order, you can simple keep the pressure on the “pinch” you have in your left hand, then fix the position of the stitches.  As long as you have secured the base, the stitches are not going anywhere.
  • If you are in double about the needles position, tip the area of concern toward you with the left hand.  At a look at the right side.

Happy “Tinking”  – KT

One more thing-  I found that dividing my tablecloth into smaller segments and knitting my circles in rounds( knitting off one end to the other), allowed me to deal with less bulk at a time.  Also, the stitches were not crammed together on one 60 inch needle.  I now have the tablecloth on three 60 inch needles.  It also gives me the opportunity to lay it out on the table to see the results of my additions to the pattern.

And, yes…… I am writing it down.


Read Full Post »

I mentioned in my last post, that I was thinking about designing a different edge, or finishing round for my English Rose tablecloth.  What you see in the about photo is that new design.

I wanted my last rose leaf to be free and overshadowed by the busy background lace. As a result,  I worked out the following method to individualize the leaves.

I began by working each leaf individually, as you would with straight needles, adding the connecting sts to only the right side edge of the leaf.  Using a spare 24 in circle needle of the same size, I then picked up the corresponding stitches for the left side of the leaf, and proceeded working across the “bridge” (connecting pattern stitches), to the next rose leaf.

Even though this is a bit of work, I find that using my extra 47 inch circles of lesser size work perfectly as carrier needles.  I pick up each completed unit on these needles, (about 3 leaves to a needle). This allows me to free up the stitches on the main 60 inch that I am using for the body of the tablecloth.

I do think that this process could be used for various shapes you might want to incorporate into designing an special edging.  As long as the work is supported on the “carrier” needles, they are easy to pick up when you are ready to finish the final rounds.

One thing I did do, was to use a different color needle tips for my needles; blue for the main/working needle, and purple for my  carrier needles; that way there is no doubt which one to pick up.

In the photo above, I am set up with my main (blue) needle tips to begin a new leaf.

When I complete the 40 leaves, I will knit all the stitches back on to my main needle, then finish the edge.

For those who might be interested, I am going to writing up a tutorial for this edging, and will upload it when I am done.


Happy Knitting- KT

Read Full Post »

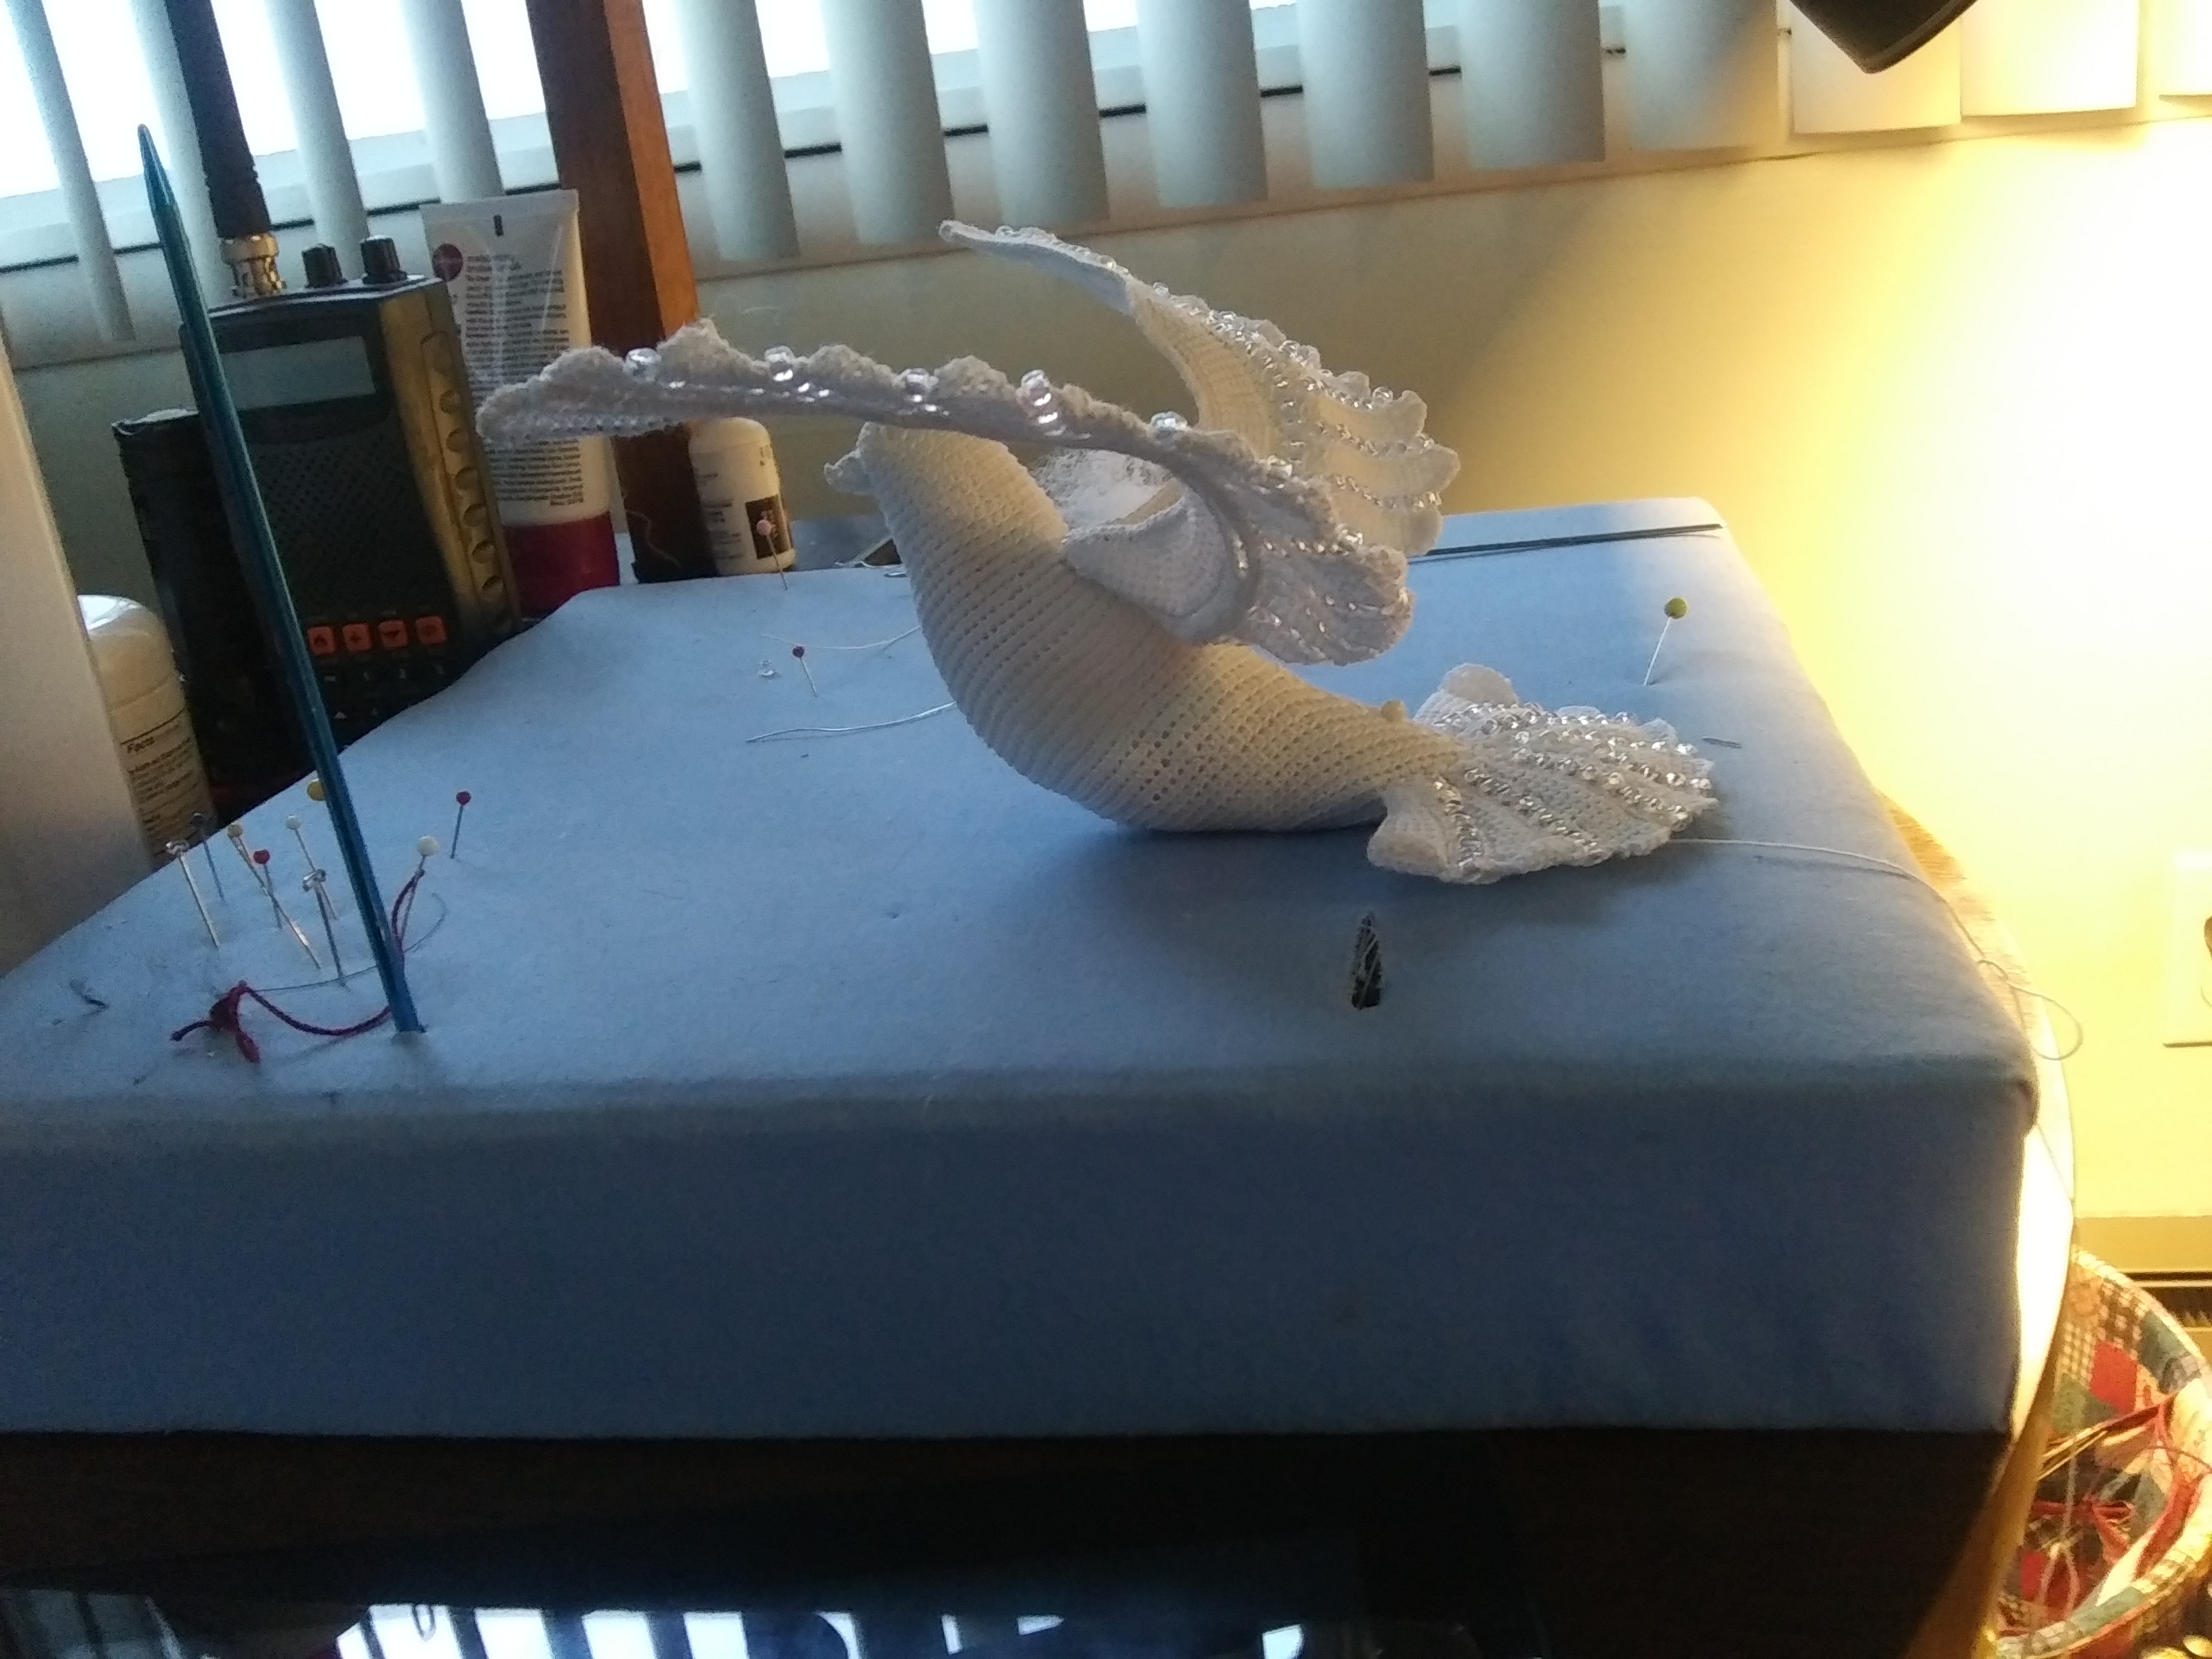
Since I didn’t want this tablecloth 72 ins, I decided to work it until I thought I had about 60 inches.  However, the only true way to know when I reached that point, or near it, was to block it.

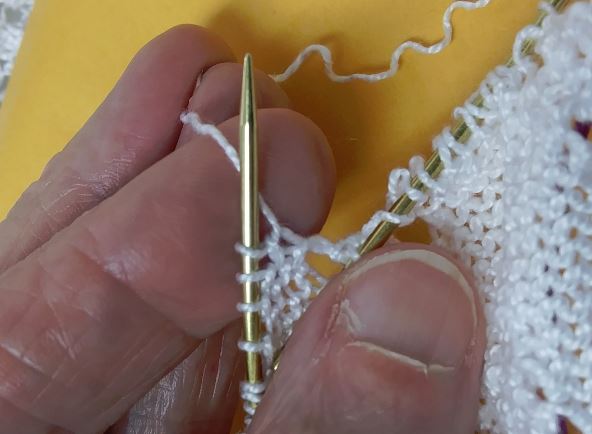
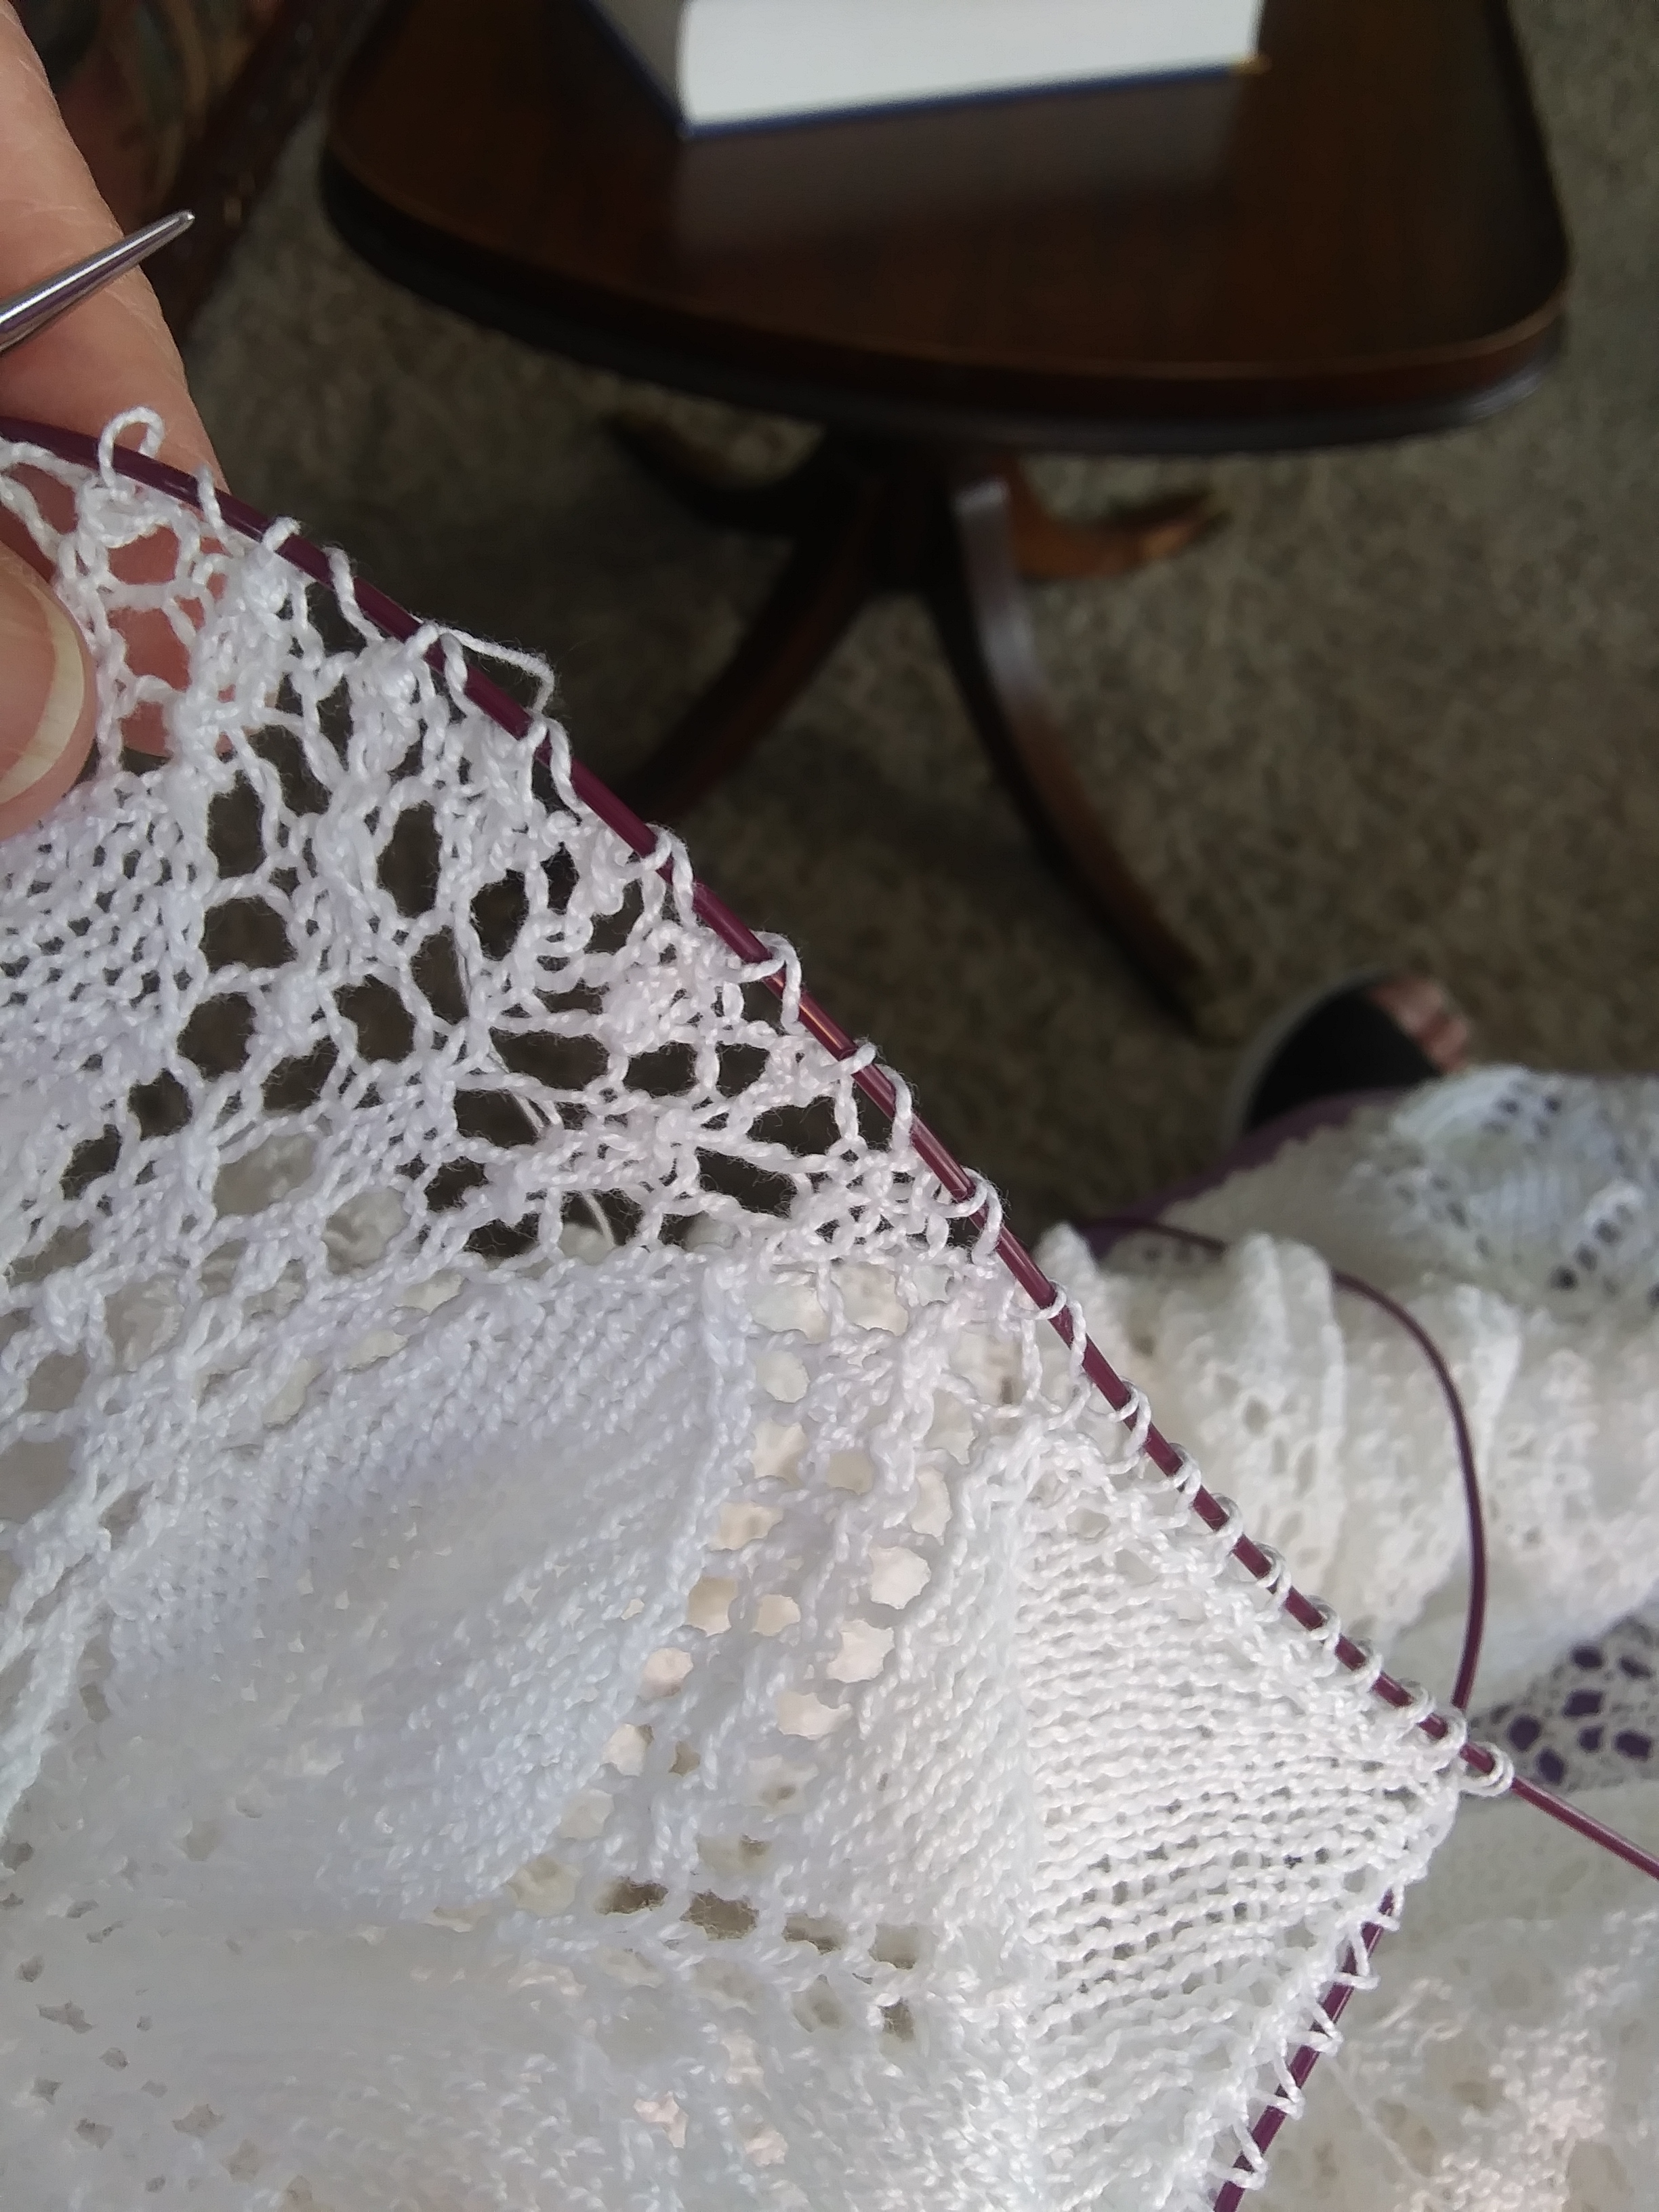
I learned how to do this when working on the Princess Shawl designed for the Queen of England.  The lady who published the pattern advised checking out what the final blocked edging looked like.   Her advice was, “When in doubt, block it out.”  The only stipulation is to have all your stitches on needle cords, and secured with stoppers.

*Even, if your project is rectangular, the circle needle cords work great.

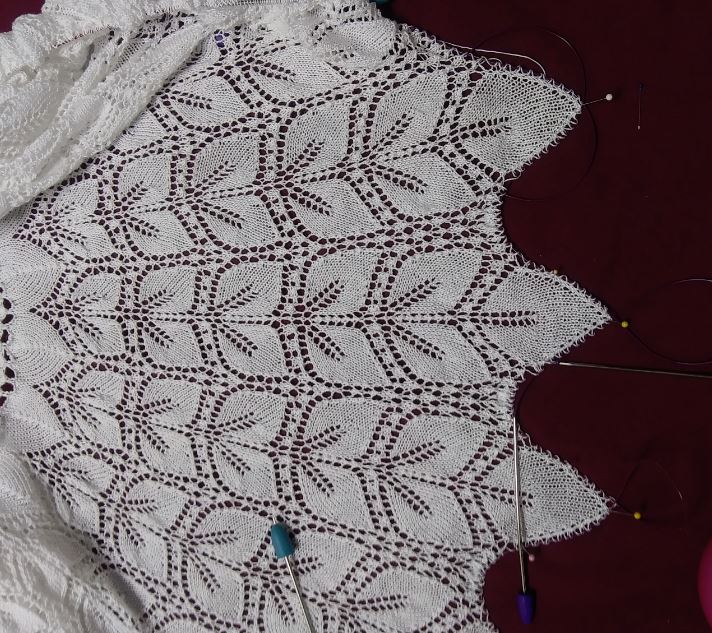
For this project, that meant using my other 47 inch circles needles, from 2 on down.  Since I have an abundance of them, this wasn’t an issue.   I just dunked, squeezed, toweled and dropped it on my bedroom floor, which I had covered with a heavy cotton quilt, and used the burgundy sheet to create contrast.

**I did put my attached working thread in a Ziplock bag to keep it dry.

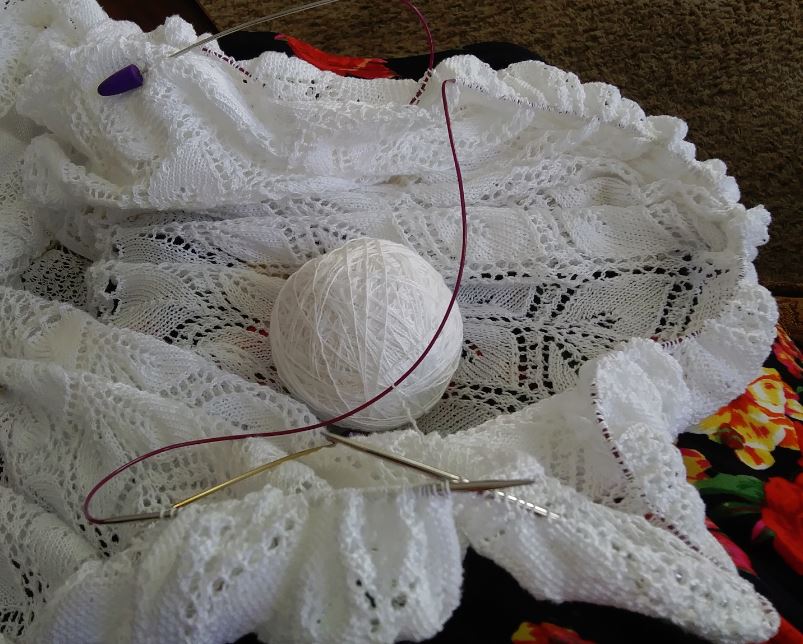
The carpet, and pad underneath gave me a perfect base for pinning.  I also used different colored tips for the original 60 inch needle, so when it is dry, I can just pick it up and start knitting the stitches off the other needles.

Since I now have the right measurements, I know exactly how much further I want to knit.  I also like the scalloped edge, so I will add the stitches necessary to maintain the stitch count to make that possible.

Don’t be afraid to try it.  You can do this with any size project.

When I do my final wash and block, I will use the tape measure to ensure that each point is exactly the same distance from center to outside edge.


Happy knitting- KT

Read Full Post »

I am sorry to say that I do not like working with double pointed needles.  That is not to say that I haven’t been successful knitting with them, but I did not enjoy it.

I recently remodeled my home and put new windows in the music room, so with all that new woodwork framing those beautiful windows, I just had to have a new white round tablecloth for the  table that sits in front of the window.

I found just the pattern in “Modern Lace Knitting” by Marianne Kinzel.  The pattern I chose was called “English Rose.”

Of course, the first instructions were to pickup the double pointed needles to start the center.  However, my inclination was to make a crocheted Magic Loop-which I did, replacing the DP needles with a 47 inch circular needle.

Here is a photo of my work in progress.  In the photos below I hope I can explain the process I used simply enough that you will be encouraged to try it, if you haven’t already done so.

Create your Magic Loop.

Insert tip of circle needle into crocheted loop.

Using the crochet hook, insert hook through Magic loop, yarn around hook and draw through to front, yarn around hook again and draw through loop on hook.  Place this loop on the knitting needle.  I repeated this process 10 times, as this pattern calls for 10 stitches to be cast on.

Take up slack in the Magic loop.

Once all the stitches are on the knitting needle, I pull the needle all the way to the left, leaving only a small amount of cord to my right.  Next, I divide the stitches up as instructed in the pattern.  In this case there were 3 sections, 4, 4, and 2.  I simply bent the cord and pulled it through, allowing a loop to form.  I did the same for the next 4 stitches, then the two that remained were my last unit.

Once this was completed, I closed the Magic loop to form the center ring.

To begin the first round, pull the left needle into the “start position.”

Pull the right needle though and make a clockwise circle, positioning the needle in the start position to begin knitting off the needle in your left hand.  Be sure to make the first stitch snug to the cord of the right needle..

Personally, once I have knitted all the stitches off the left needle, I pull my right needle through so that the stitches rest on the cord.  Next, I pull the left needle back so that it is in position to knit the next group of stitches.  I adjust my loops for comfort, before I begin the next section.  I have never lost a stitch doing it this way.

When you first try this it is best to work on a table top.  It helps you to keep the work from twisting.  I admit it takes a bit of practice, but I think it is worth it.  I also don’t have to go back and fix the center.

Here you can see the loops as they have diminished in seize.  Once the needle is full, I changed to a 60 inch circle to finish the project.


Happy knitting-  KT

Read Full Post »


I have not posted in a while, as I have been up to my eyeballs in music for the season.  As those of you who have followed me know, I am extensively involved in arranging music, etc,  for our local community choir.  This year I added a new project to the mix by restarting the hand bell choir I used to direct when we first arrived in Idaho.

It has been a labor of joy, and everyone involved has had a blast.  The smiles on the faces of everyone we have performed for has been the greatest gift of the season.  Everyone was elated to hear the Bells of Christmas.

So….., as my gift to you this blessed Christmas season I have uploaded several of the pieces we performed for your listening pleasure.

What Child is This?

Silver Bells

It’s Beginning to Look a Lot Like Christmas

O Holy Night

Gesu Bambini

Merry Christmas – KT

Read Full Post »

My rose finally has a home.  I added a few items to the mix, but not much-just enough to support the stem and leaf structure.

I might add another rose or bud someday, but for now it is enough to know that my idea worked.

I do like the look of the leaves much better than normal crochet, as they are smoother, and I was able to make them more life like.  They are in the foreground hanging over the Baby’s Breath.

Just sharing!

KT

Read Full Post »

I have been working with this stitch for a while in the hopes that I could produce a fabric like “look.”  I wanted the stitch to be flatter than normal crocheted posts, as I wanted to be able to paint and embroidery on it.  The results of my efforts are shown in the photo below.

003

This large “Peace and Love” rose is a duplicate of the one that is in my back yard, and my husband’s favorite.  He wanted me to immortalize it for posterity.  🙂

*Just as a side note- got a test from a friend

She asked if the rose was made of painted fabric and dried over a mold of some kind.  This, of course, let me know that I had achieved my goal.

As of now I am working on the leaves, and will be adding them as it section is completed.

008

The photo above shows my work in progress.  The leaf at the far right is almost finished.  You can see that each vein is worked separately.  The leaves on the far left are finished to their base, and details are embroidered with #80 crochet thread.

My leaf pattern is a duplicate of the original leaves in two sizes, as the rose I cut from the bush had leaves in groups of three, one large and two small.

It has been a fun project.

I will upload the finished product soon.

My man will be happy.


Just sharing, KT

Read Full Post »

As I mulled over the elements I wanted for my Morpho Butterfly arrangement (butterfly, Baby’s Breath, Maiden Hair fern, stems and grasses), I found I was lacking 1 essential item- a flower that my butterfly could land on.  So, I did a little research and found out that since  this butterfly comes from Central America region, then one of the flowers from the same region is what I needed.  My choice- red Hibiscus.  Not only is it gorgeous, but red is one of the background colors of the room where it will be displayed.

hibiscus- illustrations 4

Here it is in all it’s glory!

Now to examine my subject.  I noticed that the “vein’s” of the petals run vertically, just as they do in my butterfly veins.  So with that in mind, and using size 40 thread and a .09 hook, I made a sample.

001

006002

Once I had played around with this, I decided to write up the process, hoping to encourage some of you to do the same.

To start with, the paper template you see in the last photo was my guide.

hibiscus petal template with instr

Hibiscus Petal Illustration

The green lines and directional arrows, are the wires (size 32g, red).  Those wires are divided as shown in the illustration.  A and B will be used to secure the petal to the main stem.  The center 6 wires will establish the center pistols and stamen, which are at least the length of one petal plus some.  One wire from each petal with be the top of the 5 pistols and have a red bead to finish them off.  The other wires will be pealed off one at a time, trimmed to length and finish with a #11 yellow seed bead.  You can see those wires in the last photo.

By using the wires in the manner I did, I am able to flute the edge.  I add even more detail in the solid red areas, as I enclose the wire turn.  Here I can sc, hdc, etc, defining the edge as I like.  I can do the same with the 2 veins that do NOT have the wire turn.  *On the sample I did not add all the scallops.

The solid blue section of this illustration will be worked as one vein.

This may seem complicated to some, but for me it is fun.  Keep in mind that this is a guide, and I am always open to changing things as needed.  Another thing is that nature is not perfect, so any slight variation in the petals is more perfect than you think.

I can not wait for my red wire to arrive so I can get started on the Hibiscus.

I will keep you updated on the progress.


Read Full Post »

basket weave sample029

One of the most important aspects of free form crochet is knowing how to make the shapes you see on the picture or template you are working with.  To explain this concept I have uploaded the next part of the Basket Weave stitch tutorial.

You will note that the  completion of each section results in a post- ie.,  Basket Weave Post, or BWP.  You will also note that you will be working across the row in a vertical position, as the weft loops (Wflp) lead the way.

I hope that I have made this tutorial understandable, but if you have any questions, you can contact me.

Basket Weave Stitch – Ups and Downs

Happy crocheting!

Update on Morpho Butterfly arrangement elements

1 – frawn of Maiden Hair fern done!

2- 2 clusters of Babies Breath

Morpho arrg

This vase is one that is handy to put the elements in as I go.  It is not the vase that the final arrangement will be made in, that one is a 16 inch crystal fan design.


KT


Read Full Post »

20190406_113004

My Morpho Butterfly is done.  I even have 6 legs under him.

20190406_113349

In the photo above you can see both sides, and his legs.  By the way, this photo is the favorite pose of my butterfly professor.

The brown circles are tatted(Josephine knot).  The out side circles are embroidered with chain stitch, and the white wash is white enamel.


20190406_114043

Now he has a home!

I will leave him here until I have the rest of the elements of the arrangement done.

The next segment of this project involves Maiden Hair fern, and Baby’s Breath flowers.  Below is a photo of the Maiden Hair fern in progress- one branch at a time.

011

For this element, I also used the Basket Weave Stitch.  I am still working on the tutorial and will upload it as soon as it is finished.

These leaflets are about 1/2 to 5/8 inches in size.  I am using #80 thread, .06 hook, and size 32 gauge jewelry wire.   Each 12 inch section will be made separately then connected.    The brown thread you see lying on the table surface is #80, and used to tat “double stitch,” anchoring each stem to the main wire.  It is overlaid with Hard as Nails clear polish as I go.  When finished, the entire stem sections will be coated with a coffee brown polish.  Not only with this make is all match, but it helps to secure the stems in place.

As in nature, the leaflets are similar but not exactly the same.  This of course means that I am free to shape them a bit different, and just keep them in the ball park of the size I need.

And yes……………., it takes patience, but I am very happy with the results.

Below is part I of the basic Basket Weave Stitch

Basic Basket Weave Stitch


KT


Read Full Post »

« Newer Posts - Older Posts »