Feeds:
Posts
Comments

Posts Tagged ‘beads’

I know that it has been a while since I posted an article on knitting, but I have been busy redecorating my home.  Of course that called for a new lace curtain for my bathroom.

I used the valance pattern that I recently posted, then added a tatted edge with beads to bring a little sparkle into the room.

Here is a peak at the results-

and…yes, I know, it’s not quite centered….but 🙂

2016-06-21-04-34-26

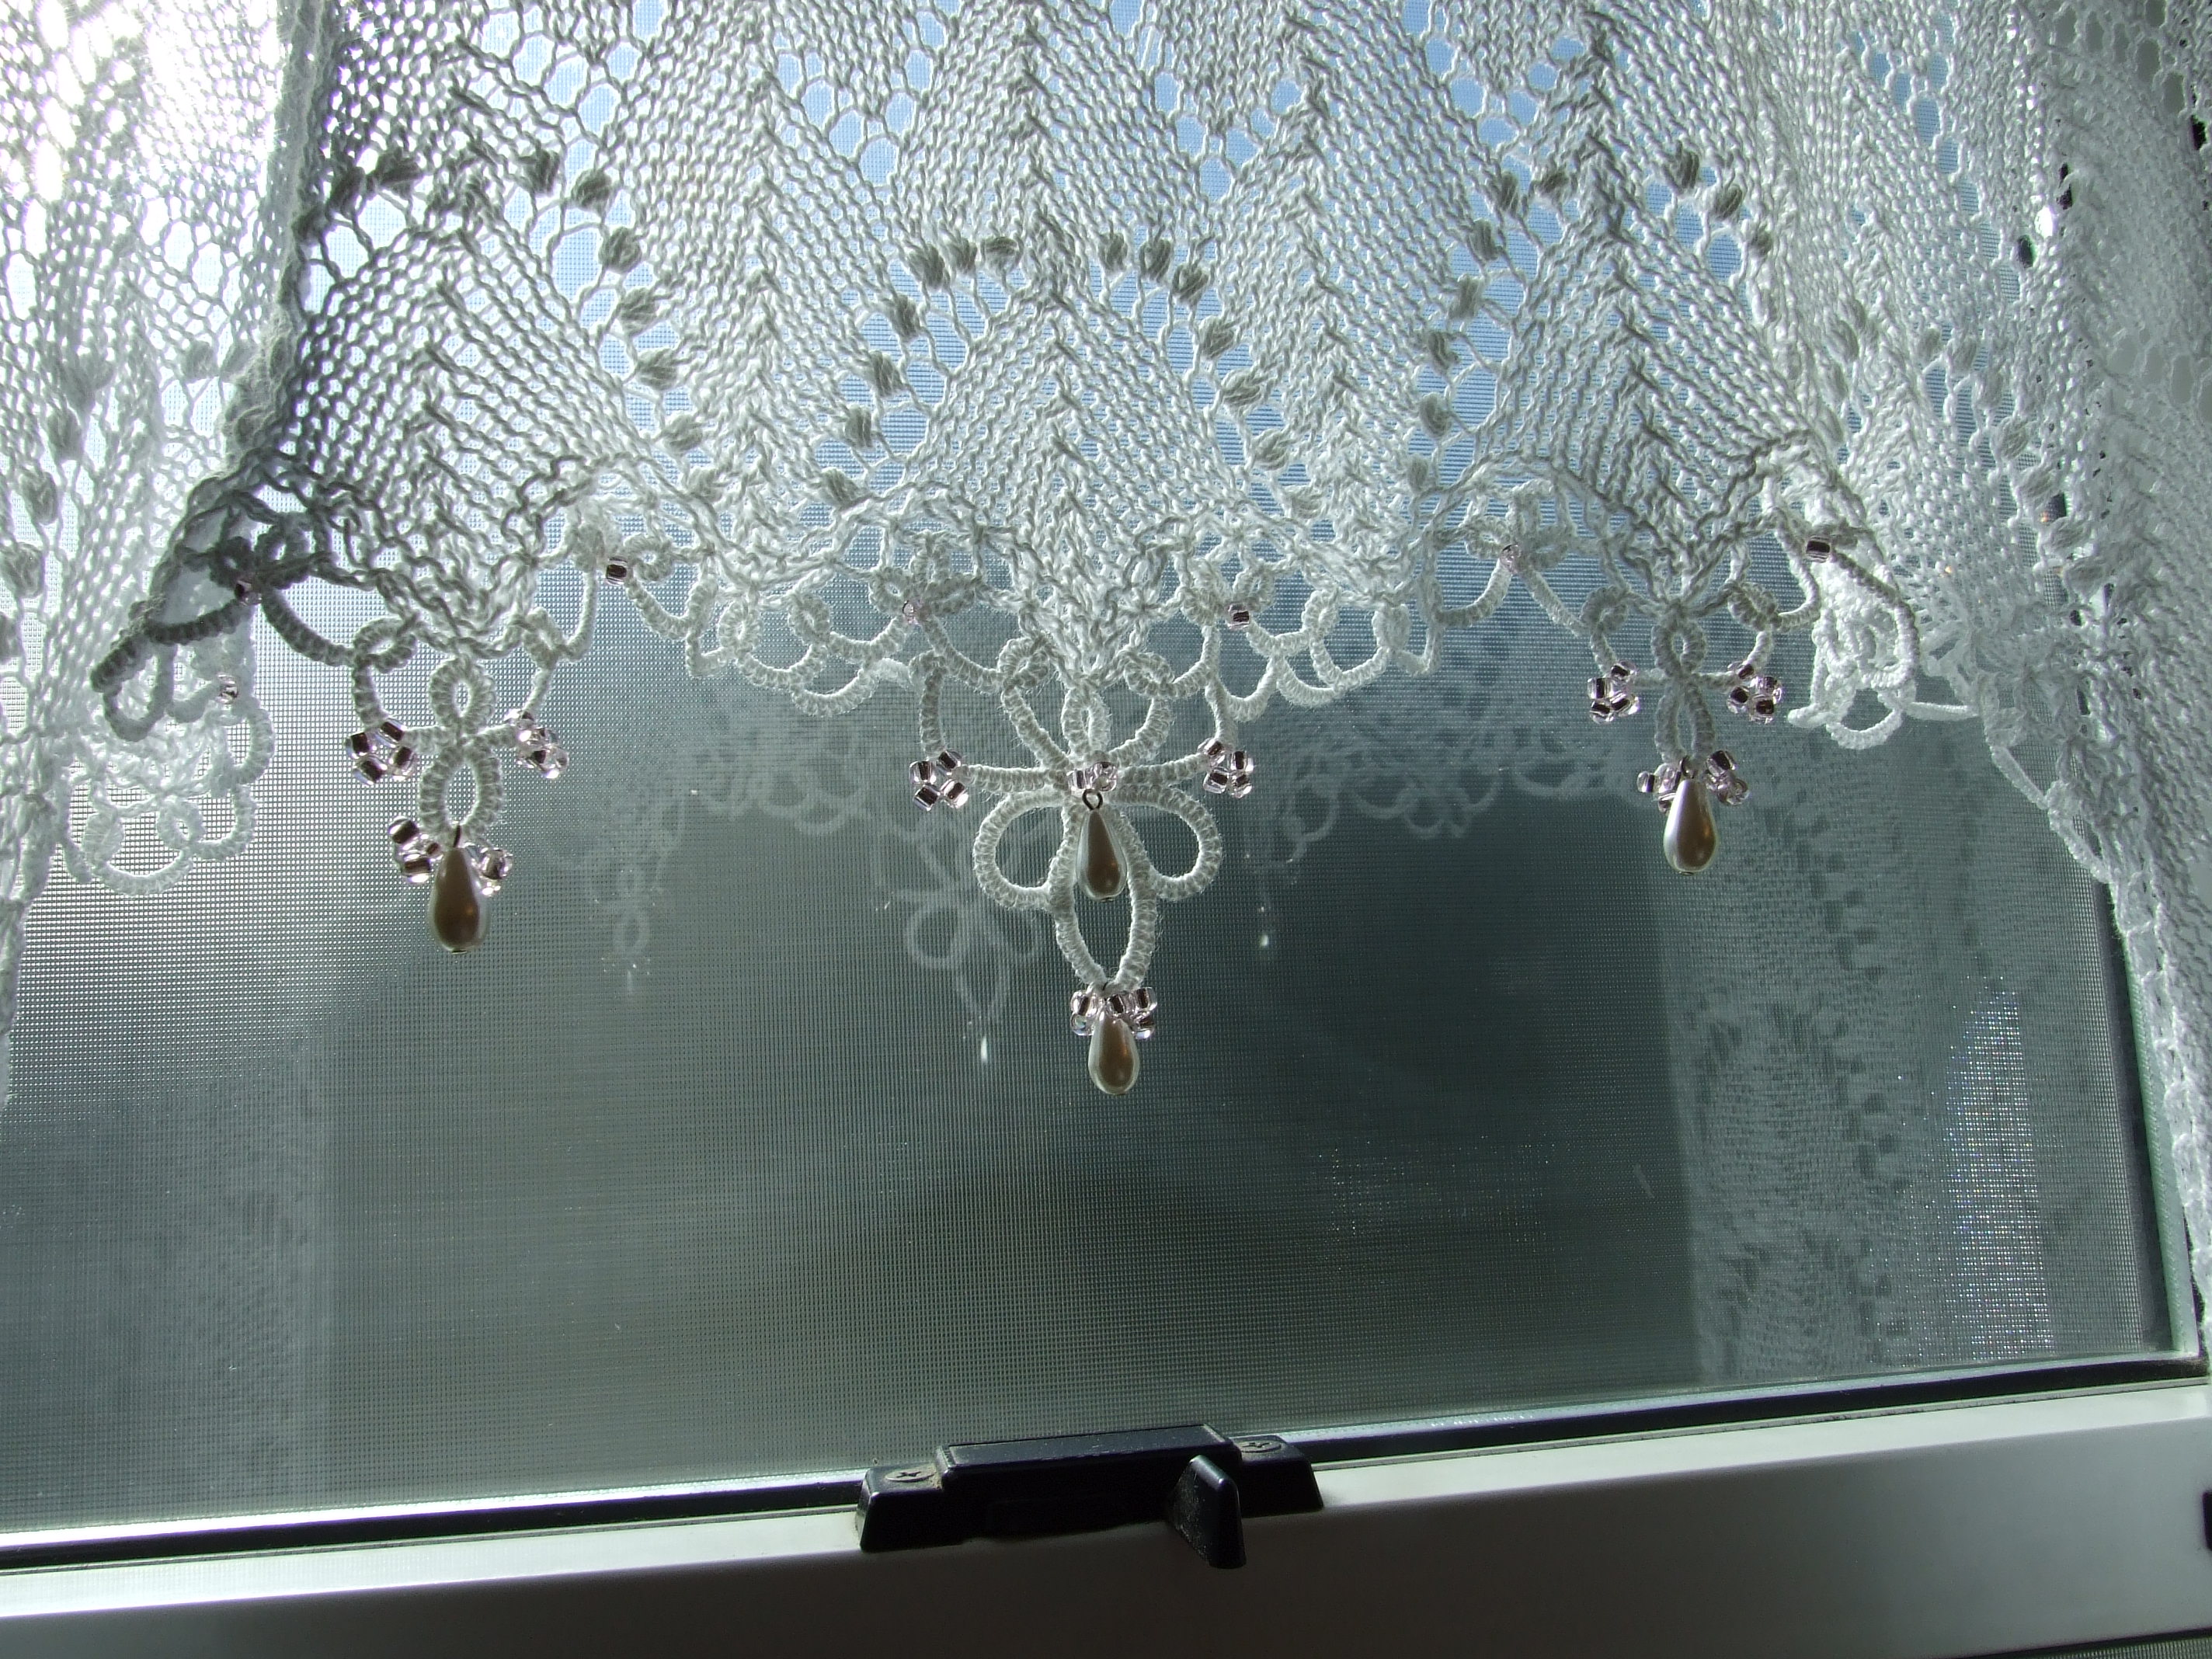
Here is a close-up of the center section.

2016-06-21-06-15-47

It was definitely a fun project.

2016-06-23-10-06-30

Though this pic is a bit darker, it gives you more of the overall affect.  The actual wall paint is a very light rose color.

Just so you know, the two angled mini-stripes under the wall art are reflections off a mirror.

Using the combined crafts gave me lots of options for the finish.

The setup was crocheting loops of 5 sts each, and spacing them equally across the bottom edges.  Next, I just played with different ideas until I came up with the combination that allowed my work to lay as flat as possible, and positioned my beads where they would accent the arches to their max.

For those of you who tat, that combo was basically; 9ds chains, and 4/4 rings which were attached to the centers of those crocheted loops.

Here is a bit of a diagram-

Lace Curtain-tatted edge-side-panel

As for the knitting pattern- I used the same chart as for the Large Lace Curtain Valance, accept that I only used one repeat of the five arches in the center section.  I also decided not to stack them, as in the original design.

My next project is to tat some pink and silver butterflies to grace my adjacent walls.

I hope this gives you some ideas to play with.

Happy knitting-KT

Read Full Post »

bead evening bag flap 2Since my recently knitted purse expanded my knowledge of knitting with beads, I thought I would try and take it one step further-paint with them.  The above photo is of an evening bag flap that will cover the hex frame and lay smoothly to about 1 1/2 inches from the bottom edge of the purse.  The design features the letter”T” in the middle, with various swirls etc to complete the shape.  In order to accomplish this I had to come up with a method that did not interfere with the gauge, and yet allow me to insert beads every stitch if need be.  Hummmm……..?????????????????????

Let see–,using the slip stitch method on YOUTUBE requirew first  pre-stringing your beads onto the yarn; then work to where you want your bead, bring your yarn forward, slip the stitch purlwise, lay the bead at the base of the slipped stitch, then bring the yarn around the back to knit the next stitch.

So what’s the problem with that??  Well, the problem is that you can’t line up your beads together, you can only put them in every other stitch.

The next method uses a crochet hook to go through the bead, and bring the newly knitted stitch through the bead hole before replacing it on the right knitting needle.  This method does not require you to pre-string the beads, however, you can’t stack them or place them every stitch without greatly changing the gauge of your knitting.

Well, that won’t work!  So what to do?????

I want the beads to set on top of the knitted surface, so they will not affect the gauge.

I want to be able to chart my design.

I don’t want to have to count stitches and rows in order to put them in, if I wanted to do that I would do counted cross stitch.

I want to be able to tweek them a bit if needed to make the design.

After playing around a bit, beginning with the idea I shared with you in the lace curtain design, I came up with this.  You can call it whatever you want.  The nice thing is it works, as you can see in the photo above.

Here it is for you to play with- Painting with Beads

I have added some illustrations to make this process more clear.


I know you will come up with your own great ideas.

Go for it!


Happy knitting!  KT

Read Full Post »