I recently finished designing a ski sweater for my grandson. I charted the back and front, and then the sleeves. But I wanted to see the finished product first.
1) would I be pleased with the layout of the floating stitches?
2) does the top of the sleeve design flow into the chest panel of the front and back?
What to do?
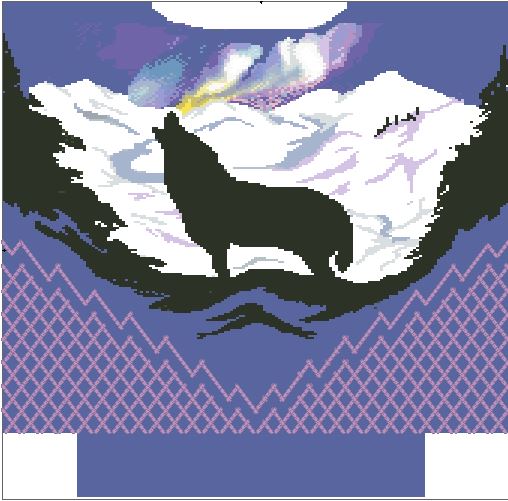
First task is to condense the charts to 33-25 %. When you do this in Pattern Maker Pro, the chart becomes a solid picture, allowing you to get a finished view. Below are clips of my three charts for the sweater.

This first one is of the front panel.

The second is of the back panel.

The third is of the sleeve.
I snipped these clips at 33 per cent.
Once condense to 25 percent they become solid in color, and the chart disappears.
Front

Back

Sleeve

Half sleeve
All these clips are made using the”snipping tool in Window 7. Once I have these clips, I insert them into my publishing program (I use Serif, any publishing program will work as long as you can import pictures from files), and arrange them into the form of a completed sweater. I create white boxes without borders to cover any unwanted sections. The results are great, and I can see what my sweater will look like when it is finished.

You can see that I added a collar for another touch of the “real” thing.
I like the floating stitch design at the bottom sections of the front and sleeve. Of course this is mirrored on the back panel as well. I have a tutorial on “floating stitches, or wandering cable chains,” just click on my “fun stuff tutorials.

In this particular case I will be using a lace weight lavender heathered yarn for these decorative stitches. These stitches are inserted in between my background stockinette stitches and lay over the top of my work- they are not counted in the base stitch count.
The next project was figuring out the square inches of each section. Once this was done, I measured the yarn needed for 10 sts, and began multiplying away. I will be using Palette fingering yarn, and a #3 circle needle for the main pieces, and a #1 for the rib.
I think he is going to love it!
I will be writing up the pattern as I go, so when it is finished I will upload the chart, and let you know exactly how much yarn I used.
Just sharing- KT
