Feeds:
Posts
Comments

Archive for the ‘corcheted butterfly’ Category

I delivered this arrangement to my friends this morning.  They were delighted.  Many people think I am crazy, but all the hours I put into this are worth it, when I see the smiles on their faces.

It is currently being displayed with dignity on their black baby grand piano.  There are also plans to provide a flash light handy for anyone who wants to view the details of the underside of the Morpho butterfly.

*You will see that the maiden’s fern is not in the mix. Why?  I have discovered that it looks better when there are no more than 3 crocheted elements in an arrangement.

So…..what’s next?  I am working on development of this stitch and it’s possible use in other projects.  As I perfect these variations, I will share with those who are interested.  Right now, I am working on using to colors, as I do in Intarsia knitting.  I think the possibilities are endless.

But….for now, it is nice to have this one finished.

KT

Read Full Post »

023

This is my latest butterfly creation.  It is called a Rice Paper Butterfly and is indigenous to the Phillipines.  I have to say it was definitely a real challenge, but a fun one.

020

The process began with a photo that was enlarged to replicate the actual size of the butterfly.  This was my template.  I used size 40 thread and appropriate hook.

Next, I planned my attack.  Starting and the top edge of the upper wing, I numbered the veins and then using the white, I worked my way down the wing, outlining each  vein in a reverse slip st using black.

The top veins was worked over wire, which allows me to shape the wing nicely.  The bottom wings are begun at the inner edge, crocheting the first vein over wire.

014

The photo above shows you both sets of wings completed.  You can also see the template in the background.

Those “little” black spots are painted on.  After the crocheting is done, I spray the wings, front and back with acrylic sealer (several coats), let them dry and then use a fine brush, a magnifying head piece, and black “Hard as Nails” fingernail polish do the detail work.

I first tried crocheting this butterfly using the two colors of thread, but found that it got a bit heavy with all the ends woven in.  This system seem to work better.


The body is made over wire, through which the wings are attached.  The two wire ends are used for the Antennae.  A black bead is used for the head.

I mounted the butterfly on a black comb, all with thread and black polish.

As this is free form crocheting I am not going to write up a pattern, but if you are interested I would be happy to help you with doing you own butterfly project.


My local “bug man” was very pleased with the results.


KT


Read Full Post »

I just couldn’t wait to share this with you.  I have been having so much fun working on this project.

005 (2)

I am going to add this crocheted Monarch butterfly to an arrangement I am making for a dear friend’s mom.  She loves the Monarch, so naturally I had to include it with the yellow rose that I am making for her.

Below is another photo taken by my local “bug” man.  He is my official “eye” and chief.  When he says, “You got it,”  I know it’s right.

IMG-20180905-WA0014_resized(1)

If I come up with an pattern in the future I will definitely share, but for now, I am still working it out.

Every butterfly is different, however, the venation (veins) for this particular group of butterflies is the same, only the colors and sizes are different.

It has been quite an education, and great fun, especially when people think it is real.  🙂

Just sharing-

KT


Read Full Post »

003

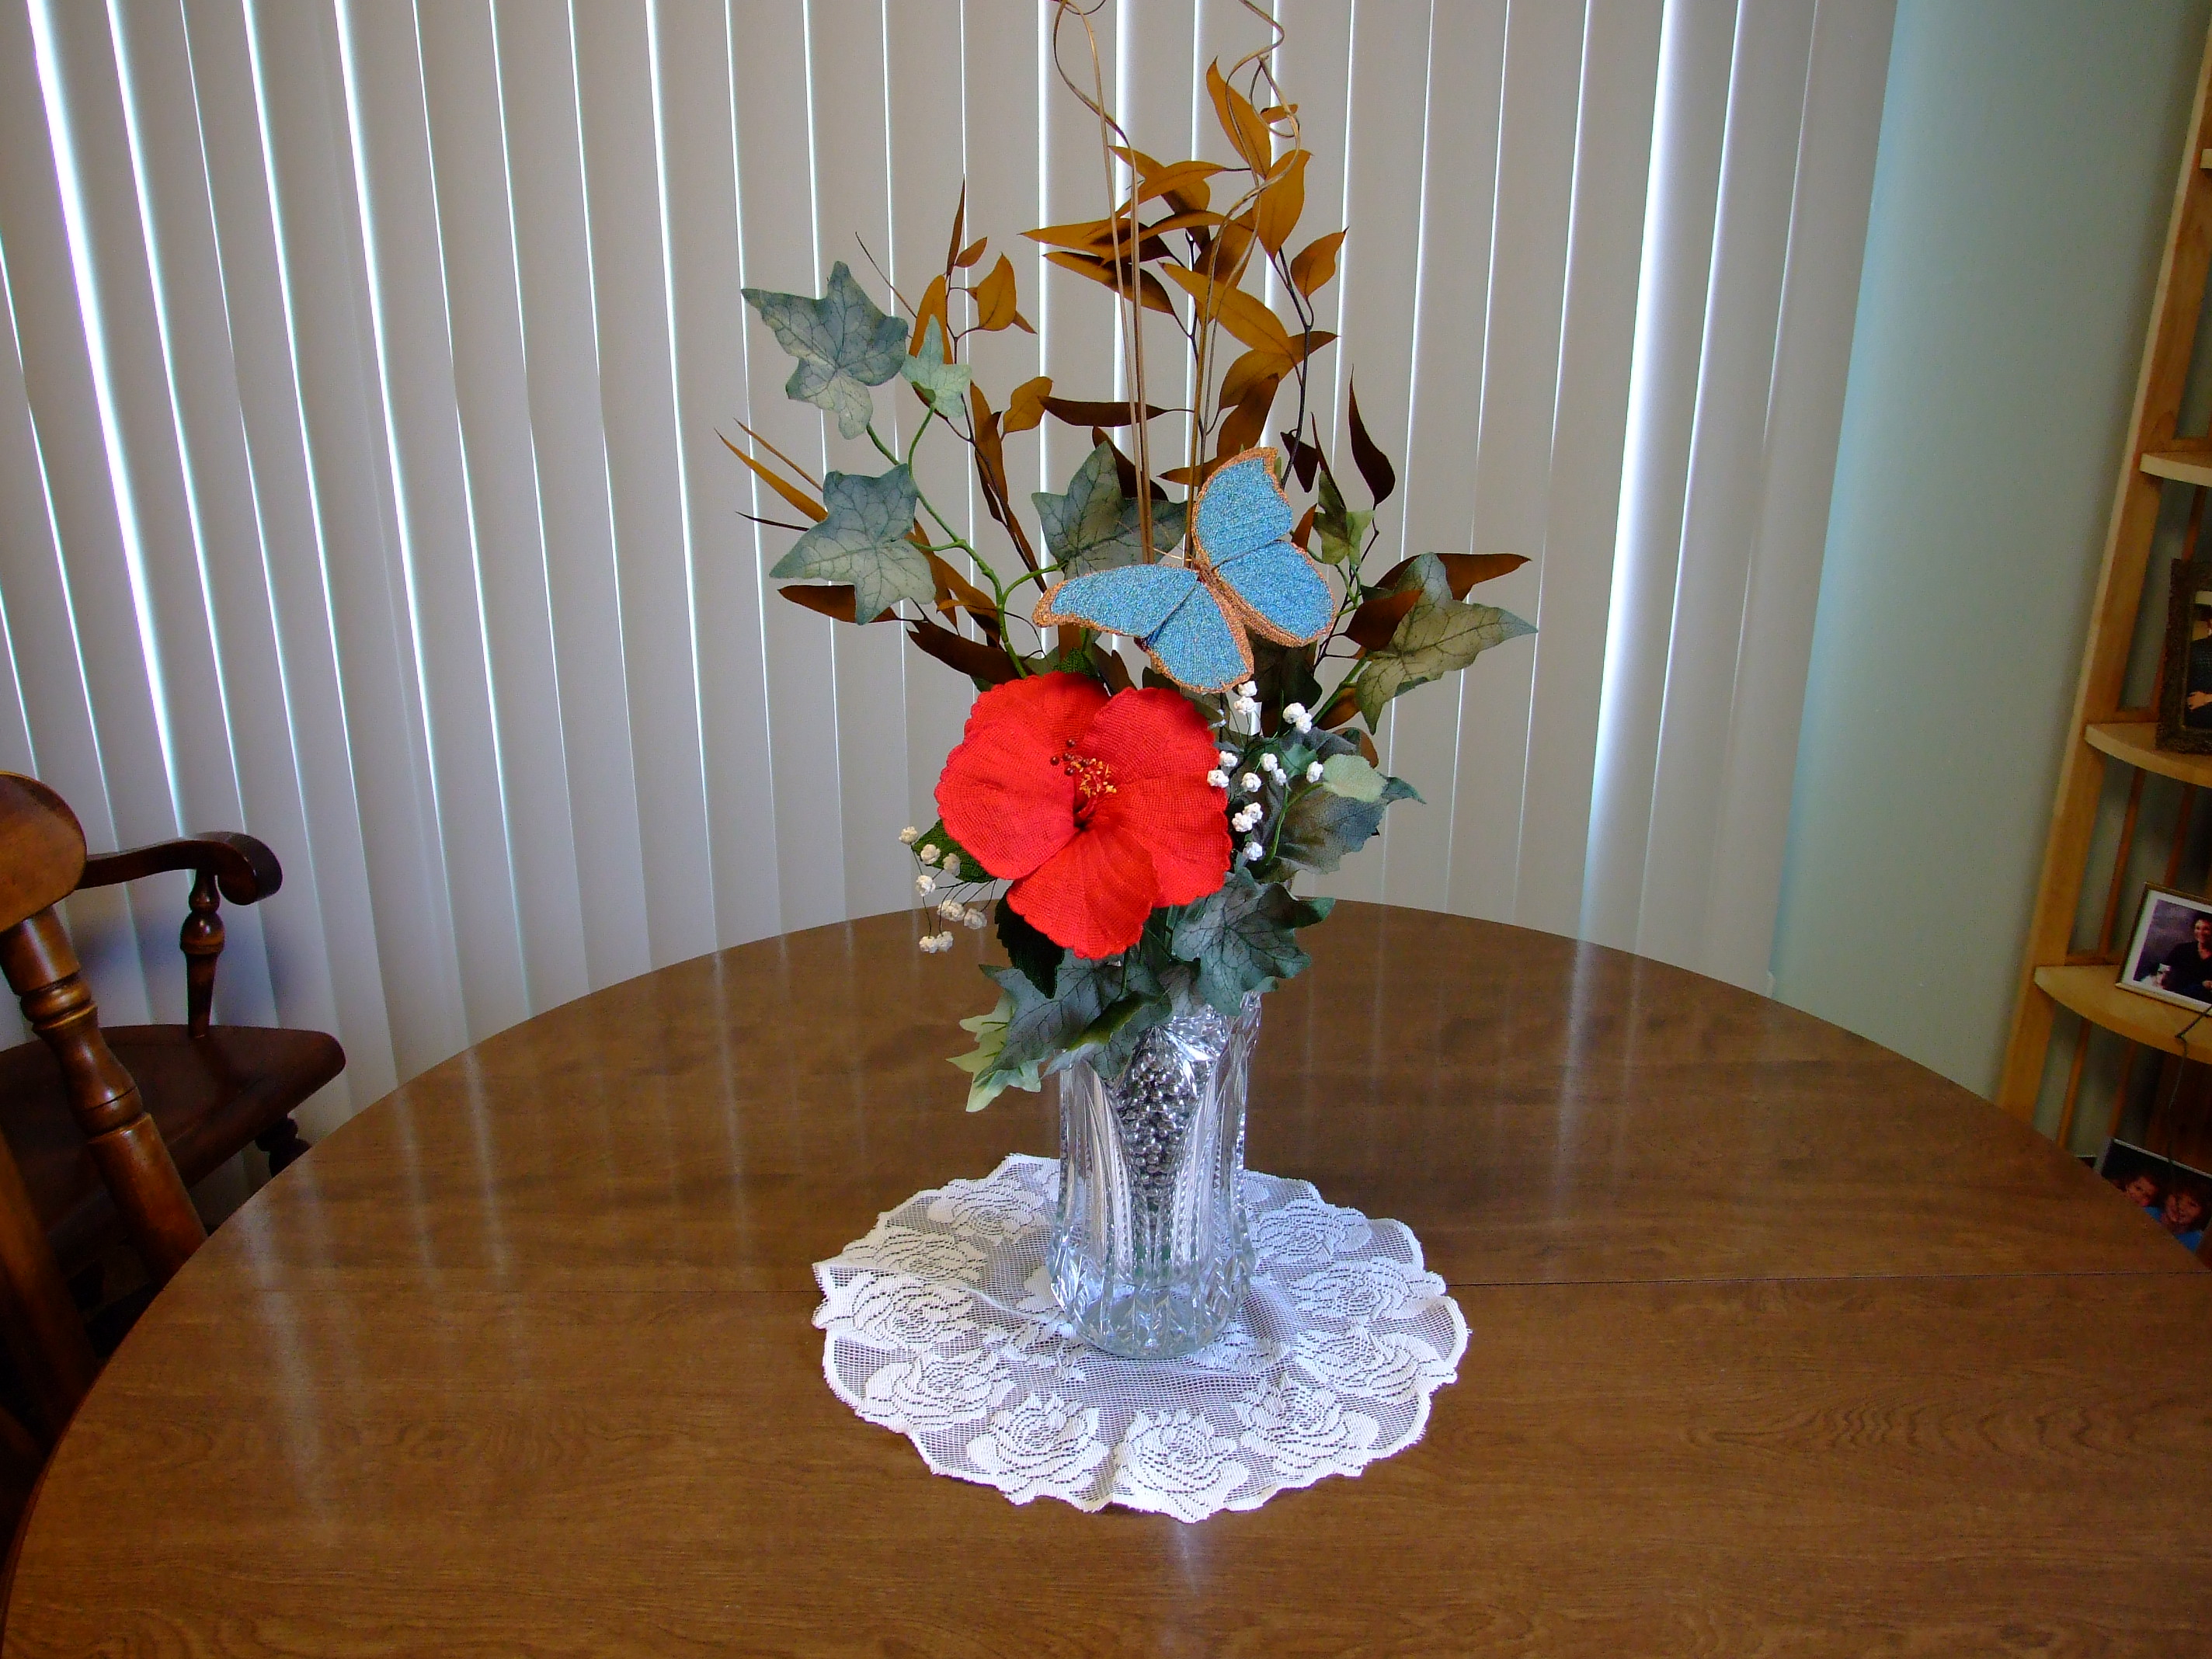
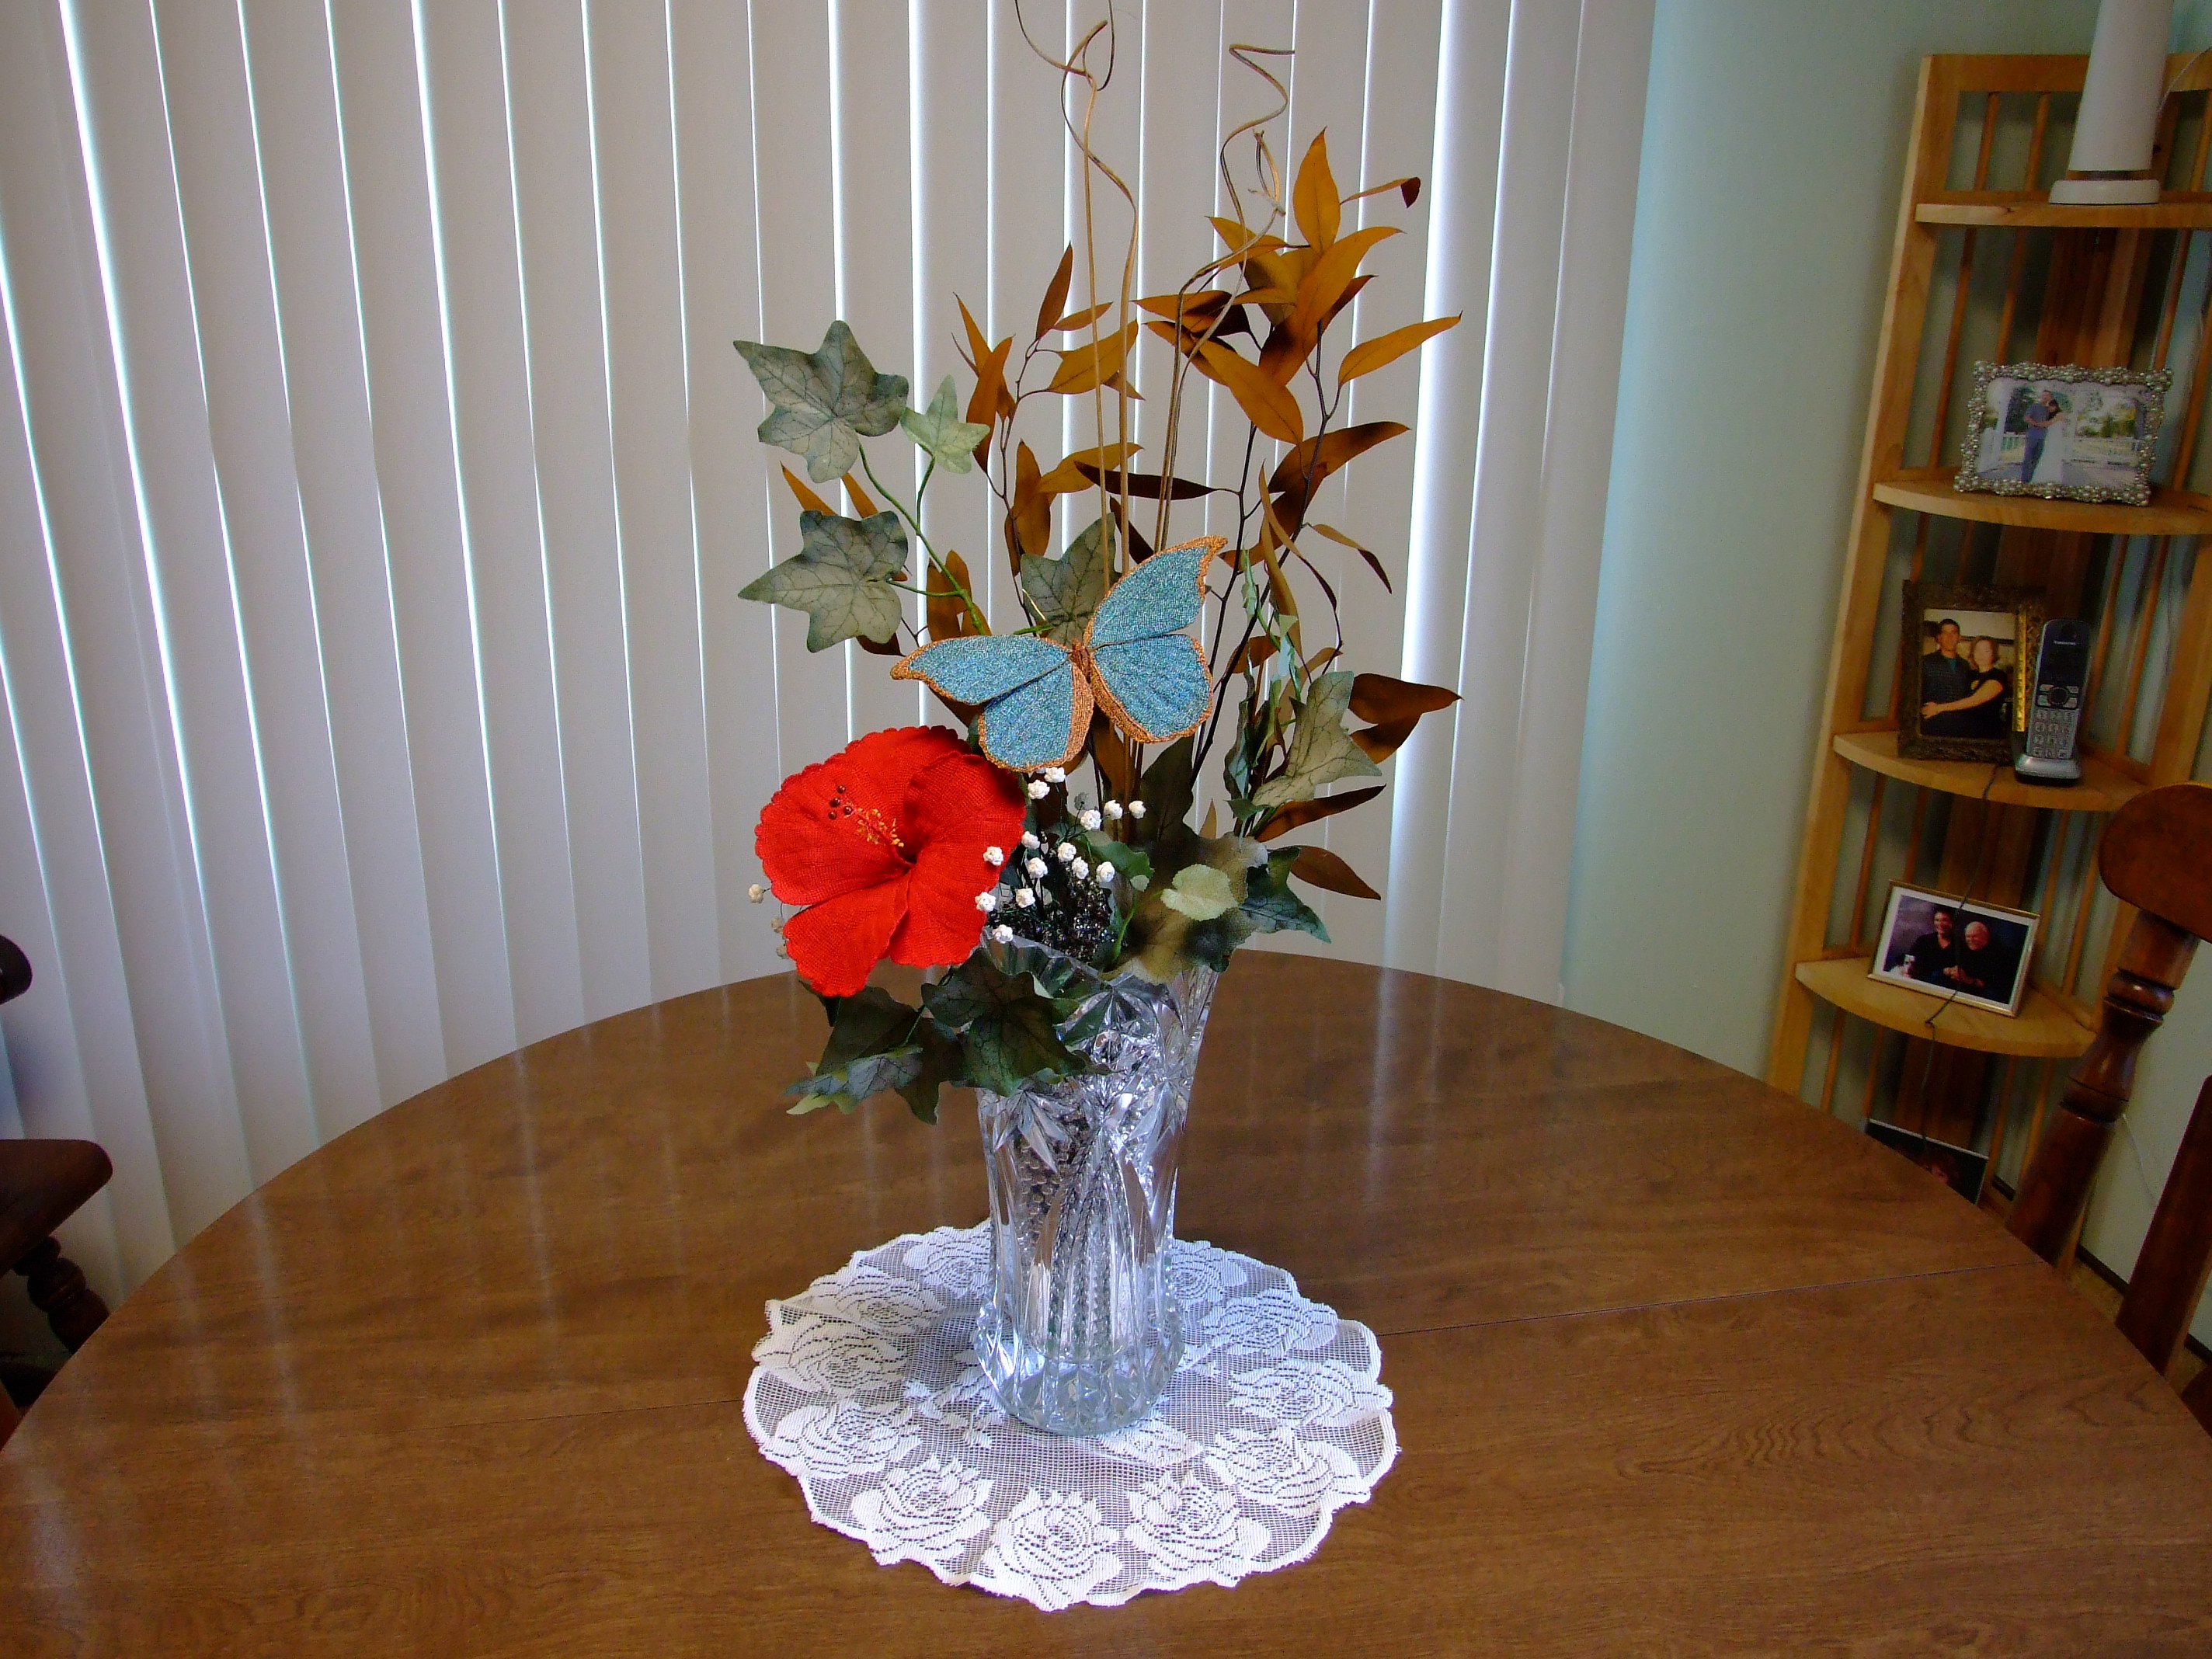
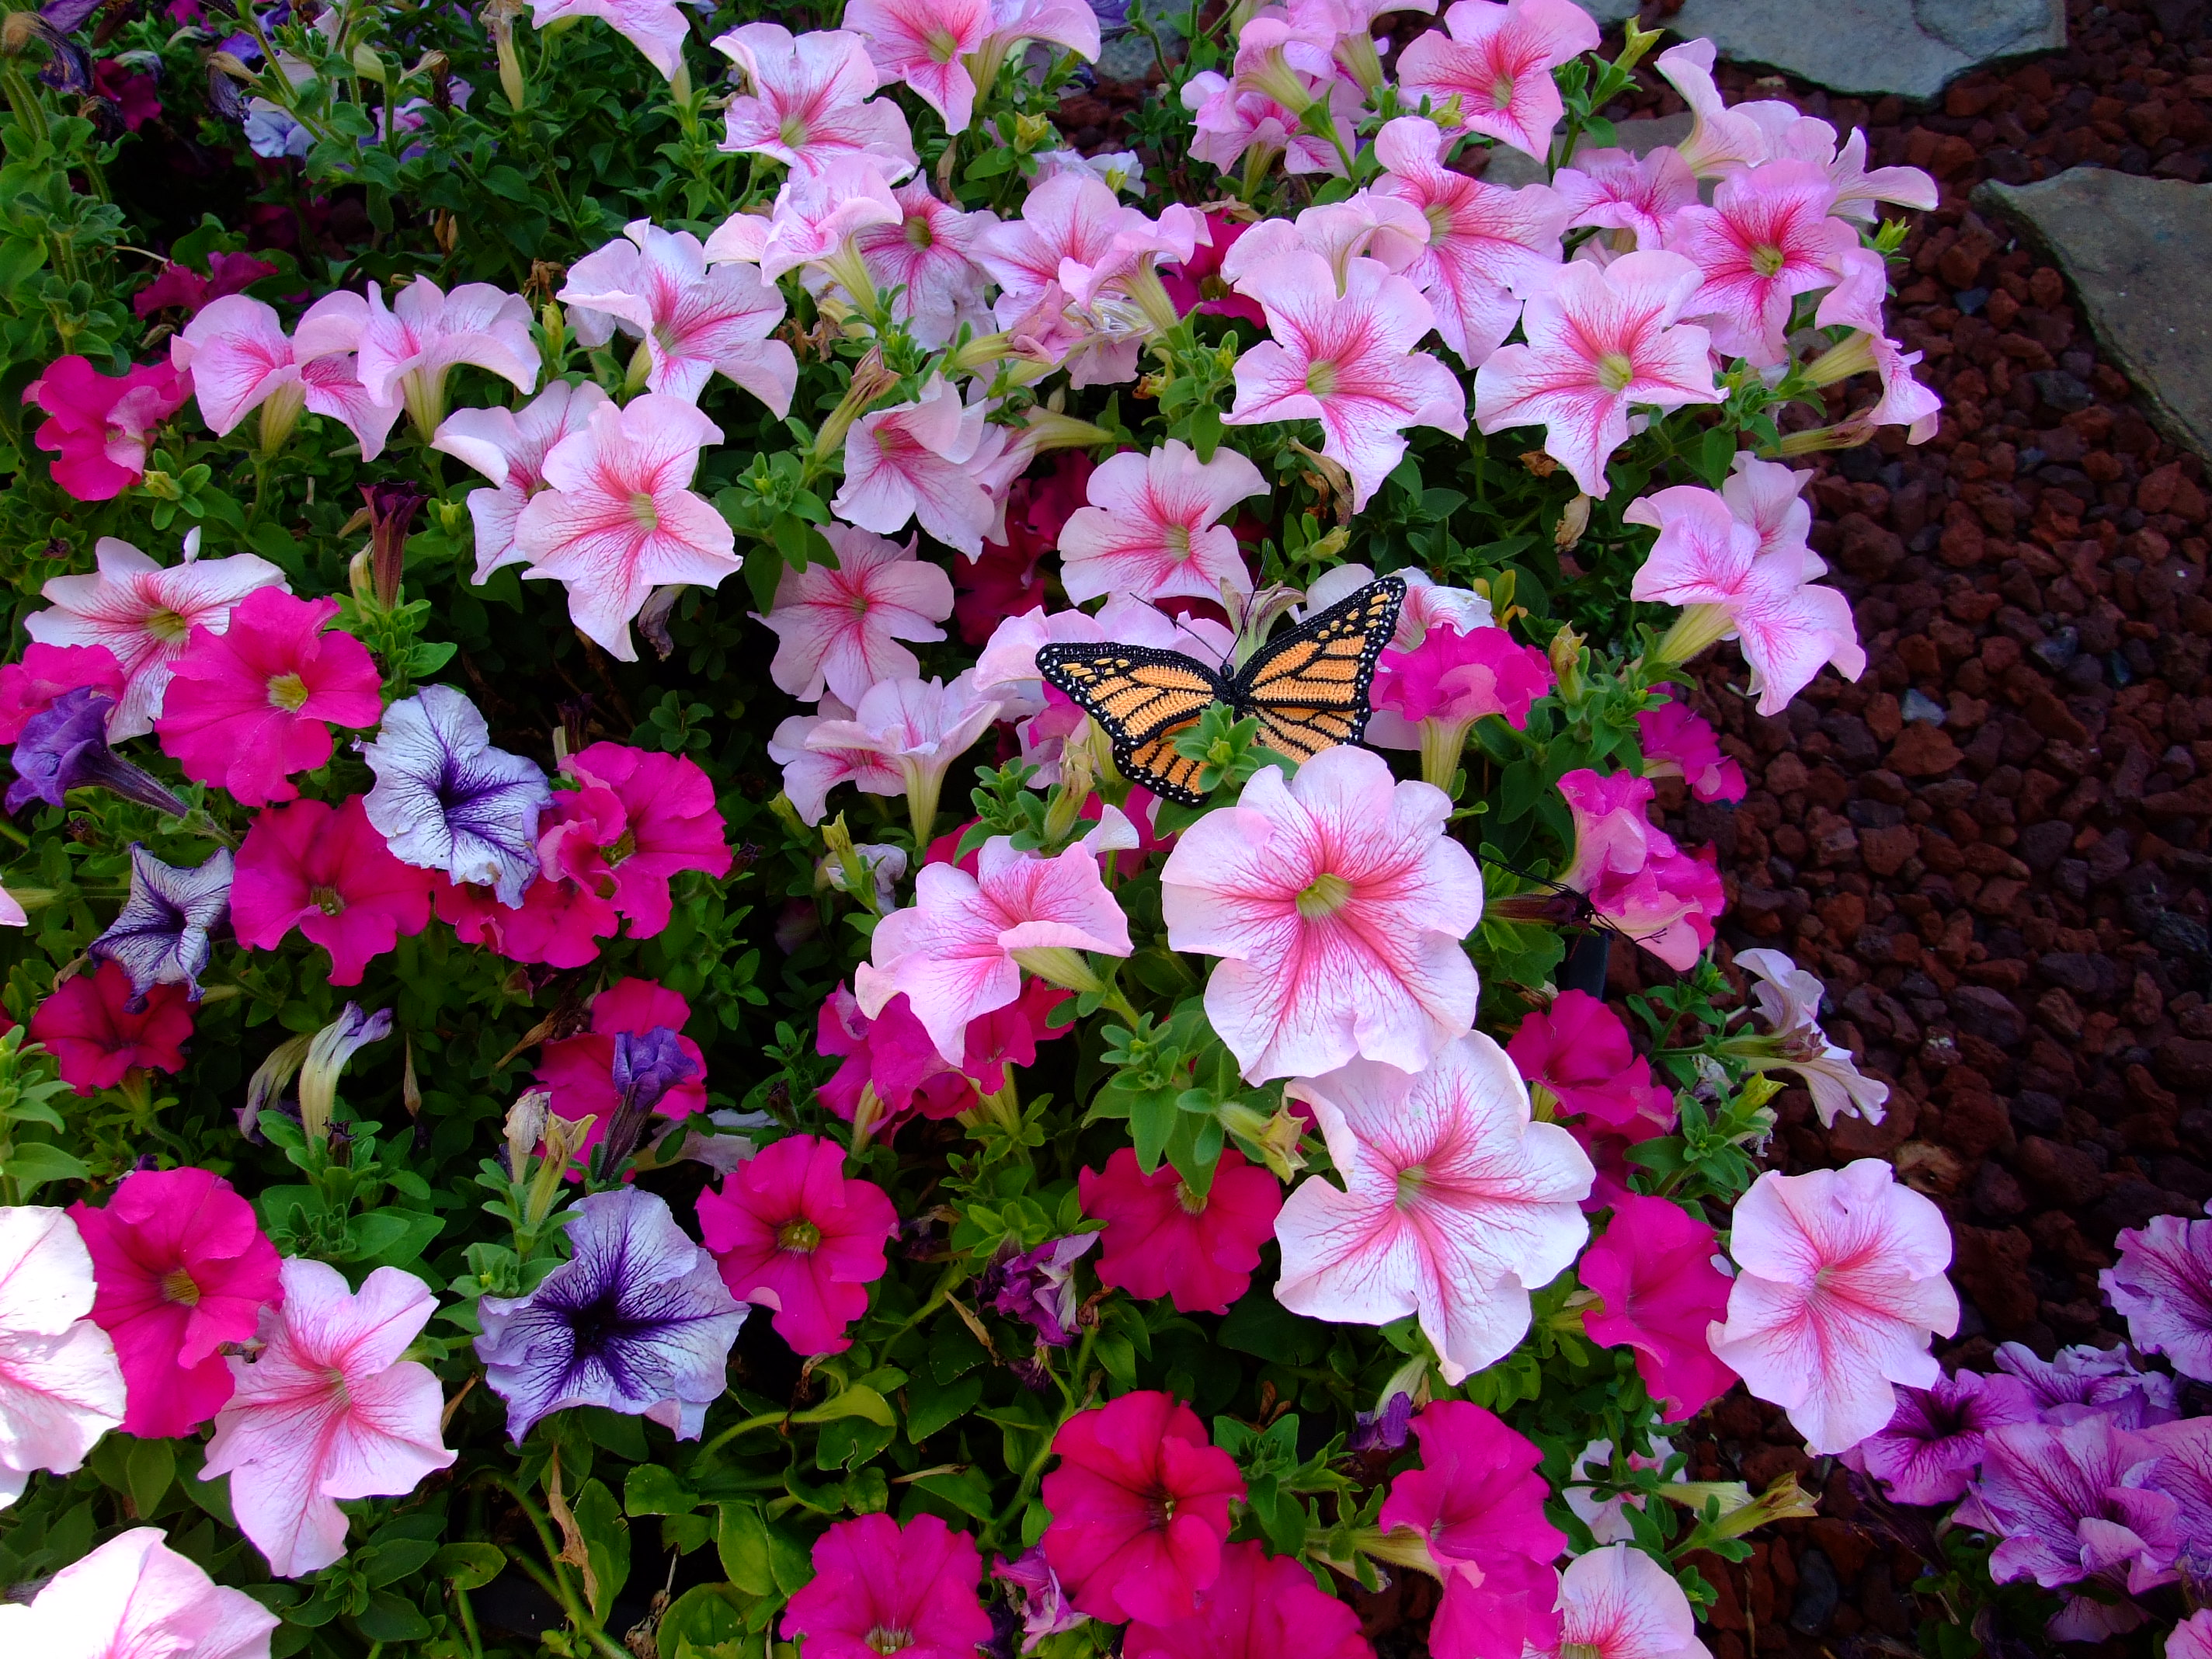
I just had to share this with you before is begins it’s journey to California.

The crocheted Magnolia’s form the main focus of the arrangement, but the butterfly adds the pizazz.  I would give you the name of the species, but my friend and entomologist is not handy at the moment-  that said, it’s as long as you arm.  🙂

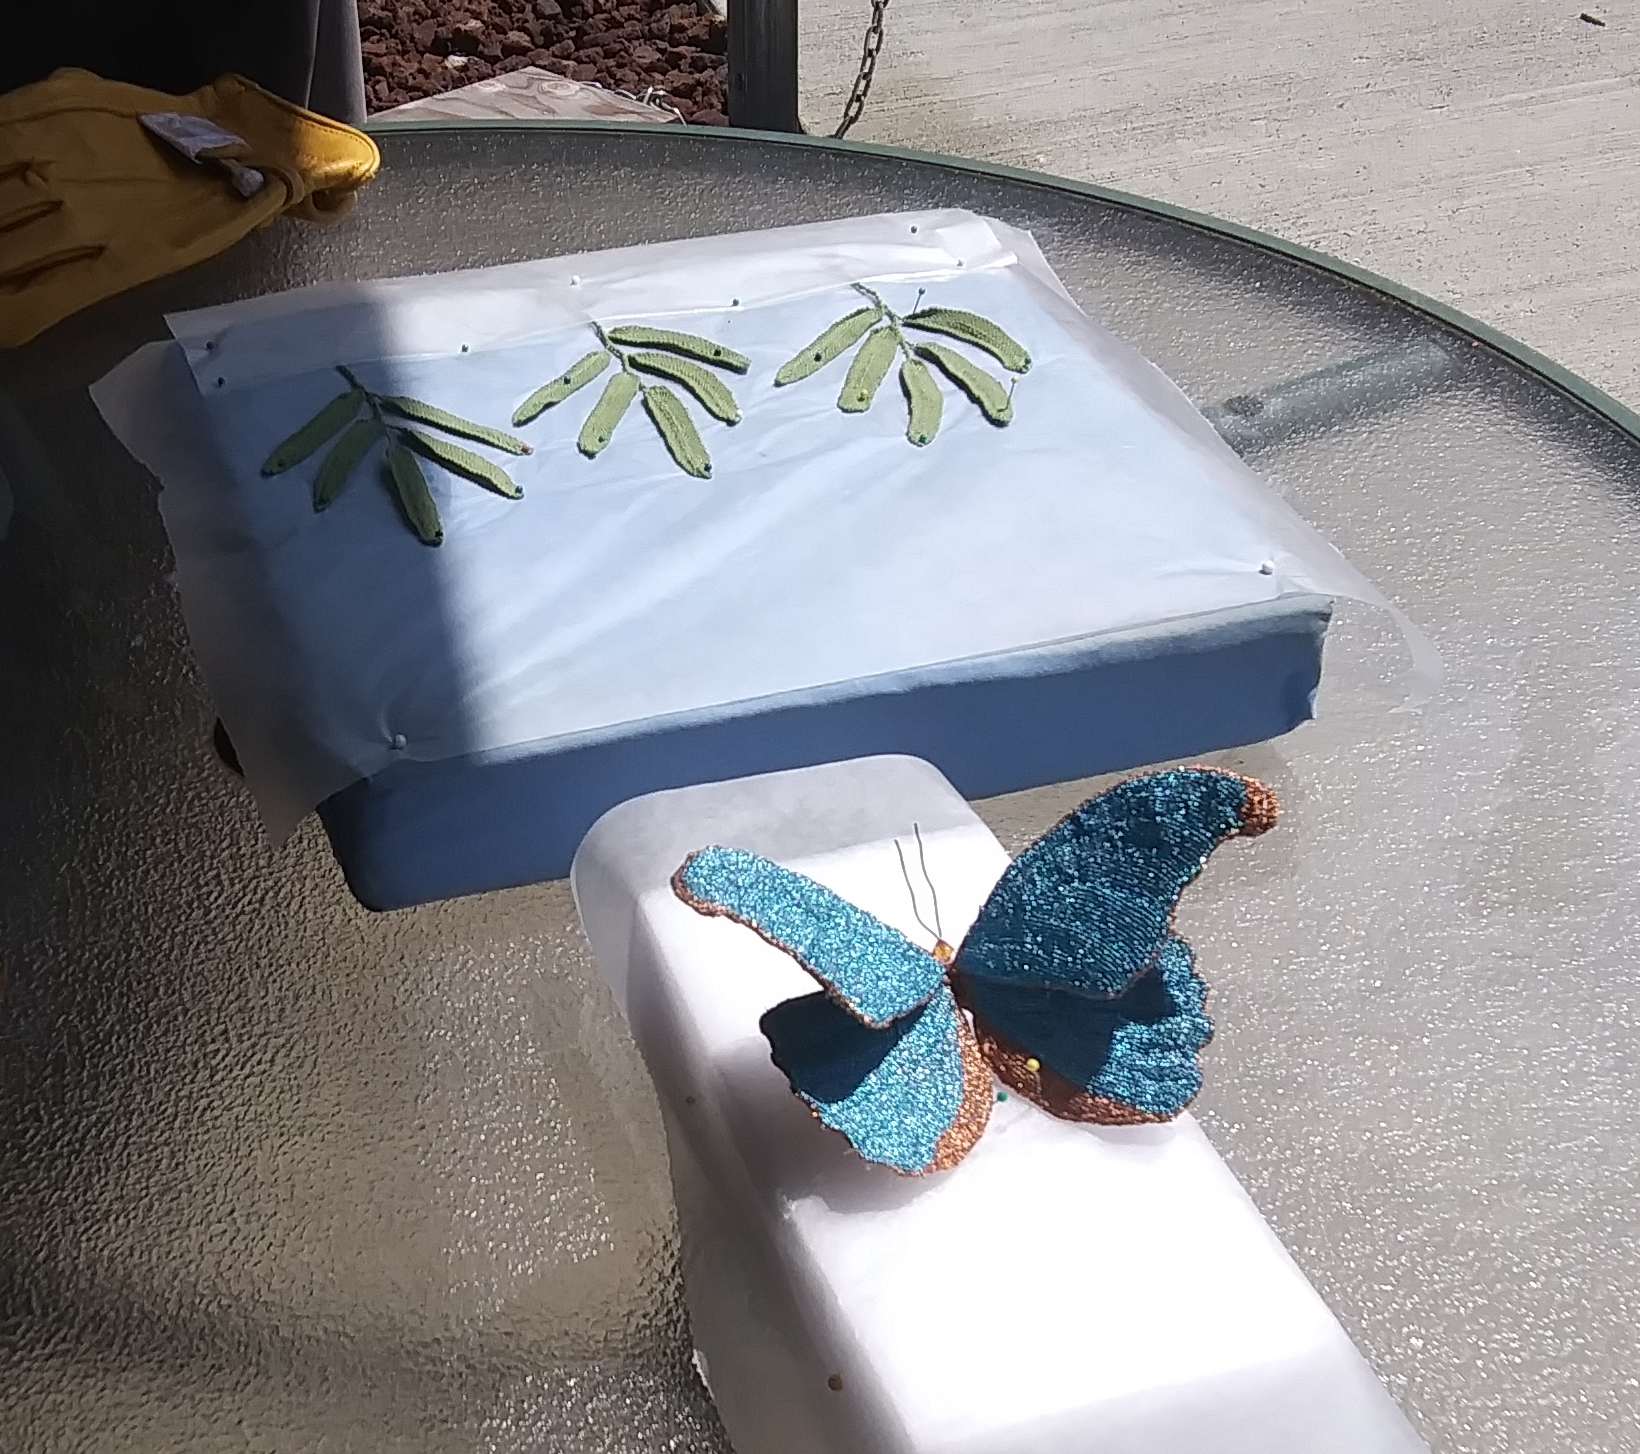
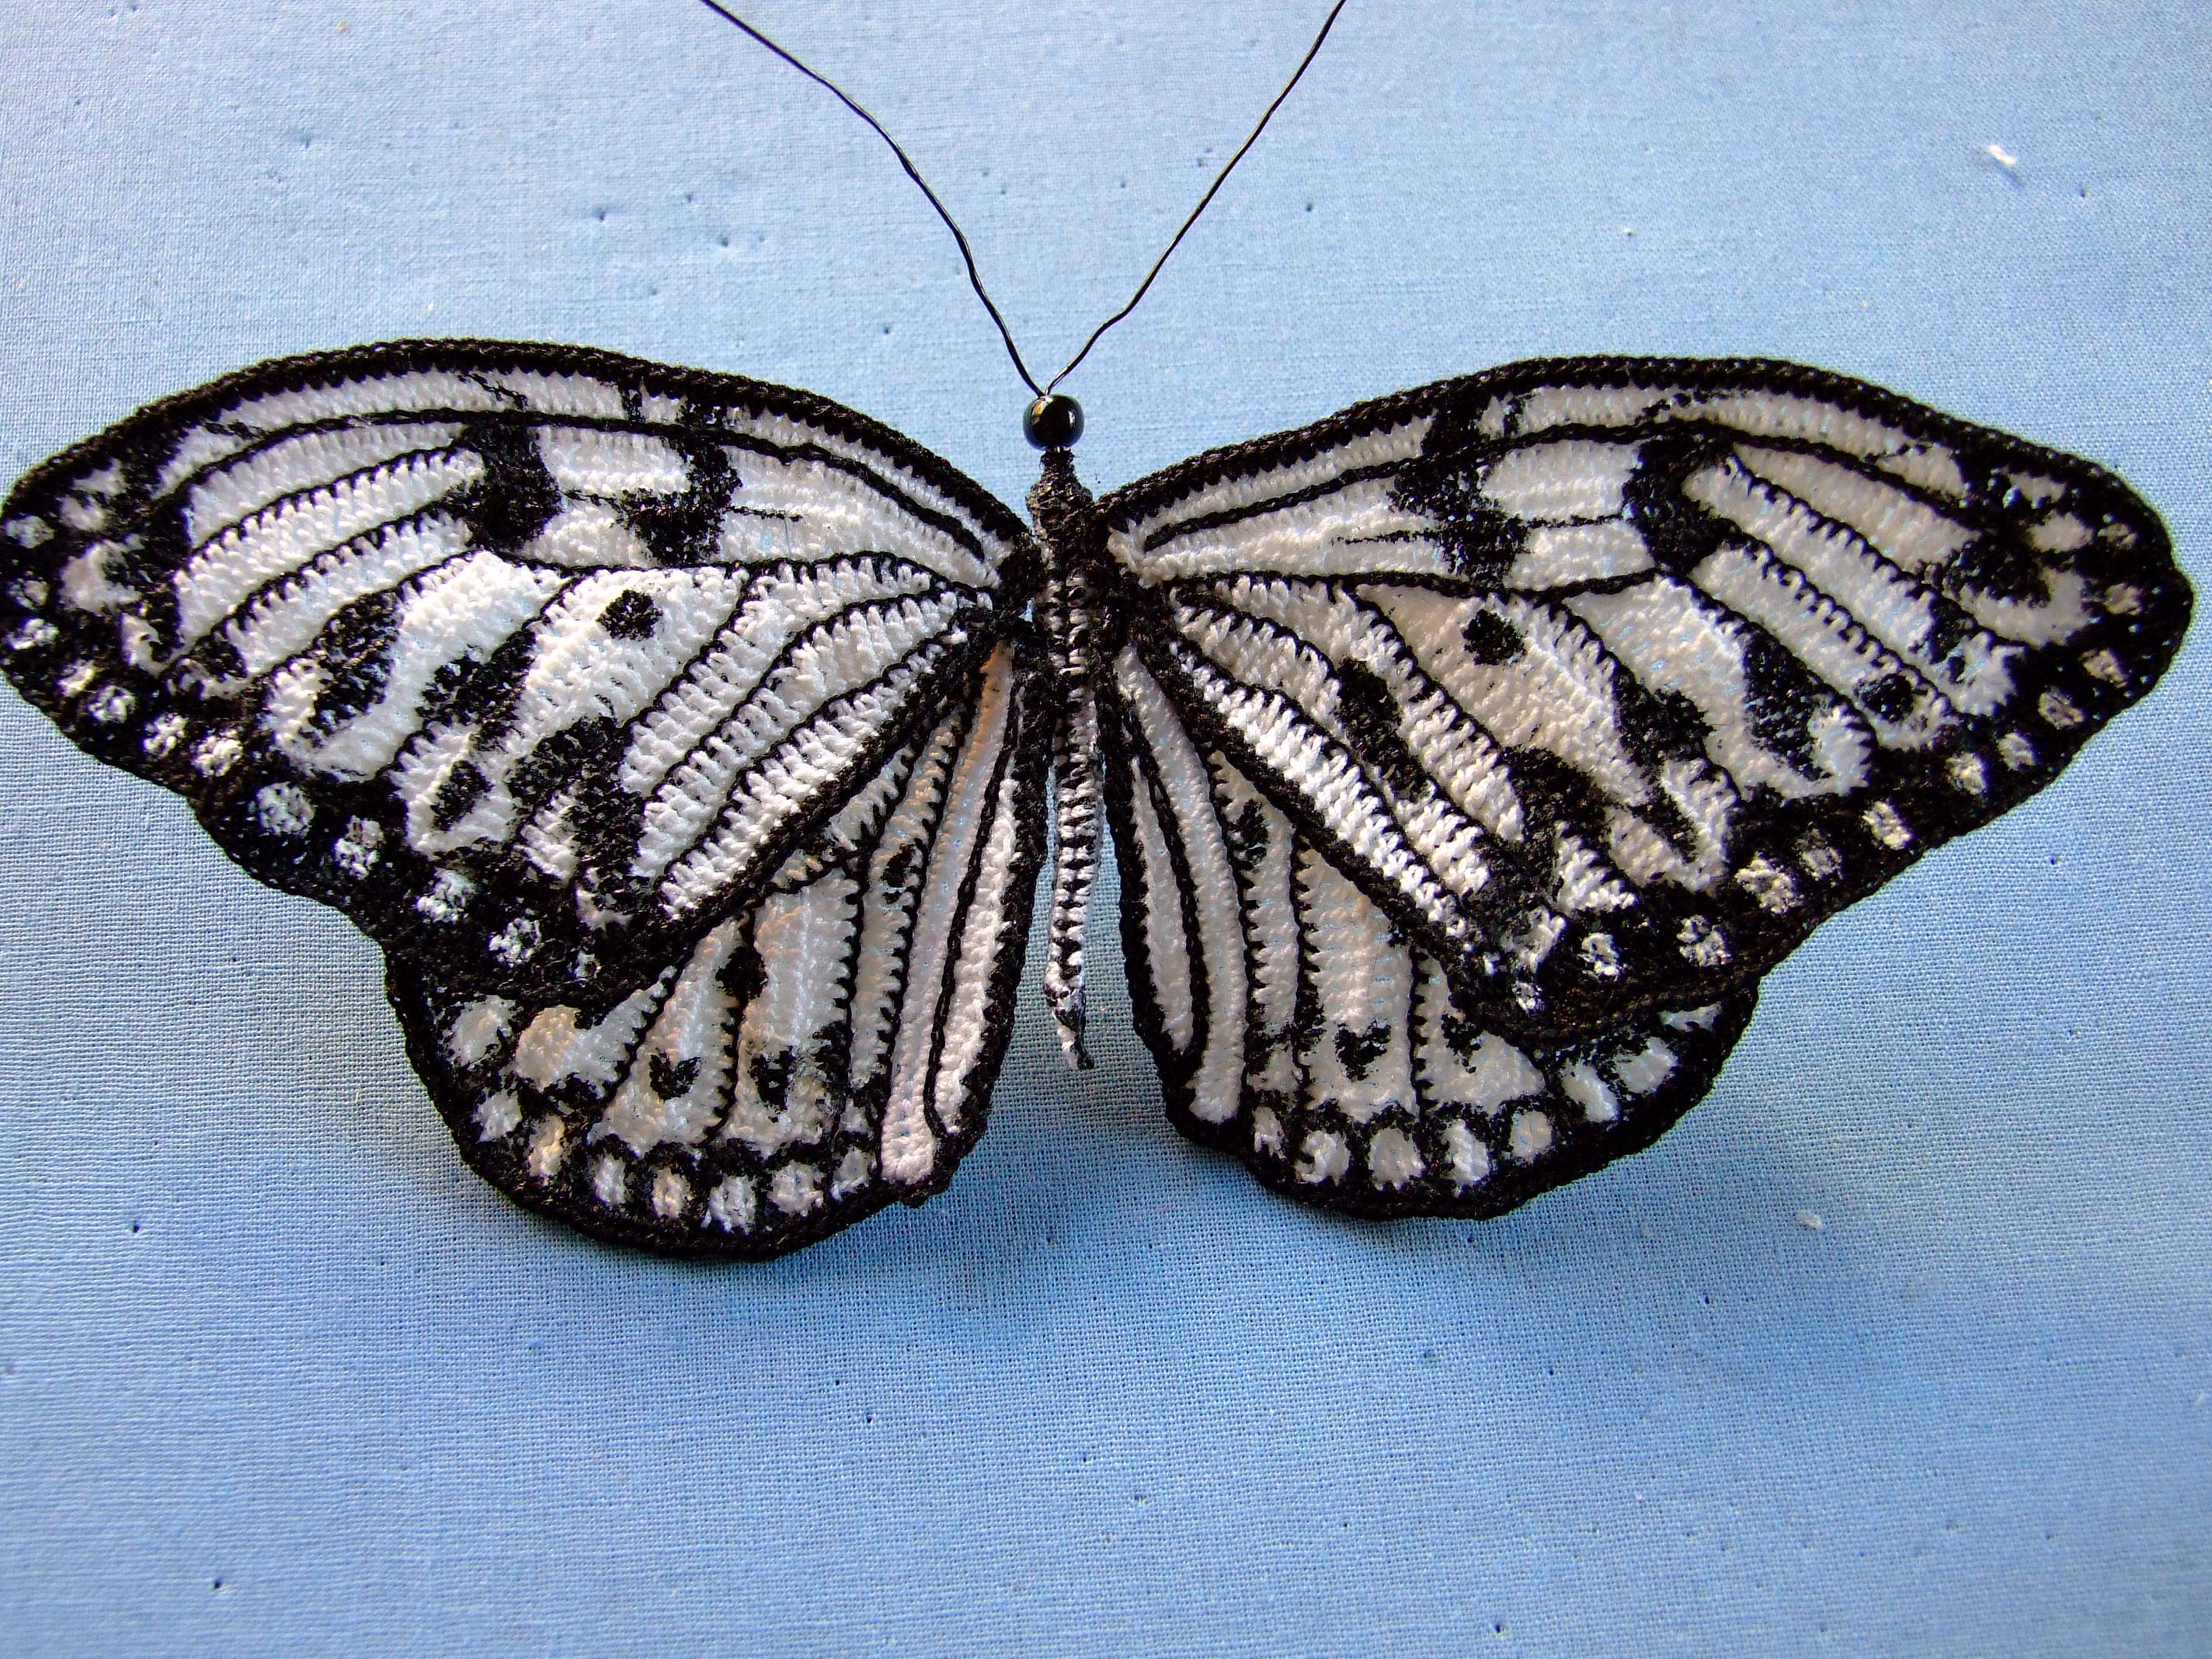
Creating this butterfly was quite a challenge, but well worth it.  As I wanted it anatomically correct, I sought out my neighbor, who had a collection of this species.  What a help that was.
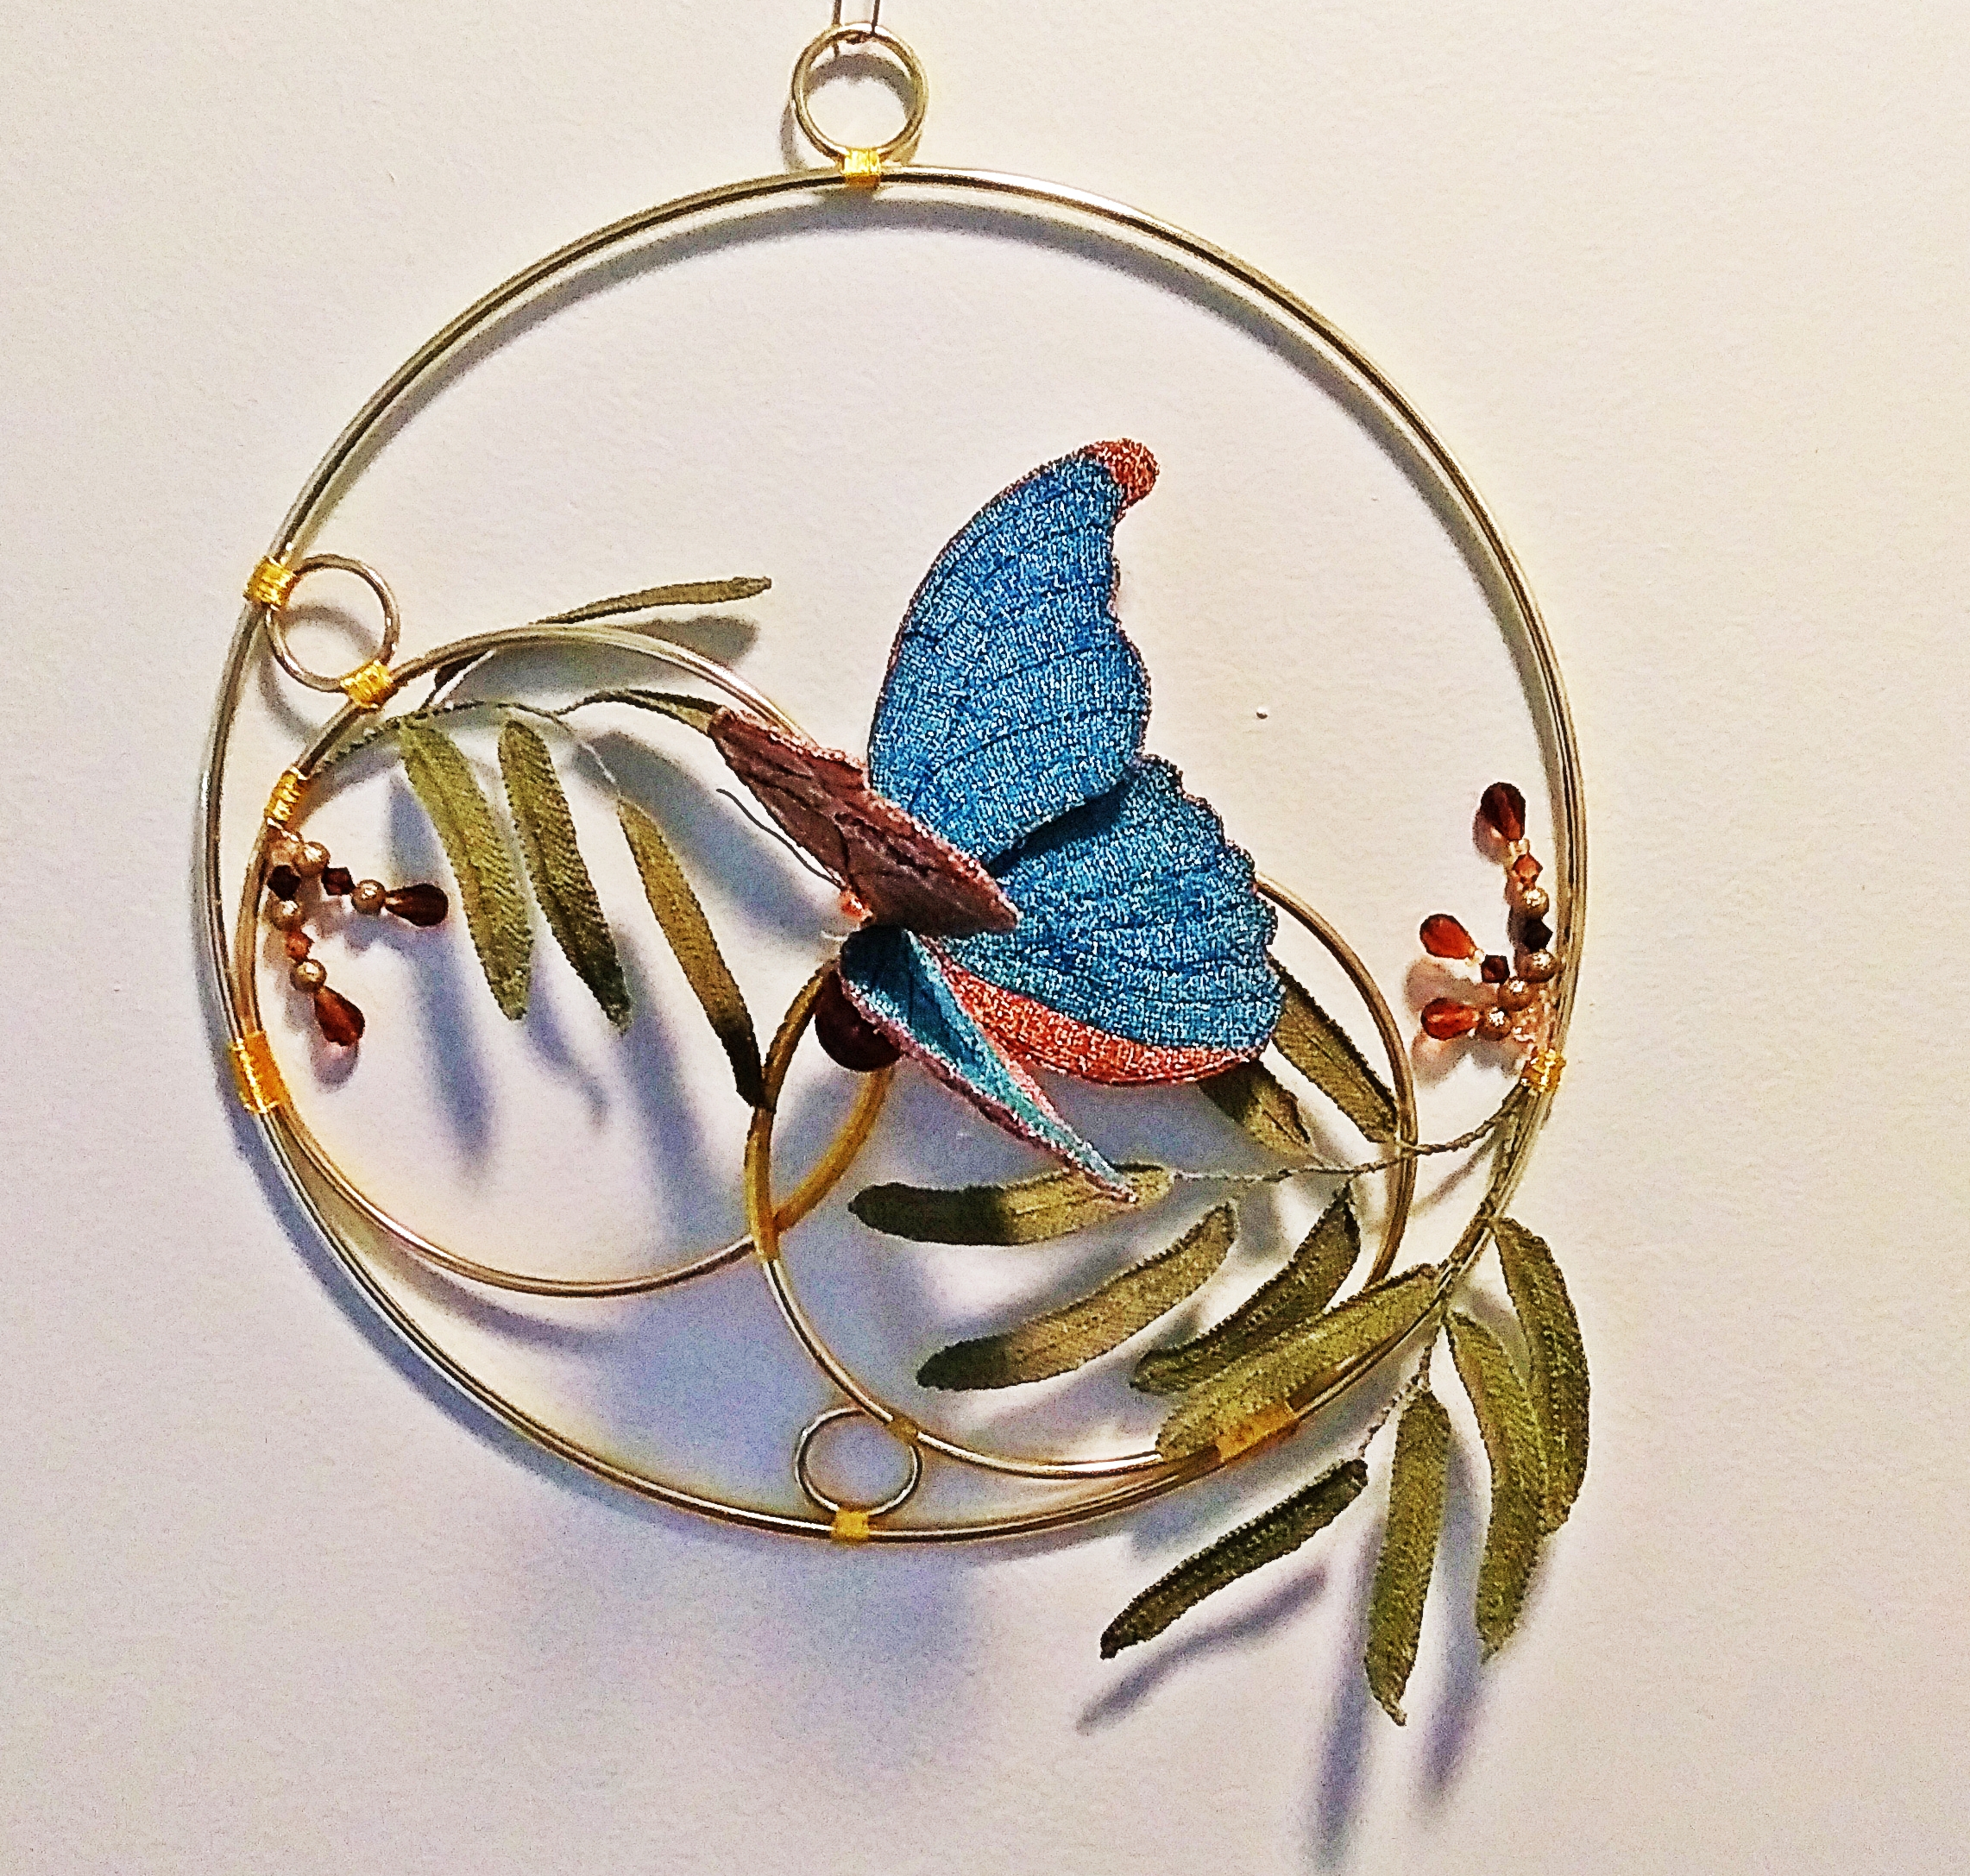
Butterfly Structure

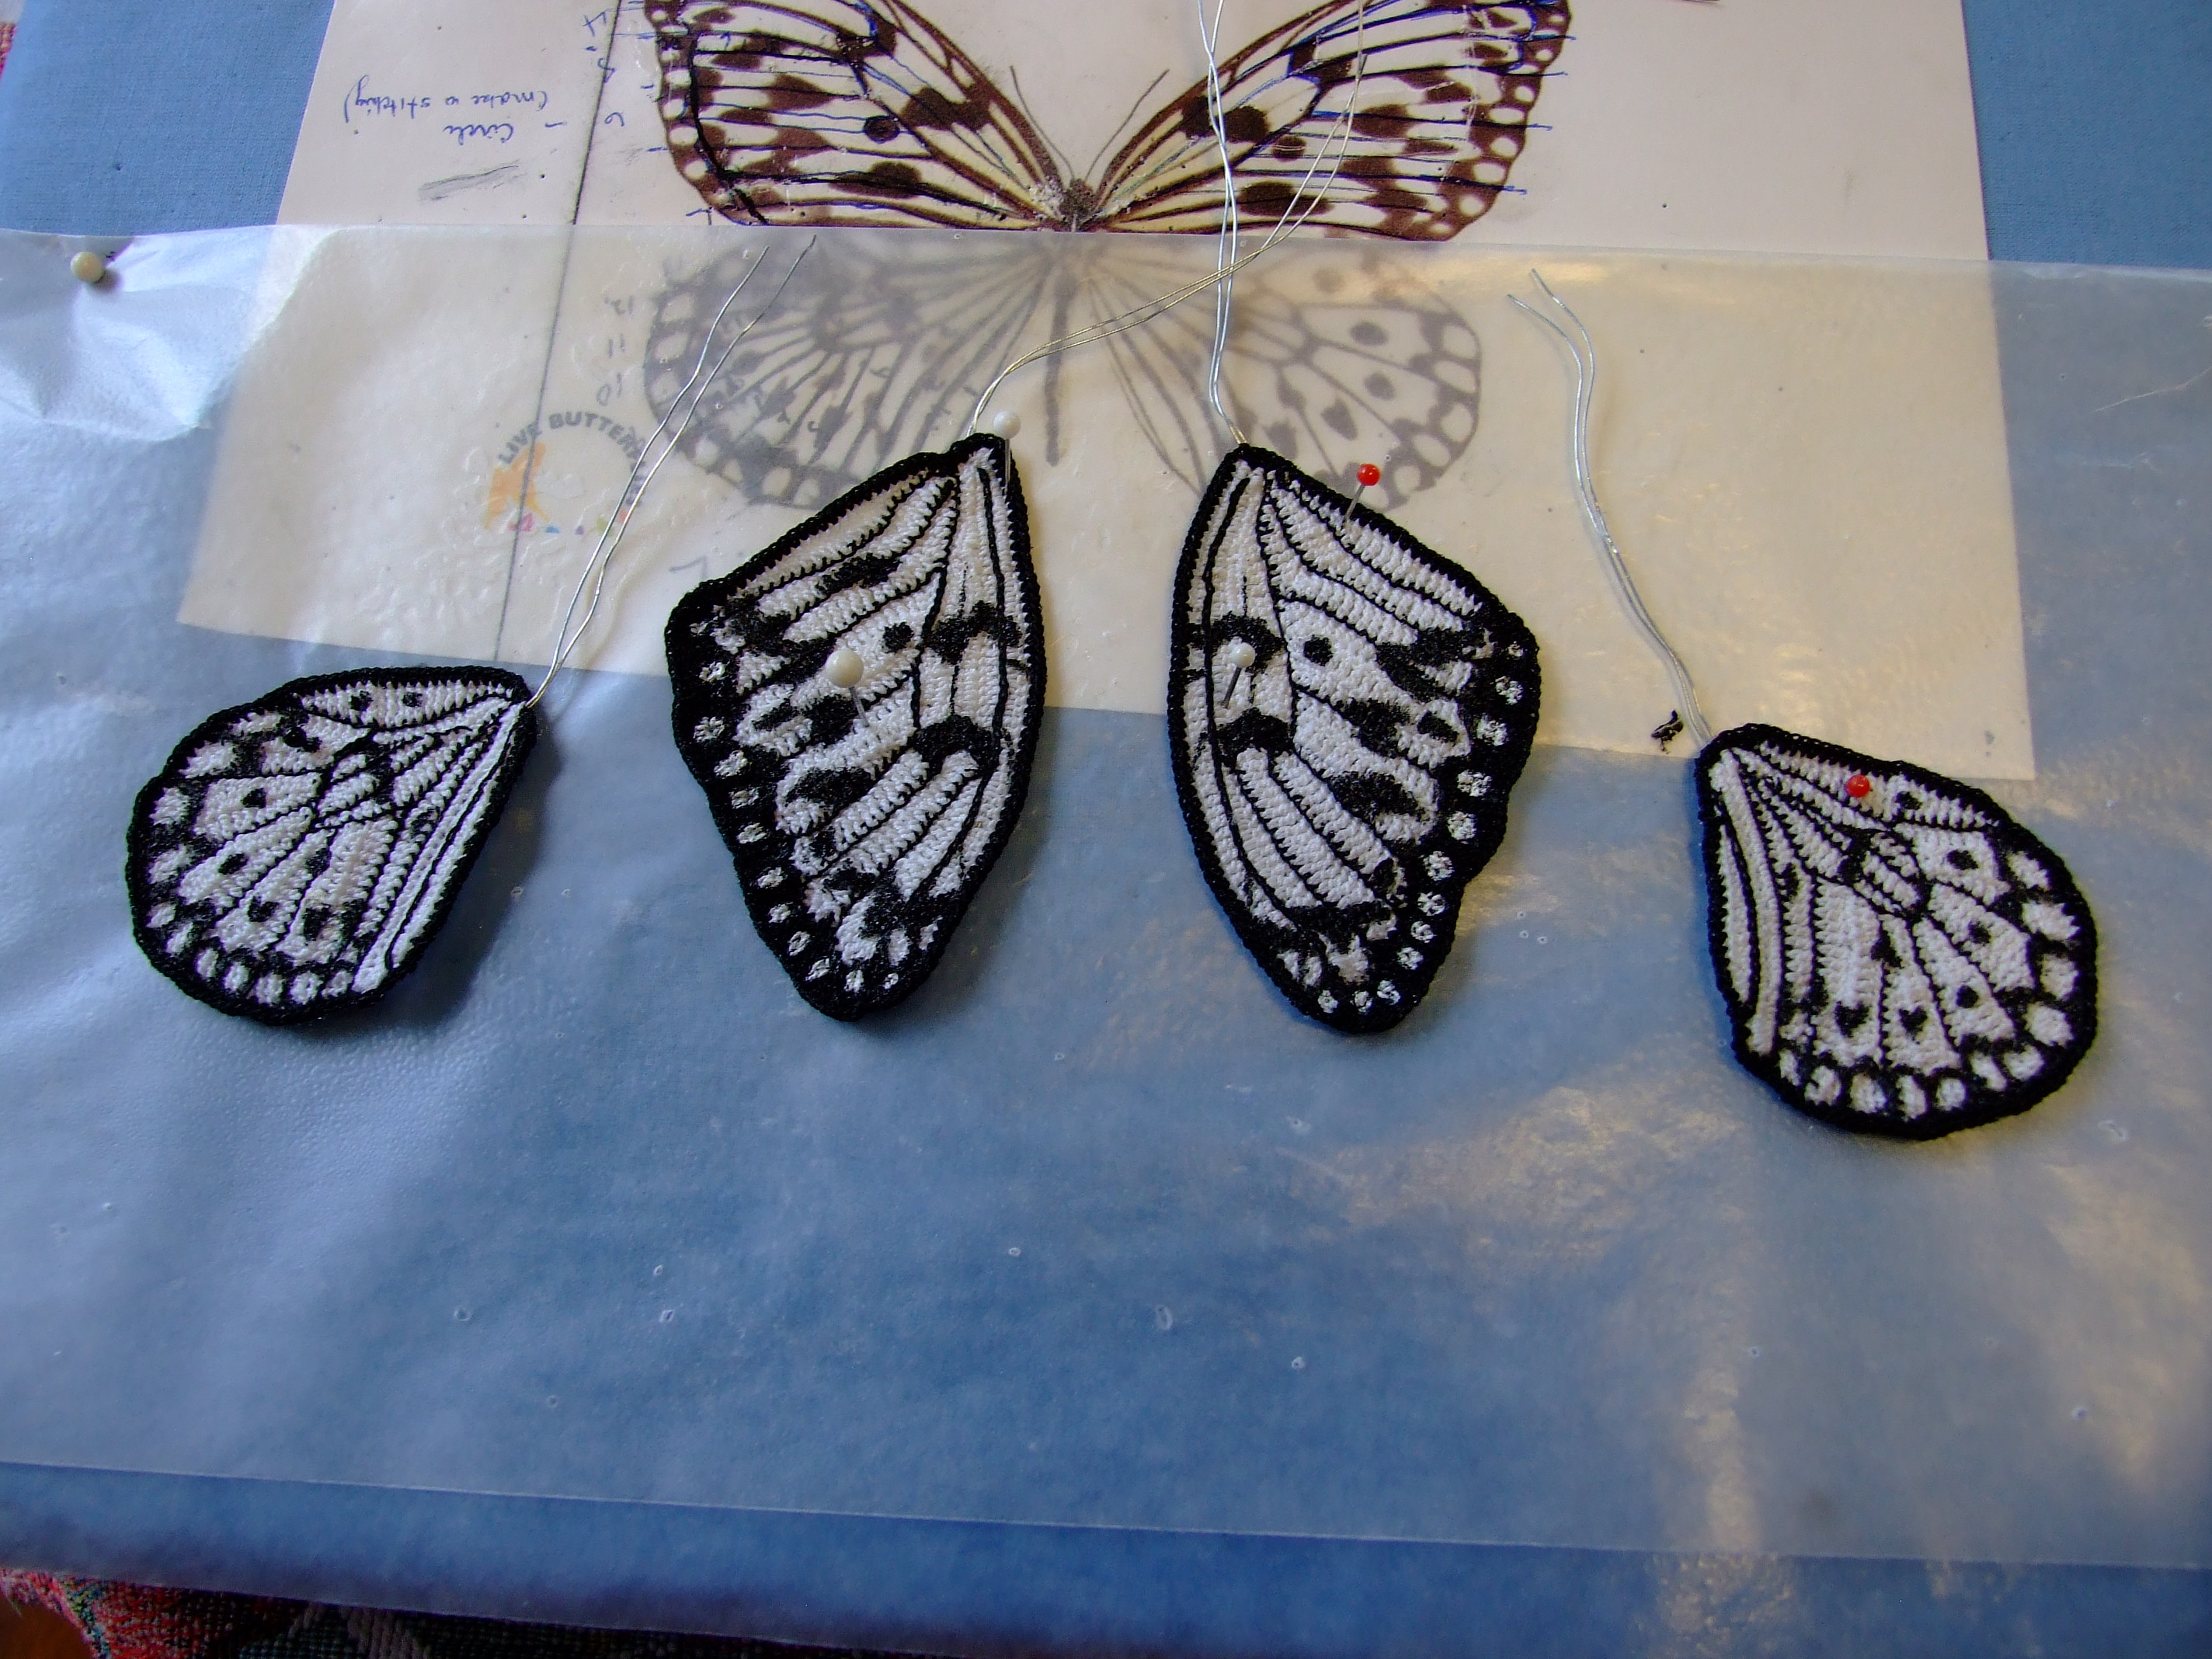
The upper wings are constructed with a wired support at the top vein, the lower have the wired vein on the inner edge.  Both are secure with these wires to the crocheted body, which itself is constructed over #26 wire.

The method I used was to crochet the “rise” (or shape of the vein, using sc to tr variations), then reverse slip st in front loop to created a raise edge.  This is just like reverse single crochet, but with a slipped stitch.  This method gives you complete flexibility in shaping wings, as you are always going back to the beginning and working on the right side.

I used a black pearl bead for the head and the two body wire ends for the antennae.  Hard as Nails black finished the job.

The details on the upper created using satin stitch and #40 thread.  The black dots on the lower wing are black seed bead, (#11), the silver satin stitch is #100 nylon thread.

I created a mount for the butterfly with a crocheted button, attach to a stem wire.  I have found that the most stable method for all my flowers is making a 90 degree bend (about and inch) at the top of the wire, then bending the inch portion into a circle that ends up centered over the main stem. * A small vice is very helpful to hold the main stem while you bend the circle.

All of this project is made with #40 thread, and a .06 hook.  The flowers were made with #20 thread and 1.0 hook.

*Crocheting over wire-  Make a foundation chain of desired length.  Holding wire (#26)in left hand lay wire on thread between hook and working thread. Chain one st, securing wire.  Holding wire in left hand, and insert hook in second chain st from hook(lying just below wire), push hook under wire, yarn over hook and pull loop through. Yarn over once more and complete single crochet.  Continue down foundation chain to last stitch.  I always make 3-7 sc in last stitch before the return.  Bend wire until it lies flush with the bottom of foundation chain.  Work single crochet down opposite side, inserting hook in loops of previous row, making sure that your hook goes under the wire every time.

  • You can secure the beginning tail after the turn, by laying it along the wire.

Happy crocheting- KT


Read Full Post »